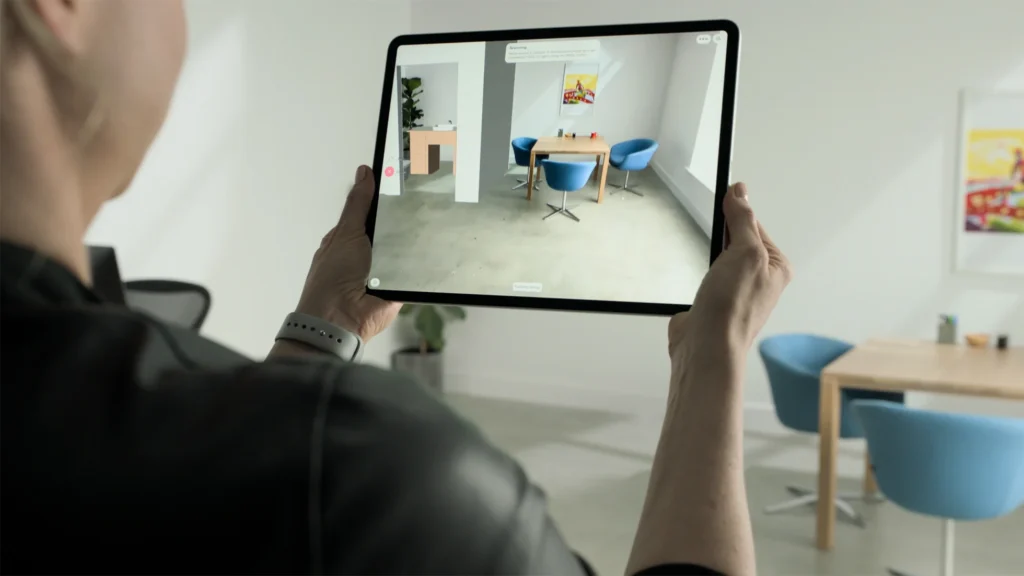
Author

admin

Browsing

Your Android device connects to Wi-Fi dozens of times a day. Yet each time you join a network—especially public or untrusted hotspots—you risk exposing personal data, browsing history, and even your exact location. In 2025, as snooping techniques become more advanced and privacy regulations shift, locking down Android Wi-Fi settings is no longer optional—it’s essential.

Wi-Fi

In this guide, you’ll learn:

  • Why Android Wi-Fi security matters now
  • Common Wi-Fi vulnerabilities on Android
  • Exact steps to harden your Wi-Fi settings
  • Tools and apps to stop snooping
  • Best practices for safe Android Wi-Fi usage
  • Answers to frequently asked questions

Throughout this article, you’ll see embedded links to reputable sources. Each hyperlink serves as a reference to back up the advice and show you where to learn more. Let’s dive in.


Why Android Wi-Fi Security Matters in 2025

You may think “I only join my home network,” but consider:

  • Public hotspots: Airports, cafes, hotels, and even gas stations often host unsecured or compromised Wi-Fi. Hackers can launch man-in-the-middle (MitM) attacks, intercepting everything you send and receive (thesun.co.uk).Wi-Fi
  • Probe requests: When Android “shouts” saved network names, nearby attackers can fingerprint your travel patterns—revealing where you live, work, or frequent (securityinabox.org).
  • Weak encryption: Older protocols like WPA2 can be cracked with modern GPUs. Wi-Fi Protected Access 3 ([WPA3](https://edition.cnn.com/cnn-underscored/home/how-to-protect-your-wifi-from-hackers “Enable WPA3 Encryption”) offers far stronger protection (edition.cnn.com).

In 2025, cybercriminals deploy AI-driven sniffers to automate snooping. Regulators in many countries now require networks to enforce better security—for example, in the EU’s Digital Services Act. Yet Android users still lag behind if they rely on default Wi-Fi settings. By hardening Android Wi-Fi, you:

  • Prevent data interception (emails, chat logs, banking details)
  • Stop location tracking through probe requests
  • Block unauthorized access to your device
  • Ensure compliance with corporate and personal privacy policies

Ready to take control? Let’s start by identifying where Android’s Wi-Fi may fail you.


Top Android Wi-Fi Vulnerabilities to Watch Out For

  1. Automatic Network Connections
    • Issue: Android often auto-joins known networks, even unsecured ones.
    • Risk: You could connect to a “malicious” “Free_WiFi” set up by an attacker.
    • Reference: Disabling auto-join stops your device from leapfrogging onto untrusted networks without your consent (lifewire.com, toxigon.com).
  2. Probe Request Broadcasting
    • Issue: When Wi-Fi is on, Android “shouts” SSIDs (network names) you’ve previously joined.
    • Risk: Attackers use sniffers to collect SSIDs and deduce who you are and where you’ve been.
    • Reference: Clearing saved networks and disabling “Turn on Wi-Fi automatically” prevents this “shouting” (securityinabox.org).
  3. Weak or Outdated Encryption Protocols
    • Issue: Many routers still run WPA2 or even WEP; some enterprise setups haven’t migrated to WPA3.
    • Risk: WPA2 can be compromised via “KRACK” or brute-force dictionary attacks.
    • Reference: Android supports WPA3 on devices running Android 10 and above—but many users don’t enable it (edition.cnn.com, androidauthority.com).
  4. Untrusted DNS and No Encryption
    • Issue: By default, Android may use your ISP’s DNS or no DNS encryption at all.
    • Risk: DNS queries (e.g., “bank.com”) can be intercepted, manipulated, or logged.
    • Reference: Android 11+ allows DNS over TLS (DoT) and Android 9+ can use DNS over HTTPS (DoH) to encrypt DNS (androidauthority.com).
  5. Auto-Join Public Networks
    • Issue: Android’s “Connect to public networks” may auto-offer to join open hotspots.
    • Risk: A rogue hotspot can masquerade as “CoffeeShop_WiFi,” tricking you into joining.
    • Reference: Turning this off ensures you always consciously choose which networks to join (airdroid.com, toxigon.com).
  6. No Built-in Firewall
    • Issue: Android lacks a native firewall, so apps can freely connect out, even on malicious networks.
    • Risk: Malware can exfiltrate data or perform tracking once connected.
    • Reference: Third-party firewall apps (NetGuard, NoRoot Firewall) can help block unwanted traffic (toxigon.com).

By understanding these vulnerabilities, you can tweak Android Wi-Fi settings to neutralize them. The next section walks you through each critical adjustment.


Step-by-Step Guide to Hardening Android Wi-Fi Settings

Below is a comprehensive, actionable plan. Read each step fully, follow every bullet, and refer to the linked articles when you need more detail.

1. Keep Android OS & Apps Updated

  • Why: Security patches often close critical Wi-Fi-related vulnerabilities.
  • How:
    1. Open SettingsSystem.
    2. Tap System update.
    3. Follow on-screen prompts to install the latest Android version.
    4. Open Google Play StoreProfile iconManage apps & deviceUpdates available.
    5. Tap Update all.
  • Tip: Enable Auto-update in Play Store to ensure apps update automatically.
  • Reference: Outdated OS/app versions expose you to known exploits (toxigon.com).

2. Disable Automatic Wi-Fi Connections

  • Why: You avoid untrusted networks that can impersonate a legitimate SSID.
  • How:
    1. Go to SettingsNetwork & Internet.
    2. Tap Wi-Fi.
    3. Tap Wi-Fi preferences (Android 10–12) or Wi-Fi settings.
    4. Turn off Connect to public networks and Turn on Wi-Fi automatically.
    5. In Wi-FiSaved networks, tap each network you no longer need → Forget.
  • Benefits:
    • Prevents stealthy connections to malicious hotspots.
    • Stops broadcasting your saved SSIDs (fingerprinting).
  • Reference: Detailed instructions available in Lifewire and Airdroid guides (lifewire.com, airdroid.com).

3. Enable Private MAC Addresses & Randomize Probe Requests

  • Why: Prevents tracking your device via its real hardware MAC address when joining networks.
  • How:
    1. In SettingsNetwork & InternetWi-Fi, tap the gear icon next to your home or trusted SSID.
    2. Under Advanced, tap Privacy or MAC address type.
    3. Select Use randomized MAC or Private MAC.
  • Result: Each network sees a unique MAC, making cross-network tracking much harder.
  • Reference: This feature is built into Android 10+; check Google’s official documentation for precise menu labels (securityinabox.org, androidauthority.com).

4. Choose Only WPA3 & WPA2-AES Encrypted Networks

  • Why: Outdated encryption (WEP/WPA) is susceptible to eavesdropping, while WPA3/WPA2-AES offer strong protection.
  • How:
    1. In a trusted network’s router settings, ensure WPA3 (if available) or WPA2-AES is enabled.
    2. If you’re connecting to a public network, check signage or Ask the administrator what encryption they support.
    3. On Android, when scanning for networks, look for “WPA2-AES” or “WPA3-SAE” in the SSID details—avoid “WPA/WPA2 Mixed Mode” or “WEP.”
  • Tip: If your home router lacks WPA3 support, consider upgrading or flashing open-source firmware (e.g., [OpenWrt](https://openwrt.org/ “Secure Router Firmware”)).
  • Reference: Enabling WPA3 helps mitigate brute-force and dictionary attacks (edition.cnn.com, androidauthority.com).

5. Disable Wi-Fi Scanning When Wi-Fi Is Off

  • Why: If Android continually scans for networks even when Wi-Fi is “off,” it still broadcasts probe requests.
  • How:
    1. SettingsLocation (or Security & location).
    2. Tap Wi-Fi scanning.
    3. Toggle off Wi-Fi scanning.
  • Impact: Ensures that when you turn off Wi-Fi, your device truly stops broadcasting.
  • Reference: SecurityInBox warns that constant scanning leaks location data (securityinabox.org).

6. Clear Unused Networks & Limit Saved SSIDs

  • Why: Each saved SSID is a potential fingerprint. The fewer you store, the less you “broadcast” your past movements.
  • How:
    1. Go to SettingsNetwork & InternetWi-FiSaved networks.
    2. Tap on each network you don’t actively use and choose Forget.
    3. Only keep “Home,” “Office,” or other essential, trusted SSIDs.
  • Pro Tip: Use a password manager (e.g., [Bitwarden](https://bitwarden.com/ “Secure Password Manager”)) to save Wi-Fi credentials externally. Then you can remove them from Android’s saved list.
  • Reference: These steps mirror SecurityInBox’s recommendation to clear Wi-Fi fingerprints (securityinabox.org).

7. Use DNS over TLS (DoT) or DNS over HTTPS (DoH)

  • Why: Standard DNS queries are plaintext. Using DoT/DoH encrypts lookups, preventing ISPs or attackers from logging visited domains.
  • How on Android 11+ (DoT):
    1. SettingsNetwork & InternetAdvancedPrivate DNS.
    2. Select Private DNS provider hostname.
    3. Enter a trusted provider (e.g., dns.nextdns.io or 1dot1dot1dot1.cloudflare-dns.com).
  • How on Android 9+ (DoH via Apps):
  • Benefits:
    • Encrypts all DNS traffic.
    • Stops on-network eavesdroppers from seeing which sites you visit.
  • Reference: Android Authority explains how to set up DoT/DoH on modern Android devices (androidauthority.com).

8. Enable a VPN When Using Public Wi-Fi

  • Why: A Virtual Private Network (VPN) adds a strong encryption layer between your device and the internet, even on untrusted networks.
  • Recommended VPNs:
  • How:
    1. Install your chosen VPN from Google Play.
    2. Open the VPN app and sign in or create an account.
    3. Connect to a nearby or fastest server before joining any public Wi-Fi.
  • Note: Many premium VPNs offer automatic “On Wi-Fi” connect features—enable this so you never forget.
  • Reference: Airdroid emphasizes VPNs’ role in preventing MitM attacks on public networks (airdroid.com) and The Sun cautions that VPNs are crucial for travel Wi-Fi safety (thesun.co.uk).

9. Install a Firewall or Network Monitor

  • Why: A firewall adds granular control over which apps can send or receive data—critical if a malicious hotspot tries to push firmware-level exploits or track you.
  • Top Android Firewall Apps:
    • NoRoot Firewall: Blocks apps from connecting without root access.
    • NetGuard: Simple UI, per-app control, supports IPv4/IPv6, blocks background data.
    • AFWall+ (requires root): Advanced features like tethering support, chained rules.
  • How (using NetGuard as an example):
    1. Download NetGuard from Google Play.
    2. Open NetGuard → Grant permissions (VPN permission required to route traffic).
    3. Toggle Enable NetGuard.
    4. For each app, toggle Wi-Fi or Cellular access.
  • Benefits:
    • Blocks suspicious or unnecessary apps from talking to unknown servers.
    • Helps tamper with malicious traffic in real time.
  • Reference: Toxigon and Airdroid list firewall solutions for Android to block unwanted network traffic (toxigon.com, airdroid.com).

10. Configure Advanced Wi-Fi Settings (Static IP, Proxy)

  • Why: Using a static IP (instead of DHCP) on trusted networks prevents your router from issuing you an IP in a malicious DHCP environment. A proxy can filter out unwanted traffic.
  • How (Static IP):
    1. SettingsNetwork & InternetWi-Fi → Tap your home SSID → AdvancedIP settings.
    2. Switch from DHCP to Static.
    3. Enter:
      • IP address (e.g., 192.168.1.50)
      • Gateway (e.g., 192.168.1.1)
      • Network prefix length (e.g., 24)
      • DNS 1/2 (e.g., 1.1.1.1 / 8.8.8.8)
  • How (Proxy):
    1. In the same Advanced menu → Proxy.
    2. Choose Manual.
    3. Enter Proxy hostname (e.g., proxy.myhome.local) and Port (e.g., 8080).
    4. (Optional) Enter Bypass proxy for (e.g., local IPs).
  • Benefits:
    • Static IP removes reliance on potentially compromised DHCP servers.
    • Proxy filters or logs web traffic, adding another security layer.
  • Reference: Android Authority and OnlyCloud mention advanced Wi-Fi setups for power users (androidauthority.com, onlycloud.co.za).

Android Wi-Fi Privacy Features by Version

Below is a quick comparison of Android versions and the key Wi-Fi privacy/security features each supports. Use this table to map your device’s OS to the protections you can enable.

Android Version Private MAC (Randomized) DNS over TLS (DoT) DNS over HTTPS (DoH) WPA3 Support Auto-Join Controls Notes
Android 9 (Pie) No No Yes (via third-party apps) Limited (manufacturer-dependent) Yes (basic) Use DoH apps (e.g., Intra)
Android 10 (Q) Yes (per-network) No Yes (via apps) Yes (if hardware supports) Yes (enhanced) Private MAC per network
Android 11 (R) Yes (per-network) Yes Yes (via apps) Yes Yes (fine-tuned) Built-in DoT settings
Android 12 (S) Yes (per-network) Yes Yes (native) Yes Yes (fine-tuned) Improved WPA3 interoperability
Android 13 (T) Yes (per-network) Yes Yes (native) Yes (WPA3 Enterprise) Yes (advanced) Enhanced Wi-Fi standard support
Android 14 (U) Yes (per-network) Yes Yes (native) Yes Yes (advanced) Additional privacy toggles

Table: Android Wi-Fi Security Features by OS Version

This table helps you see which features are available on your device. If your Android version lacks a needed feature, consider upgrading—either the OS itself or your device—to take advantage of stronger Wi-Fi protections.


Additional Tools to Prevent Wi-Fi Snooping on Android

No single tweak stops every threat. Combine built-in settings with specialized apps:

  • ARP Guard
  • NetGuard (Firewall)
    • Purpose: Blocks apps from accessing the internet unless explicitly allowed.
    • How to use: Download from Google Play → Grant VPN permission → Toggle blocking rules per app.
    • Benefit: If an app tries to exfiltrate data on a malicious hotspot, you stop it.
  • Intra (DNS over HTTPS Client)
    • Purpose: Forces DNS lookups over HTTPS, preventing on-network DNS interception.
    • How to use: Install → Select DNS provider (Google, Cloudflare, NextDNS) → Enable.
    • Benefit: Invisible protection—no need to configure system settings (androidauthority.com).
  • VPN Apps (Proton VPN, NordVPN, ExpressVPN)
    • Purpose: Encrypt all data to/from your device on any network.
    • How to use: Install → Sign in → Connect to server.
    • Benefit: Even if your Wi-Fi is compromised, attackers can’t read your traffic (airdroid.com, thesun.co.uk).
  • Wireshark (via Termux, Rooted Devices)
    • Purpose: Packet analyzer to monitor real-time traffic (for advanced users).
    • How to use: Install Termux → pkg install wireshark → Grant root access → Run sniffing commands.
    • Benefit: Complex, but lets you verify if anyone’s sniffing your traffic.
  • LineageOS / GrapheneOS (Custom ROMs)
    • Purpose: Enhanced security by removing bloatware, enforcing stricter permissions.
    • How to use: Unlock bootloader → Flash custom recovery → Install trusted custom ROM.
    • Benefit: Fine-tuned permission control, security-hardened kernel, reduced attack surface.

Best Practices for Safe Android Wi-Fi Usage

Beyond tweaking settings, adopt these habits to keep snoopers at bay:

  • Never Join “Open” or “Free” Wi-Fi Without Verification
    • Always ask a staff member or IT admin for the correct SSID name. Avoid typosquatted names like “Free_CoffeeShop.”
  • Use Cellular Data When Possible
    • If you need to send sensitive information (bank details, personal email), switch to LTE/5G.
  • Turn Wi-Fi Off When Not in Use
    • Every time you disable Wi-Fi in Settings, ensure Wi-Fi scanning is also off (see Step 5).
  • Avoid Public Charging Stations
    • Chargers can contain “juice jacking” malware. Use your own cable and avoid unknown USB ports (thesun.co.uk).
  • Check Network Certificate Prompts
    • When joining enterprise or corporate Wi-Fi, Android may prompt you to trust a certificate. Verify the certificate’s fingerprint with IT.
  • Regularly Review Connected Apps
    • In Settings → AppsApp permissionsNearby devices or Wi-Fi access, revoke permissions for apps that don’t need network access.
  • Use Multi-Factor Authentication (MFA)
    • Even if someone intercepts your credentials on Wi-Fi, MFA (SMS-based or an authenticator app) protects your accounts.
  • Monitor Your Wi-Fi Logs
    • For home users: check your router’s logs for unknown MAC addresses or repeated authentication failures.
  • Educate Yourself on Phishing & Social Engineering
    • Attackers often combine Wi-Fi snooping with phishing sites. Always inspect suspicious links before clicking.

Frequently Asked Questions

1. Can my Android device detect if someone is snooping on my Wi-Fi?

  • By default, Android lacks built-in “snooper detection.”
  • However, you can use network-monitoring tools like [Wireshark](https://www.wireshark.org/ “Network Protocol Analyzer”) on a rooted device or run ARP Guard to detect ARP spoofing (airdroid.com, toxigon.com).

2. Does using a VPN completely eliminate the risk of Wi-Fi snooping?

  • A VPN encrypts all data between your device and the VPN server, preventing local attackers from intercepting unencrypted traffic.
  • Caveat: The VPN provider itself could potentially monitor your traffic—choose a reputable, no-logs VPN (e.g., Proton VPN, NordVPN) (airdroid.com, thesun.co.uk).

3. What’s the difference between WPA2 and WPA3?

  • WPA2-AES uses a pre-shared key and 128-bit encryption; vulnerable to advanced brute-force if the key is weak.
  • WPA3 employs Simultaneous Authentication of Equals (SAE) for stronger handshake protection and 192-bit encryption in WPA3-Enterprise.
  • In 2025, most premium routers and Android 10+ devices support WPA3. Always pick WPA3 if both your router and device support it (edition.cnn.com, androidauthority.com).

4. How often should I change my home Wi-Fi password and encryption settings?

  • Password: At least every 6 months, or immediately if you suspect unauthorized access. Use a strong, unique passphrase (16+ characters with letters, numbers, symbols).
  • Encryption Settings: Check your router firmware quarterly for updates; ensure WPA3 remains enabled. If new vulnerabilities appear (e.g., KRACK variants), update or replace your router.
  • Tip: Use a [password manager](https://bitwarden.com/ “Password Manager”) to generate and store complex Wi-Fi passwords.

5. Are public DNS services like Google DNS (8.8.8.8) safe, or should I use private DNS only?

  • Public DNS (8.8.8.8, 1.1.1.1): Faster and generally secure, but queries travel in plaintext by default—anyone on the same network can snoop.
  • Private DNS (DoT/DoH): Encrypts queries, preventing local snooping. In Settings → Network & InternetPrivate DNS, choose a secure provider (e.g., 1dot1dot1dot1.cloudflare-dns.com) (androidauthority.com).

6. Does Android 14 offer new Wi-Fi security features I should know about?

  • Yes. Android 14 enhances privacy toggles, improving “MAC address randomization” granularity and adding “Wi-Fi wake-up” controls to prevent background scanning.
  • It also makes DNS over HTTPS native (no third-party app needed). Be sure to apply these controls under SettingsNetwork & InternetPrivate DNS and Wi-FiWi-Fi preferences.

Conclusion

2025 brings more sophisticated Wi-Fi snooping tactics—from advanced ARP spoofers to AI-powered sniffers that deduce identities via probe requests. But you hold the keys to fortress-level protection:

  1. Update & Patch regularly.
  2. Disable Auto-Join & Scanning to prevent stealthy connections.
  3. Randomize MAC Addresses and Clear Unused SSIDs.
  4. Force DNS Encryption (DoT/DoH) to mask your browsing.
  5. Enable WPA3 or at least WPA2-AES.
  6. Use a VPN on untrusted networks.
  7. Install a Firewall and monitor ARP integrity.
  8. Leverage Static IP/Proxy for trusted networks.
  9. Adopt Best Practices: MFA, router firmware updates, strong passphrases, and user education.

By following this guide, you’ll significantly reduce your exposure to data interception, location tracking, and credential theft—keeping your Android communications private in 2025 and beyond. Take each bullet seriously, apply the settings today, and rest easy knowing snoopers won’t get an easy foothold on your data.

Stay secure, stay informed, and keep your Android Wi-Fi locked down.

Losing your Android phone can feel like the end of the world. In an instant, all your contacts, photos, banking apps, and personal details can be in the hands of a stranger. To avoid that nightmare scenario, it’s vital to configure anti-theft settings before it happens. In this comprehensive guide, you’ll learn exactly which features to enable and how to set them up, ensuring that your Android phone security is bulletproof come 2025.

anti-theft

Throughout this post, you’ll find actionable insights, relatable scenarios, and embedded links to authoritative sources that back up each recommendation. We’ve structured the content logically—moving from foundational security concepts to advanced tips—while keeping the tone friendly, conversational, and easy to follow. Whenever you see a  keyword highlighted as an H2, that indicates a section optimized for search engines. Let’s dive in!


Table of Contents

  1. Why Android Anti-Theft Protection Matters in 2025
  2. H2: Android Phone Security: Essential Settings to Activate Now
  3. H2: Android Anti-Theft Protection: The Core Features
  4. H2: Best Anti-Theft Apps & In-Built Android Tools Compared (2025)
  5. H2: How to Configure Key Anti-Theft Settings Step by Step
  6. H2: Frequently Asked Questions (FAQs)
  7. Conclusion: Take Control of Your Android Security

Why Android Anti-Theft Protection Matters in 2025

Smartphone theft remains a significant problem worldwide. In the UK alone, the Metropolitan Police estimate that stolen phones account for over £50 million in annual losses, with many thieves using stolen devices to commit further crimes such as unauthorized banking transactions or identity theft (thesun.co.uk, lifewire.com).

In Nigeria, phone theft is also on the rise, targeting individuals who rely heavily on mobile payments, e-learning platforms, and personal data stored on their devices. With the rollout of Android 15 and its advanced security features, 2025 is the perfect time to harden your android phone security and make your device less attractive to thieves.

  • Financial Consequences: When thieves gain access to mobile banking apps, they can drain your accounts.
  • Personal Data Exposure: Photos, contacts, emails, and sensitive documents can be exposed or sold on the black market.
  • Identity Theft: With your personal information in hand, scammers can open accounts or take out loans in your name.
  • Resale Value: A phone without robust anti-theft protection loses its resale value; criminals prefer devices that are easy to wipe and resell. (security.googleblog.com, thesun.co.uk)

By enabling anti-theft settings before you lose your phone, you ensure that if a thief gets hold of your device, it becomes nearly impossible to access your data or restore the phone without the right credentials. Below, we’ll highlight the top settings you should enable to keep your device and data safe.


Android Phone Security: Essential Settings to Activate Now

Keeping your Android phone secure isn’t just about installing antivirus apps. Modern android phone security extends far beyond malware protection to include anti-theft measures built into the operating system. Before diving into more complex settings, make sure you have the basics covered:

  • Update to the Latest Android OS: Security patches fix vulnerabilities that could be exploited by thieves. (security.googleblog.com, lifewire.com)
  • Use a Strong Screen Lock: A PIN, password, or complex pattern is mandatory. Avoid simple patterns (e.g., “1234” or “L-shape”).
  • Enable Biometrics: Fingerprint or facial recognition provides convenience without sacrificing security, but don’t rely solely on biometrics.
  • Disable Notifications on Lock Screen: Prevent prying eyes from seeing sensitive messages or emails.

Once these foundational steps are in place, move on to anti-theft-specific tools built into Android 10, Android 11, up through Android 15, such as Theft Detection Lock, Offline Device Lock, and Remote Lock & Wipe. We’ll cover how to set up each one in the next section.


Android Anti-Theft Protection: The Core Features

Android’s anti-theft features have evolved quickly, especially with the arrival of Android 15. Below are the most critical built-in protections you should activate on your device, along with an explanation of why each is vital.

Theft Detection Lock

What It Does: Theft Detection Lock leverages on-device AI to detect suspicious motion patterns—like a quick grab-and-run scenario. If it senses potential theft while your device is unlocked, it instantly locks the screen, preventing the thief from accessing any apps or data (security.googleblog.com, wired.com).

Why You Need It: In a bustling environment—say, a crowded market or a busy bus station—a thief can snatch your phone and slip away within seconds. Theft Detection Lock acts within milliseconds, anticipating the motion of a theft and locking your phone before it leaves your hand.

Offline Device Lock

What It Does: Normally, thieves try to cut off internet access to prevent remote tracking or wiping. Offline Device Lock activates when the phone goes offline for a short period while unlocked. Once the device detects it’s offline and possibly in the hands of a thief, it locks the screen, stopping unauthorized access to your private data (support.google.com, security.googleblog.com).

Why You Need It: If a thief removes your SIM or turns on airplane mode, they can bypass location tracking. Offline Device Lock closes that loophole by locking the phone even without an internet connection.

Remote Lock & Wipe

What It Does: If your phone is lost or stolen, you can remotely lock it (with just a verified phone number, no Google credentials required), locate it via GPS, or wipe all data. This feature relies on Find My Device, Google’s official tracking and remote-control tool for Android (security.googleblog.com, support.google.com).

Why You Need It: Even if someone steals your phone, this setting gives you control: lock it to block access, ring it to find its approximate location, or erase personal files to protect sensitive data.

Enhanced Factory Reset Protection

What It Does: Android 15 makes it significantly harder for thieves to bypass security by factory resetting the device. If a thief tries to erase your phone, they can’t set it up again without your Google account credentials, making stolen phones virtually worthless to criminals (blog.google, security.googleblog.com).

Why You Need It: Factory Reset Protection acts as a deterrent. A thief won’t bother stealing a phone they can’t reset and resell.

Private Space for Sensitive Apps

What It Does: This feature, new in Android 15, creates a separate, hidden “container” on your device for sensitive apps—like banking, healthcare, or corporate apps—secured by its own PIN or biometric lock. Apps and data in Private Space remain invisible unless you open the container with the correct credentials (blog.google, lifewire.com).

Why You Need It: Even if a thief bypasses your lock screen, they can’t access anything in Private Space unless they know the separate PIN or biometric method. This ensures that your most sensitive apps remain truly secure.

Identity Check for Critical Settings

What It Does: Later in 2025, Android 15 will introduce an opt-in “Identity Check” that forces biometric authentication (fingerprint, face scan) or your PIN whenever you try to disable key anti-theft features—like turning off Theft Detection Lock or disabling Find My Device. This prevents thieves who’ve forced you to unlock your phone from altering critical security settings (security.googleblog.com, blog.google).

Why You Need It: If a thief coerces you to unlock your phone, they still can’t turn off anti-theft protections without the extra biometric step. This ensures the features remain intact until you can regain control.


Best Anti-Theft Apps & In-Built Android Tools Compared (2025)

While Android’s built-in anti-theft features cover most scenarios, there are times when third-party solutions can complement them, especially if you want extra bells and whistles. Below is a comparison table highlighting the key differences between:

  • Android’s Native Tools (Theft Detection Lock, Offline Device Lock, Find My Device)
  • Samsung’s Theft Protection Suite (for Galaxy devices)
  • Cerberus Anti-Theft (third-party app known for advanced features)
  • Prey Anti-Theft (multi-platform solution)
Feature Android (Built-In) Samsung Theft Protection Suite Cerberus Anti-Theft Prey Anti-Theft
Theft Detection AI Yes (on supported Android 10+ devices, rolling out to 90% of users) (security.googleblog.com, wired.com) Yes (Galaxy S25 series onward, leveraging Samsung Knox and motion sensors) (thesun.co.uk) No (relies on manual triggers or motion detection via accelerometer) No (relies on manual triggers, location-based alarms)
Offline Device Lock Yes (locks screen when device goes offline while unlocked) (support.google.com, security.googleblog.com) Yes (Samsung extends this to warn when SIM is removed) Limited (locks device when SIM changed, but no automatic offline lock) Limited (locks based on location change, not true offline detection)
Remote Lock & Wipe Yes (via Find My Device: lock, locate, or factory reset) (support.google.com, security.googleblog.com) Yes (through Samsung Find My Mobile: locate, lock, wipe, set custom messages on lock screen) Yes (lock, locate, wipe, take pictures, record audio, use strong anti-tamper measures) Yes (lock, locate, wipe, alarm, and network-based lockdown)
Enhanced Factory Reset Protection Yes (requires Google credentials after reset on Android 15+) (security.googleblog.com, blog.google) Yes (Knox-based FRP requiring Samsung account after reset) No (if someone has root or firmware access, they can bypass FRP but Cerberus can send alerts when FRP disabled) No (cannot prevent factory reset, but can send alerts if reset is attempted)
Private Space / Secure Folder Yes (Private Space in Android 15 for hiding apps and data) (blog.google, lifewire.com) Yes (Secure Folder: Samsung Knox container for apps and files) No (Cerberus does not offer a container, but you can configure certain stealth features) No (Prey focuses on tracking/loss prevention rather than in-device containers)
Identity Check for Settings Coming soon (requires biometric/PIN to change anti-theft settings in Android 15) (security.googleblog.com, blog.google) ¿ Yes (Knox requires Samsung account and biometrics to alter security settings) No (you can hide Cerberus in system settings, but changing Cerberus settings requires Cerberus password) No (settings can be disabled if thief factory resets device; cannot prevent someone from uninstalling Prey if root access is gained)
Multi-Platform Support No (only Android devices) No (only Samsung devices) Yes (supports Android, iOS, Windows, macOS, Linux) Yes (supports Android, iOS, Windows, macOS, Linux, and Chrome OS)
Ease of Setup Very easy (Settings → Google → All services → Theft protection; enabled by default on Android 15 devices) (support.google.com, security.googleblog.com) Moderate (Settings → Biometrics and security → Find My Mobile → enable Samsung account) Moderate (Install Cerberus, grant all device admin privileges, set up server account) Easy (Install Prey, sign up, grant location and admin permissions)
Cost Free Free for Samsung account holders Freemium (basic free features; premium subscription for advanced features) Freemium (basic free features; premium subscription for multiple devices and advanced controls)

Table: Comparison of anti-theft features in 2025 across top solutions

This table helps you see at a glance which anti-theft features are covered natively by Android and which may require third-party or manufacturer-specific apps. For most users, Android’s built-in tools (Theft Detection Lock, Offline Device Lock, Remote Lock & Wipe) along with Enhanced Factory Reset Protection and Private Space will suffice. However, if you juggle multiple devices or want advanced remote control, consider Cerberus or Prey.


How to Configure Key Anti-Theft Settings Step by Step

Below is a detailed, actionable walkthrough to set up each critical anti-theft feature. Follow these steps in order, and you’ll transform your Android device into a fortress.

Step 1: Update to the Latest Android Version

Keeping your operating system updated is the most fundamental way to ensure android phone security. Security vulnerabilities are patched in each minor and major update, preventing thieves from exploiting known holes.

  1. Go to Settings → System → System update (or Settings → Software update on some OEM skins).
  2. Check for updates and install the latest Android release (Android 15 as of mid-2025).
  3. Allow your phone to reboot and finish the installation.

Once updated, verify that Google Play Services and other security-related apps (e.g., Google Play Protect) are up-to-date via the Play Store. (security.googleblog.com, blog.google)


Step 2: Set Up a Secure Screen Lock

A strong lock screen is non-negotiable. If someone can bypass your lock screen, all your anti-theft measures lose effectiveness.

  • Preferred Lock Types:
    • PIN (6+ digits)
    • Complex Password (8+ characters with letters, numbers, symbols)
    • Pattern (avoid simple shapes; make it at least 6 points long)
  • Avoid:
    • Easy-to-guess PINs (e.g., “123456”)
    • Simple patterns (straight lines, L-shapes)
  1. Navigate to Settings → Security → Screen lock (or Settings → Lock screen & security → Screen lock).
  2. Choose PIN or Password over pattern if you want maximum security.
  3. Follow the prompts to set up your chosen lock and memorize it.
  4. Enable Auto-lock after a short interval (30 seconds or 1 minute).

Additionally, set up biometric authentication (fingerprint, face unlock) in addition to your PIN or password—never as the sole method. This ensures that if your biometrics fail, you still need the PIN/password. (komando.com, the-sun.com)


Step 3: Enable Theft Detection Lock

Theft Detection Lock is one of Android’s most innovative features. Using AI and sensors, it can detect when someone snatches your phone from you and locks it in milliseconds.

  1. Open Settings → Google → All services → Theft protection (or use the search bar in Settings to find “Theft protection”).
  2. Tap Theft Detection Lock and toggle it ON.anti-theft
  3. Ensure that Motion Access (under Settings → Apps → Special app access → Physical activity or similar) is granted for Google Play Services, as Theft Detection Lock relies on motion sensors.

Tips:

  • Practice triggering it in a safe environment—lock screen alerts if you move the unlocked device too abruptly.
  • If you false-trigger it often, adjust how you hold your phone (e.g., avoid quick downward jerks).

Once enabled, you’re protected in scenarios where a thief yanks your phone; the device locks before they can see your gallery, banking apps, or text messages. (support.google.com, wired.com)


Step 4: Turn On Offline Device Lock

A savvy thief might immediately put your phone in airplane mode or eject the SIM to avoid GPS tracking. Offline Device Lock shuts that down by locking your phone when it detects loss of internet connectivity while unlocked.

  1. Go to Settings → Google → All services → Theft protection (same menu as Theft Detection Lock).
  2. Tap Offline Device Lock and toggle it ON.
    • If your phone goes offline while unlocked, it will lock automatically within a short interval (2 minutes max).
  3. Make sure you have a screen lock set up (PIN, password, or biometrics); otherwise, Offline Device Lock won’t work.

Real-World Use Case:
Imagine you’re traveling on a bus, and a thief grabs your phone. They immediately enter airplane mode. If Offline Device Lock is enabled, within seconds of losing connectivity, your phone locks, rendering it useless. (support.google.com, security.googleblog.com)


Step 5: Activate Remote Lock & Wipe

Find My Device is Google’s official solution for locating, locking, or erasing a lost or stolen phone.

  1. Verify Find My Device Is Active:
    • Settings → Security → Find My Device (or use the search bar to locate Find My Device).
    • Ensure “Find My Device” is toggled ON.
  2. Enable Remote Lock:
    • Within Settings → Google → All services → Theft protection, toggle Remote Lock to ON.
    • Verify your phone number: when prompted, enter your number and complete the verification process.
  3. Test Remote Lock (safely):
    • Go to android.com/lock on another device or PC.
    • Sign in with your Google account or, if you lost your credentials, use your verified phone number.
    • Follow the on-screen instructions to send a lock command. Your phone should lock within seconds.
  4. Remote Wipe (Factory Reset):
    • From android.com/find, sign in and select the lost device.
    • Select Erase Device to wipe personal data. Note: This action is irreversible; make sure you have recent backups.

Why It Matters:
If you lose your phone, you can instantly lock it and send a custom message (e.g., “This phone is lost. Call [your number]”). If you can’t recover it, you can wipe all data so thieves can’t get personal information. (support.google.com, security.googleblog.com)


Step 6: Configure Enhanced Factory Reset Protection

Thieves often resort to a hard factory reset to circumvent lock screens and anti-theft settings. Enhanced Factory Reset Protection in Android 15 remedies this: after a reset, the device demands your Google account credentials before proceeding.

  1. Navigate to Settings → System → Reset options (or search “Factory reset”).
  2. Confirm that “Factory Reset Protection” (often called FRP) is enabled: it should be on by default in Android 15.
  3. Test FRP (cautiously):
    • (Optional) Borrow a secondary device or ask a tech-savvy friend to initiate a factory reset.
    • After reset, the phone should prompt for your Google account that was last used. If it doesn’t, FRP isn’t set up correctly; revisit your Google account settings.
  4. Link a Secondary Recovery Method:
    • In Settings → Google → Account → Security, add a recovery phone number and email.
    • This ensures you can recover your Google account credentials if you forget them, preventing you from being locked out of your own device. (blog.google, security.googleblog.com)

Key Takeaway:
If a thief factory resets your phone, they won’t get past the Google account prompt. This makes stolen phones far less valuable, stopping theft at the source.


Step 7: Use Private Space for Sensitive Apps

Android 15’s Private Space feature acts like a hidden vault on your phone, shielding your most confidential apps and data behind a separate PIN or biometric lock.

  1. Open Settings → Privacy → Private Space (or search for “Private Space”).
  2. Set Up Private Space:
    • Choose a new PIN or biometric profile specifically for Private Space.
    • Follow the prompts to create the space.
  3. Move Sensitive Apps In:
    • Once Private Space is active, you can install or move apps directly into it (e.g., banking apps, health trackers, secure notes).
    • Data stored in Private Space is invisible and inaccessible unless you open Private Space itself.
  4. Switching Between Spaces:
    • From the lock screen, swipe up and select Switch User, then choose Private Space.
    • Authenticate using your Private Space PIN or biometric method to enter the hidden environment.

Why You Need Private Space:
Even if a thief overcomes other protections, they can’t see or open apps and data in Private Space, because it doesn’t appear in your standard app drawer. This ensures that your most sensitive information—like banking credentials, private documents, or business apps—remains secured behind an additional barrier. (blog.google, lifewire.com)


Step 8: Enable Identity Check for Critical Settings

Later in 2025, Android 15 will roll out an Identity Check option that requires biometric authentication or your PIN whenever you or someone else tries to alter key security settings—such as turning off Theft Detection Lock or disabling Find My Device.

  1. Open Settings → Security → Identity Check (if available on your device).
  2. Toggle Identity Check to ON.
  3. Choose which settings require extra authentication:
    • Disable Theft Detection Lock
    • Turn off Offline Device Lock
    • Disable Remote Lock & Wipe (Find My Device)
    • Remove Device Admin privileges (important for third-party anti-theft apps)
  4. Confirm Biometric/PIN: When prompted, register a biometric (fingerprint or face) if you haven’t already, or confirm your existing PIN/password.

Outcome:
If a thief forcibly unlocks your phone, they can’t disable anti-theft measures without the extra biometric step. This preserves your security settings until you can restore control. (security.googleblog.com, blog.google)


Step 9: Secure Your SIM Card & Network Connections

A stolen SIM can let a criminal intercept your SMS-based two-factor authentication codes or disable your phone’s tracking capabilities. Lock your SIM and manage network connections wisely.

  1. Set a SIM PIN:
    • Settings → Security → SIM card lock (or Settings → Connections → SIM card manager → SIM card lock).
    • Toggle on Lock SIM card; enter a 4- to 8-digit PIN.
    • If you enter the wrong SIM PIN too many times, you’ll need your PUK code from your carrier—don’t lose that!
  2. Prefer eSIM (If Available):
    • eSIMs are digital SIMs that can make it harder for thieves to remove your SIM card.
    • Settings → Network & internet → SIM cards → Add carrier → Use eSIM and follow the provider’s instructions.
  3. Disable Auto-Connect to Unsecured Wi-Fi:
    • Settings → Network & internet → Wi-Fi → Wi-Fi preferences.
    • Turn off “Connect to open networks” to prevent your phone from automatically joining potentially malicious hotspots.
  4. Turn Off Bluetooth When Not in Use:
    • Thieves can exploit Bluetooth vulnerabilities to pair with your device or track its location.
    • Swipe down the notification shade and toggle Bluetooth OFF when you don’t need it.

Why This Matters:
A locked SIM prevents a thief from swapping your SIM to avoid tracking. eSIMs add another layer of difficulty for criminals. Managing network connections stops sneaky hacks and location spoofing. (the-sun.com, prodigitalweb.com)


Step 10: Regular Backups & Two-Factor Authentication

Apart from anti-theft locks, protecting your data through backups and 2FA ensures that even if you lose your phone, you won’t lose all your information, and your online accounts remain secure.

  • Two-Factor Authentication (2FA):
    • Why: If a thief gets access to your unlocked phone, they could open email or social media apps. With 2FA, they still need a second code from another device or your SIM-linked number.
    • How:
      1. Go to Settings → Google → Manage your Google Account → Security → 2-Step Verification.
      2. Follow prompts to add your phone number or set up an authenticator app (e.g., Google Authenticator, Authy).
      3. Enable 2FA for every critical account: email, banking, social media, cloud storage. (komando.com, prodigitalweb.com)
  • Data Backups:
    • Why: If you must remotely wipe your phone, a recent backup ensures you can restore contacts, photos, apps, and settings to a new device without hassle.
    • How:
      1. Photos & Videos: Use Google Photos (Settings → Back up & sync → Toggle ON).
      2. Contacts: Sync contacts to your Google account (Contacts app → Settings → Accounts → Google → Toggle “Sync Contacts”).
      3. Apps & Settings: Go to Settings → System → Backup, and toggle on Back up to Google Drive.
      4. For additional peace of mind, consider a secondary backup service (e.g., Dropbox, OneDrive). (prodigitalweb.com, thesun.co.uk)

Outcome:
With 2FA, even physical access to your phone doesn’t equal access to your accounts. With regular backups, you won’t lose precious data—even if you have to factory erase your phone remotely.


Frequently Asked Questions (FAQs)

Below are some common questions about Android anti-theft settings, answered concisely to help you troubleshoot or deepen your understanding.

1. How does Theft Detection Lock actually detect theft?

It uses on-device AI and motion sensors (accelerometer, gyroscope) to recognize abrupt movements that resemble snatching—like a quick “grab-and-run.” When the phone is unlocked and suddenly experiences suspicious acceleration/deceleration patterns, the feature auto-locks your screen in milliseconds (security.googleblog.com, wired.com).

2. Will Offline Device Lock prevent me from using my phone in airplane mode?

No. Offline Device Lock triggers only if your phone loses internet connectivity while the device is unlocked. If you intentionally switch to airplane mode while your phone is already locked, it won’t re-lock. However, if you are using the phone unlocked and then put it in airplane mode (or lose connection abruptly), it will lock within a short timeframe (usually within two minutes) (support.google.com, security.googleblog.com).

3. Can a thief disable Find My Device without my knowledge?

Not if you enable Identity Check in Android 15. Identity Check forces a biometric/PIN prompt when someone tries to turn off Find My Device or other critical anti-theft settings. Without that second authentication, thieves cannot disable these features—even if they know your PIN or fingerprint (security.googleblog.com, blog.google).

4. What happens if my phone battery dies while I’m trying to locate it remotely?

If the battery dies, Find My Device can’t fetch the current location. However, once the phone is recharged or powered on, it will auto-connect to the internet (if Wifi or mobile data is available) and update its location. That’s why it’s crucial to ask family members or authorities to keep an eye out around last known locations and consider using Bluetooth trackers in addition to Android’s native features for more granular tracking (thesun.co.uk, lifewire.com).

5. Will enabling all these anti‐theft features drain my battery significantly?

Minimal impact. Theft Detection Lock and Offline Device Lock rely on low-power sensors (accelerometer, gyroscope) or the device simply checking connectivity status. These features are optimized for power efficiency, and the occasional micro-bursts of processing when they detect suspicious motion have negligible battery impact. Still, if you’re an extreme power userdata user, check Settings → Battery → Battery usage to confirm no single service is hogging resources after activation (security.googleblog.com, support.google.com).

6. If I sell or give away my phone in the future, how do I ensure these anti-theft settings won’t lock out the new owner?

Before passing your phone on:

  1. Disable Link to Google Account: Go to Settings → Accounts → Google → Remove account.
  2. Turn off Theft Detection Lock and Offline Device Lock in Settings → Google → All services → Theft protection.
  3. Factory reset the device: Settings → System → Reset options → Erase all data (factory reset).
  4. After reset, the phone will no longer be associated with your Google account, and the new owner can set up their own credentials. (blog.google, security.googleblog.com).

7. Can I enable these settings on older Android devices (Android 10 or 11)?

  • Theft Detection Lock: Rolling out gradually; many Android 10+ devices now support it, but older or budget devices may not. Check Settings → Google → All services → Theft protection to see if it’s available.
  • Offline Device Lock & Remote Lock: Available on Android 10+ via Google Play Services updates.
  • Enhanced Factory Reset Protection: Present on most Android 10 devices, but the more advanced protections (Android 15) require the latest OS.
  • Private Space & Identity Check: Only on Android 15 and newer. If you have an older phone that can’t update, consider using third-party apps like Cerberus or Prey (see the comparison table above) for supplemental protection (security.googleblog.com, blog.google).

Conclusion: Take Control of Your Android Security

By following this guide and enabling each anti-theft feature, you’ll transform your Android phone into a fortress that’s extremely tough for thieves to crack. Let’s recap:

  1. Update Operating System: Keep your device patched with the latest Android updates.
  2. Set a Strong Screen Lock: Use long PINs/passwords and combine with biometrics.
  3. Enable Theft Detection Lock: Let AI lock your phone the moment a snatch occurs.
  4. Activate Offline Device Lock: Prevent thieves from disabling tracking by going offline.
  5. Use Remote Lock & Wipe (Find My Device): Control your phone remotely to secure or erase it.
  6. Configure Enhanced Factory Reset Protection: Block thieves from resetting and reselling your phone.
  7. Set Up Private Space: Hide your most sensitive apps and data in a separate vault.
  8. Turn On Identity Check: Force biometric/PIN verification to change critical settings.
  9. Secure SIM & Network: Lock your SIM and control Wi-Fi/Bluetooth connectivity.
  10. Regular Backups & Two-Factor Authentication: Ensure data safety and multi-layered account protection.

With these settings in place, you’re well-protected against the most common theft scenarios in 2025. Not only can thieves not easily access your personal data, but they’ll also find the phone nearly impossible to resell.

Remember, security is an ongoing process—review your anti-theft settings periodically, update your passwords, and stay informed about new Android security features as they roll out. Taking control of your Android phone security today means you can use your device with confidence, knowing that even if you lose it, your data remains safe.

Stay safe, stay secure, and never let thieves win.

References

Your smartphone holds a treasure trove of personal information—photos, emails, banking apps, and more. When it’s compromised, the fallout can be devastating. In 2025, cybercriminals have grown more sophisticated, exploiting every vulnerability they can find. This guide helps you identify signs of a hacked smartphone and offers practical, step-by-step actions you can take immediately to protect your data and regain control.

warning


How to Tell If Your Phone Is Hacked

Your phone may exhibit subtle or glaring issues when a hacker gains access. Watch for these telltale warning signs:

  • Unexplained Battery Drain
    If your battery suddenly depletes faster than usual, malware may be running in the background, continuously siphoning power (economictimes.indiatimes.com, cisomag.com).
  • Overheating and Performance Slowdowns
    A phone that feels hot to the touch for no reason or experiences frequent freezes indicates malicious activity such as background processes or crypto-mining (inc.com, mcafee.com).
  • Strange Pop-Ups and Ads
    Unexpected pop-ups—even outside your browser—often signal adware or spyware. Hackers inject these ads to lure you into malicious links or track your clicks (geo.tv, cellularnews.com).
  • Unfamiliar Apps or Files
    Discovering apps you didn’t install, or files that appeared out of nowhere, often points to unauthorized access. These could be malware packages created to harvest your data (cisomag.com, thesun.co.uk).
  • Excessive Data Usage
    If your data bill spikes despite usual usage, malware could be transmitting personal information in the background. Check data usage per app to spot anomalies (cisomag.com, citizen.co.za).
  • Weird Calls or Texts
    Outgoing calls or messages you didn’t send, or texts with strange characters, may mean hackers are using your number to scam contacts (cisomag.com, mcafee.com).
  • Settings Changes You Didn’t Make
    If your home screen layout, lock screen, or privacy settings are altered without your input, that’s a red flag. Hackers often tweak settings to keep their malware hidden (citizen.co.za, cellularnews.com).
  • Notifications About Unfamiliar Logins
    Receiving login alerts from unknown locations for your email or social media accounts typically means a cybercriminal bypassed your defenses (citizen.co.za).
  • Suspicious Bank or Credit Card Charges
    Unrecognized transactions are one of the clearest indications of account theft or card cloning. Monitor your statements daily to catch these early (thesun.co.uk).
  • Camera/Location Indicator Lights Stay On
    Some devices show a tiny status light when the camera or microphone is active. If you see it glowing when you’re not using those features, spyware might be tracking you (thesun.co.uk).

Why You Should Act Immediately

Waiting can cost you more than just data. Here’s what’s at stake when you delay:

  • Identity Theft: Hackers can access personal photos, messages, and saved passwords to impersonate you online.
  • Financial Loss: Unauthorized banking transactions, cloned credit cards, or ransomware demands can drain your accounts.
  • Data Breach: Your private conversations, location history, and even contact lists can end up on the dark web.
  • Privacy Invasion: Spyware can record your microphone and camera, monitoring your every move.

By acting fast, you can limit the damage, prevent further breaches, and secure your phone and personal data.


H2: “How to Know Your Phone Is Compromised”

You need clear indicators that your device is under attack. Keep an eye out for:

  • Unwanted Pop-Ups and Ads
    Cybercriminals often use adware to bombard you with convincing (but fraudulent) ads. These can redirect you to phishing sites or download additional malware when clicked (geo.tv, cellularnews.com).
  • Apps Behaving Erratically
    If your normally reliable apps crash, freeze, or behave strangely—like asking for new permissions—that’s a major red flag. Malware can manipulate legitimate apps to help steal data (inc.com, cellularnews.com).
  • Unusual System Activity
    Frequent reboots, random shutdowns, or waking from standby without you touching it suggests hidden processes are running without your consent (mybroadband.co.za, geo.tv).
  • Spikes in SMS or Data Usage
    Hackers might use your phone to send premium-rate texts or mine cryptocurrency, racking up your bill. Keep an eye on your carrier’s usage dashboard for unexplained spikes (inc.com, citizen.co.za).

Understanding Mobile Malware: Comparison at a Glance

Malware comes in different flavors, each with its own behavior and risks. Use the table below to see how they compare:

Type Symptoms Method of Infection What It Steals Recommended Action
Spyware/Keylogger Unwanted tracking indicator lights; odd camera or mic activation Hidden in free app downloads or phishing links Keystrokes, browsing history, contacts Uninstall suspicious app; factory reset
Adware Constant pop-ups; aggressive ads outside browser Bundled with free software; shady app stores Click-stream data, browsing habits Install ad blocker, uninstall adware
Ransomware Locked screens; ransom message on startup Malicious links in SMS/email; compromised websites Access to files, threat to delete data Do not pay ransom; restore backup; factory reset
Cryptominer Overheating; rapid battery drain; slow performance Malicious scripts in websites; trojanized apps CPU cycles for mining cryptocurrency Uninstall infected apps; install reputable antivirus
Trojan (Backdoor) Strange network activity; unknown apps installed Email attachments; third-party app stores Full device control, full data access Disconnect from internet; remove Trojan; reinstall OS

This comparison helps you quickly understand which category your symptoms match, so you can choose the best course of action.


H2: “Signs of a Hacked Smartphone”

Below, you’ll find an expanded list of the 10 signs that your smartphone may be hacked, each paired with actionable insights.

1. Rapid Battery Drain Indicates Hidden Malware

  • What Happens: Malware often runs non-stop in the background—capturing keystrokes, mining cryptocurrency, or transmitting data—draining your battery at an alarming rate (economictimes.indiatimes.com, cisomag.com).
  • Actionable Steps:
    • Open Settings > Battery (Android) or Settings > Battery Usage (iOS) to see which apps use the most power.
    • Look for apps you don’t recognize or ones with excessive usage.
    • Force-stop or uninstall suspicious apps immediately.
    • If battery usage remains high, consider a full factory reset (details below).

2. Unexplained Overheating & Performance Slowdowns

  • What Happens: Malicious processes consume CPU cycles, making your phone hot even when idle. You may notice apps freezing or the interface stuttering (inc.com, mcafee.com).
  • Actionable Steps:
    • Go to Settings > System > Developer Options (Android) or Settings > General > iPhone Storage (iOS) to check CPU usage.
    • Identify abnormal spikes in CPU load.
    • Remove newly installed apps or any you don’t trust.
    • Run a mobile antivirus scan (see recommended apps below).

3. Strange Pop-Ups & Unauthorized Ads

  • What Happens: Adware injects advertisements even when you’re not using a browser. Clicking these can spread malware or phish your credentials (geo.tv, cellularnews.com).
  • Actionable Steps:
    • Install an ad-blocker or reputable mobile security app that detects adware.
    • Avoid clicking random ads and be cautious of “critical alert” pop-ups claiming your phone is infected—these often lead to rogue sites.
    • Navigate to Settings > Apps and uninstall any new apps installed around the time ads started appearing.

4. Presence of Unknown Apps or Files

  • What Happens: Some malware disguises itself as innocuous apps or downloads additional payloads without your knowledge (cisomag.com, thesun.co.uk).
  • Actionable Steps:
    • Regularly audit your app list:
      • On Android, go to Settings > Apps & notifications > See all apps.
      • On iOS, tap and hold any app icon; any unrecognized icon should be deleted.
    • Check Downloads or Files app for strange files you didn’t save.
    • Run a full antivirus scan and remove flagged items.

5. Spikes in Data Usage Reveal Silent Data Transmission

  • What Happens: Malware often uploads sensitive data to remote servers. This activity consumes data, especially if large files (photos, documents) are being exfiltrated (cisomag.com, citizen.co.za).
  • Actionable Steps:
    • On Android, go to Settings > Network & internet > Data usage.
    • On iOS, go to Settings > Cellular > Cellular Data Usage.
    • Identify any app using more data than expected.
    • Temporarily disable mobile data or switch to airplane mode if you suspect active data transmission.
    • Uninstall or disable the culprit apps immediately.

6. Password Reset Emails & Unfamiliar Login Alerts

  • What Happens: If you’re receiving password reset links you didn’t request, or notifications about logins from unknown devices, hackers may be attempting to take over your accounts (citizen.co.za, inc.com).
  • Actionable Steps:
    • Change your primary email and social media passwords from a secure device.
    • Enable two-factor authentication (2FA) on all accounts (Google, Apple ID, banking, etc.).
    • Review active sessions (most platforms let you see logged-in devices) and revoke any you don’t recognize.

7. Unexpected Calls, Texts, or Messages You Didn’t Send

  • What Happens: Hackers sometimes use infected phones to send premium-rate texts or to launch phishing attacks from your number (cisomag.com, mcafee.com).
  • Actionable Steps:
    • Check your call log and message history for entries you don’t recall.
    • Contact your carrier to ensure no SMS-to-premium services are active on your line.
    • Reset your SIM PIN code and ask your carrier to add extra security locks if available (e.g., SIM swap protection).

8. Unauthorized Settings Changes

  • What Happens: Hackers might disable your security settings to avoid detection—turning off antivirus, changing lock-screen methods, or permitting installation from unknown sources (citizen.co.za, cellularnews.com).
  • Actionable Steps:
    • Review critical security settings:
      • On Android: Settings > Security > Device admin apps.
      • On iOS: Settings > Face ID & Passcode and Settings > Privacy.
    • Revoke admin rights for apps you don’t trust.
    • Disable “Install unknown apps” (Android) unless absolutely necessary.

9. Suspicious Bank or Credit Card Transactions

  • What Happens: Hackers can intercept banking apps or clone your cards to make unauthorized purchases. These will appear as strange transactions on your statement (thesun.co.uk).
  • Actionable Steps:
    • Log in to your banking app or online portal and review recent transactions.
    • Report unknown charges to your bank immediately.
    • Consider freezing your cards and ordering replacements.
    • Check your credit report for signs of identity theft.

10. Camera/Location Indicator Lights Stay Lit

  • What Happens: Some operating systems display a green or orange dot when the camera or microphone is active. If these lights stay on when you’re not using the camera, malware may be spying on you (thesun.co.uk).
  • Actionable Steps:
    • On iOS, swipe down from the top-right to open Control Center; check if “Location Services” or “Microphone” was recently accessed.
    • On Android, install an app like Access Dots to see which sensors are active.
    • Run a mobile antivirus scan specifically targeting spyware.

H2: “What to Do If Your Smartphone Is Hacked: Immediate Steps”

Taking swift action can limit the damage, remove malware, and secure your personal data. Follow these steps immediately:

  1. Disconnect from the Internet
    • Turn on Airplane Mode or toggle Wi-Fi & Mobile Data off.
    • This prevents malware from transmitting more data to hackers or receiving malicious commands (citizen.co.za).
  2. Revoke App Permissions
    • Review which apps have extensive permissions (camera, microphone, SMS).
    • On Android: Settings > Apps > App permissions.
    • On iOS: Settings > Privacy & Security > [Camera, Microphone, Location, etc.].
    • Revoke permissions for any app that looks suspicious.
  3. Uninstall Suspicious Apps
    • Go to the app list and remove any unfamiliar apps (including those you installed around the time signs started).
    • For stubborn apps on Android, use Settings > Security > Device administrators to remove any admin-level privileges before uninstalling.
  4. Run a Reputable Mobile Antivirus/Anti-Spyware Scan
    • Top Picks (2025 update):
      • Bitdefender Mobile Security – Real-time scanning, anti-theft, and VPN.
      • Norton Mobile Security – App advisor, malware detection, and call blocking.
      • Kaspersky Mobile Antivirus – Anti-phishing, web protection, and app lock.
    • Install one of these from a trusted source: Google Play Store or Apple App Store.
    • Perform a full device scan and quarantine any threats detected (mcafee.com).
  5. Change All Passwords From a Different Device
    • Log in to all your online accounts (email, banking, social media) from a known-clean device (desktop or friend’s phone).
    • Change passwords to strong, unique combinations.
    • Enable 2-Factor Authentication (2FA) wherever possible (citizen.co.za).
  6. Check for SIM Swap or Cloning
    • Contact your carrier immediately if you suspect your SIM has been compromised.
    • Ask them to add a PIN or password to your account to prevent unauthorized SIM changes.
  7. Backup Important Data
    • If you haven’t already, back up contacts, photos, and documents to a secure cloud service (Google Drive, iCloud) or computer.
    • Use end-to-end encrypted backup solutions where possible.
  8. Perform a Factory Reset (As a Last Resort)
    • If malware persists or you can’t isolate it, a full factory reset wipes all data and apps.
      • Android: Settings > System > Reset Options > Erase all data (factory reset).
      • iOS: Settings > General > Transfer or Reset iPhone > Erase All Content and Settings.
    • Before wiping, ensure you’ve backed up essential data (but avoid restoring infected app backups).
    • After resetting, reinstall apps from official stores only, and restore data selectively.
  9. Monitor Your Accounts and Phone Behavior
    • For the next 30 days, watch for any sign of recurring issues: rapid battery drain, strange notifications, or unusual transactions.
    • Review your credit report for identity theft.
    • Change passwords regularly and keep your OS and apps updated.

H2: “Best Mobile Security Practices to Prevent Future Hacks”

Prevention is better than cure. Adopt these habits to keep hackers at bay:

  • Install Software Updates Immediately
    • Both iOS and Android roll out security patches monthly.
    • Enable “Auto-Update” for apps and system firmware.
  • Only Use Official App Stores
    • Avoid sideloading APKs or jailbreaking/rooting your device.
    • Check app reviews and developer information before installing.
  • Use a VPN on Public Wi-Fi
    • Public hotspots are prime hunting grounds for man-in-the-middle attacks.
    • Choose a reputable VPN (NordVPN, ExpressVPN, ProtonVPN) to encrypt your traffic.
  • Enable App-Specific Locks
    • Most modern phones let you lock individual apps with PINs or biometric authentication.
    • Protect banking apps, email clients, and social networks.
  • Use a Password Manager
    • Generate strong, unique passwords for each account.
    • Tools like LastPass, Dashlane, or Bitwarden encrypt and store them securely.
  • Be Cautious of Phishing Attempts
    • Never click email or SMS links from unknown senders.
    • Verify any “urgent” security alerts by navigating to the official site yourself—do not tap embedded links.
  • Regularly Review Permissions and App Activity
    • Audit permissions every month.
    • Use built-in Android “Permission manager” or iOS’s “Privacy & Security” to track which apps have access to sensitive features.
  • Enable Biometric or Strong Passcodes
    • Fingerprint or Face ID (iOS) significantly reduces the chance of unauthorized access.
    • If your device doesn’t support biometrics, use a complex alphanumeric passcode.

H2: “Top Mobile Antivirus Apps for 2025”

Below is a comparison of leading mobile security solutions to scan for malware and protect your privacy:

App Key Features Price (Annual) Pros Cons
Bitdefender Mobile Security Real-time protection; anti-theft; VPN (limited data); web advisor $39.99 Lightweight; minimal performance impact; accurate detection VPN data cap; no free tier
Norton Mobile Security App advisor; Wi-Fi security; malware scanning; call/text filter $29.99 Excellent UI; low battery usage; reliable support No VPN; fewer free features
Kaspersky Mobile Antivirus Anti-phishing; app lock; web filter; anti-theft $29.95 Very thorough scans; free version available Occasional false positives
McAfee Mobile Security Theft protection; secure media vault; Wi-Fi security; performance optimization $34.99 Includes anti-theft features; backup capabilities Ad-supported free version; higher battery draw
Avast Mobile Security Privacy advisor; call blocker; anti-theft; photo vault Free/$24.99 Robust free features; simple interface Displays ads in free version

Select a reputable solution that fits your budget and needs. A minimal annual investment can save you from costly data breaches. (mcafee.com)


H2: “Frequently Asked Questions (FAQs)”

Q1: Can a simple restart fix a hacked phone?
A1: A restart rarely removes sophisticated malware. While it may temporarily halt background processes, genuine threats often reside in system files or have admin privileges that persist after reboot. Always scan with security software and consider deeper actions like uninstalling suspicious apps or performing a factory reset.


Q2: How quickly should I change my passwords after suspecting a hack?
A2: Immediately—preferably from a clean device. Change passwords for all critical accounts (email, banking, social media) before doing anything else. Delay increases the risk that hackers intercept your new credentials. Enable 2FA where possible.


Q3: Does antivirus software really work on smartphones?
A3: Yes—modern mobile security suites can detect and block a wide range of malware, from adware to spyware. They also provide features such as anti-phishing, secure browsing, and system optimizers. Always keep the antivirus definitions up to date.


Q4: Could a public Wi-Fi network hack my phone?
A4: Public Wi-Fi can expose your data to man-in-the-middle attacks. Hackers can intercept unencrypted traffic, steal login credentials, or inject malware. Always use a VPN when connecting to public hotspots.


Q5: What if I can’t find any suspicious apps but still see warning signs?
A5: Some advanced malware disguises itself as harmless system processes. If you’ve ruled out visible culprits, disconnect from networks, run a comprehensive antivirus scan, and consider a factory reset. Before resetting, back up important data, but avoid reinstalling apps from unknown sources.


Q6: How can I spot phishing links on my phone?
A6: Look for misspelled domain names (e.g., “yourbank-secure.com” with slight variations) and generic greetings instead of your actual name. Avoid clicking links in unsolicited emails, texts, or social media messages. When in doubt, navigate to the website manually via your browser.


Q7: Is jailbreaking or rooting my phone making it more vulnerable?
A7: Absolutely. Removing manufacturer or carrier restrictions disables built-in security features, opening doors for malware. If you’ve rooted/jailbroken your device and suspect a hack, unroot/un-jailbreak or perform a factory reset to restore security protections.


Conclusion

Smartphones are integral to our daily lives, making them prime targets for hackers. Recognizing the signs your phone has been hacked—from rapid battery drain to unexplained apps—can help you act quickly and safeguard your personal data. By following the step-by-step actions above—disconnecting from the internet, uninstalling suspicious apps, running antivirus scans, and, if necessary, factory resetting—you can neutralize threats and secure your device.

Adopt proactive measures like installing a reputable security suite, enabling software updates, using strong passcodes, and avoiding risky downloads. By staying vigilant, you minimize the risk of future hacks and ensure your smartphone remains a safe, reliable tool for work, communication, and entertainment. Stay informed, stay protected, and take control of your mobile security today.

When your smartphone is compromised, your social media accounts become prime targets. Hackers can intercept messages, hijack account access, and manipulate your online identity to deceive friends and family. If you’ve experienced a phone hack—whether through malware, a phishing link, or a stolen device—you need to act fast. This guide will walk you through immediate, practical steps to secure Facebook, Instagram, and WhatsApp. You’ll find actionable insights, high-value keywords, and embedded references to credible sources throughout, ensuring you have the most up-to-date advice at your fingertips.

hack


Table of Contents

  1. Why Immediate Action Matters
  2. Initial Damage Control
  3. Securing Your Facebook Account
  4. Locking Down Your Instagram
  5. Fortifying WhatsApp Security
  6. Creating Strong Passwords & Managing Credentials
  7. Understanding Advanced Authentication
  8. Managing Third-Party Access
  9. Recognizing and Avoiding Phishing Scams
  10. Restoring Account Control and Monitoring Activity
  11. Preventative Privacy Settings
  12. Family & Friends: How to Protect Loved Ones
  13. Comparing Security Features: Facebook vs. Instagram vs. WhatsApp
  14. Tools You Can Use: Password Managers & Security Apps
  15. Frequently Asked Questions

Why Immediate Action Matters

When your phone is hacked, every app that stores credentials or messages becomes vulnerable. Hackers often exploit such access to:

  • Steal Login Credentials: Once inside, they harvest saved passwords and session tokens.
  • Send Malicious Messages: They impersonate you to defraud your contacts.
  • Access Sensitive Conversations: Personal or financial discussions can be weaponized.

Take action within 15–30 minutes of noticing suspicious activity. Delay can allow adversaries to propagate phishing links, post on your behalf, or lock you out entirely.


Initial Damage Control

  1. Disconnect from the Internet Immediately
    • Turn off Wi-Fi and cellular data the moment you suspect a hack.
    • This prevents remote commands from reaching malware on your phone.
  2. Log Out of All Devices
    • Use your desktop or a friend’s device to access each social media platform.
    • Navigate to Settings → Security → Where You’re Logged In, then choose Log Out of All Sessions.
  3. Put Your SIM Card on Hold (If Stolen)
    • Contact your mobile carrier to block your SIM and prevent SMS-based codes from being intercepted.

Tip: If you’re using Android, enable Google’s Find My Device feature to remotely lock or erase your phone. If on iOS, use Find My iPhone to do the same. (wired.com, americanbar.org)


Securing Your Facebook Account

1. Change Your Password Immediately

  • Go to Settings & Privacy → Settings → Security and Login → Change Password.
    • Choose a password at least 12 characters long, mixing uppercase, lowercase, numbers, and symbols.
    • Avoid reused passwords; each major account needs a unique passphrase. (infocons.org, timesofindia.indiatimes.com)
  • Use a Password Manager

2. Enable Two-Factor Authentication (2FA)

  • Navigate to Settings → Security and Login → Use Two-Factor Authentication → Get Started.
    • Select Authentication App (e.g., Google Authenticator, Authy) for best security.
    • Avoid SMS-based codes if possible, because SIM swap attacks can intercept messages. (infocons.org, thedefendopsdiaries.com)
  • Set Up Security Key (Optional)
    • Facebook supports hardware security keys (like a YubiKey).
    • Under 2FA settings, choose Add Security Key.
    • This provides passwordless entry using FIDO2 standards.

3. Review and Revoke Suspicious Sessions

  • Go to Settings → Security and Login → Where You’re Logged In.
    • If you see locations or devices you don’t recognize, click Log Out next to each entry.
    • Clicking Log Out of All Sessions forces re-logins everywhere. (bsi.bund.de)

4. Audit Authorized Apps and Third-Party Access

  • Navigate to Settings → Apps and Websites.
    • Remove any unfamiliar or unused applications.
    • This prevents malicious apps from continuing to access your profile info. (bsi.bund.de)

5. Update Privacy Settings

  • Limit Profile Visibility
    • Settings → Privacy → Who Can See Your Future Posts: Set to Friends or Only Me.
    • Review past posts’ visibility and adjust from Public to Friends.
  • Disable Face Recognition
    • Settings → Face Recognition → Choose No to prevent deepfake profiling.
  • Turn Off Location History
    • Settings → Location → Turn off Manage Your Location History to prevent geotargeting hacks.

Locking Down Your Instagram

1. Reset Your Password

  • Open Instagram → Tap Profile → Menu → Settings → Security → Password.
    • Immediately choose a strong, unique password.
    • If you suspect someone changed your password, use the Forgot Password link on the login page; Instagram will send a reset link to your verified email or phone number. (architecturaldigest.com, timesofindia.indiatimes.com)

2. Enable Two-Factor Authentication

  • Settings → Security → Two-Factor Authentication → Get Started.
  • Backup Codes
    • Store your backup codes somewhere safe (e.g., a password manager).
    • These codes mean you can still get into your account if you lose your phone.

3. Verify Your Contact Info

  • Settings → Account → Personal Information

4. Review Login Activity

  • Settings → Security → Login Activity.
    • Look for unfamiliar IP addresses or locations.
    • Tap Log Out beside suspicious entries. (bsi.bund.de)

5. Disconnect Suspicious Third-Party Apps

  • Settings → Security → Apps and Websites.
    • Under Active, revoke access for any service you don’t recognize.
    • Malicious third-party apps can harvest your data or post on your behalf. (bsi.bund.de)

6. Adjust Privacy Settings

  • Private Account
    • Settings → Privacy → Account Privacy → Toggle Private Account.
    • Ensures only approved followers see your content.
  • Story Sharing
    • Settings → Privacy → Story → Disable Allow Sharing to prevent followers from resharing your stories.

Fortifying WhatsApp Security

1. Change Your PIN for Two-Step Verification

  • Open WhatsApp → Settings → Account → Two-Step Verification.

2. Verify Encryption Settings

  • Settings → Account → Security → Show Security Notifications.
    • Toggle on to receive alerts when a contact’s encryption code changes.
  • Check Encryption Status
    • In any chat, tap the contact → Encryption → Compare the numbers with your contact to ensure only you both see messages.

3. Lock WhatsApp with Biometric or Passcode

  • Settings → Privacy → Fingerprint Lock (Android) / Screen Lock (iOS).
    • Enable fingerprint or Face ID so no one can open the app without your biometrics.

4. Review Linked Devices

  • Settings → Linked Devices.
    • If someone gained remote access, you might see unknown web or desktop sessions.
    • Tap each to Log Out if you don’t recognize them. (thesun.co.uk)

5. Backup and Restore Safely

  • Avoid Unencrypted Cloud Backups
    • If using Google Drive or iCloud, enable end-to-end encrypted backups.
    • Settings → Chats → Chat Backup → End-to-End Encrypted Backup.

Creating Strong Passwords & Managing Credentials

1. Characteristics of a Strong Password

  • Length: Minimum of 12–16 characters.
  • Complexity: Mix of uppercase, lowercase, numbers, and symbols.
  • Uniqueness: No password reuse.
  • Memorability: Use a memorable phrase with subtle modifications (e.g., “MyBaby#2025_LovesAI!”). (pulse.ug, pulse.com.gh)

2. Using a Password Manager

  • Why It Matters:
    • Generates truly random passwords.
    • Auto-fills login forms securely.
    • Alerts you to breached credentials.
  • Top Password Managers to Consider:
    Password Manager Free Plan Available? End-to-End Encryption Password Health Reports Browser & Mobile Support
    LastPass Yes (Limited) Yes Yes Chrome, Firefox, Edge, iOS, Android
    1Password No (14-day trial) Yes Yes Chrome, Firefox, Safari, iOS, Android
    Bitwarden Yes (Unlimited) Yes Yes Chrome, Firefox, Edge, iOS, Android
    KeePassXC Yes (Open-Source) Yes Manual Windows, macOS, Linux
    Dashlane Yes (Limited) Yes Yes Chrome, Firefox, Edge, iOS, Android

    (infocons.org, pulse.com.gh)

3. Regularly Rotate Critical Passwords

  • Change passwords for email, banking, and social media every 3–6 months.
  • Automate reminders via calendar or password manager.

Understanding Advanced Authentication

1. Multi-Factor Authentication (MFA) Evolution

  • Beyond SMS Codes:
    • Biometric authentication (fingerprint, Face ID) is increasingly standard.
    • Hardware security keys (e.g., YubiKey) provide FIDO2 compliance, protecting against phishing. (thedefendopsdiaries.com)

2. Passwordless Authentication

  • Magic Links & One-Time Passcodes:
    • Platforms like Google, LinkedIn, and Twitter now offer email-based “magic link” logins.
    • Reduces reliance on passwords, cutting risk of credential theft. (thedefendopsdiaries.com)

Managing Third-Party Access

1. Why Revoke Unused Apps?

  • Attack Surface Expansion:
    • Every connected app can request data or post on your behalf.
    • Some malicious apps can remain dormant until triggered. (bsi.bund.de)

2. How to Audit and Revoke Access

  • Facebook: Settings → Apps and Websites → Active → Remove.
  • Instagram: Settings → Security → Apps and Websites → Active → Remove.
  • WhatsApp: Review linked devices under Settings → Linked Devices.

Pro Tip: Schedule a quarterly “app audit” to ensure only necessary services retain access.


Recognizing and Avoiding Phishing Scams

1. Common Phishing Tactics on Social Media

  • Fake Login Pages:
    • Links that mimic Facebook or Instagram’s login screens.
    • Check the URL: legitimate domains end in facebook.com, instagram.com, whastapp.com.
  • Impersonation Accounts:
    • Fraudsters create profiles posing as support teams, luring you to click malicious attachments.
  • Malicious Chatbots or Links in DMs:
    • A DM from a friend’s compromised account may contain a shortened URL that redirects to malware. (pulse.ug, pulse.com.gh)

2. Best Practices to Avoid Phishing

  • Never Click Suspicious Links
    • On Facebook or Instagram, hover over a link to preview the URL in the bottom-left of your browser.
    • If on mobile, press and hold the link to see if it matches the displayed text.
  • Verify Sender Before Responding
    • If a friend sends a link out of the blue, call or text them to confirm.
    • Authentic support teams never DM you first requesting credentials.
  • Use Phishing Detection Tools

Restoring Account Control and Monitoring Activity

1. Reporting a Compromised Account

2. Monitor Login Alerts and Notifications

  • Facebook Alerts:
    • Settings → Security and Login → Get alerts about unrecognized logins → choose Notifications (email, Messenger, SMS). (timesofindia.indiatimes.com)
  • Instagram Alerts:
  • WhatsApp Alerts:
    • WhatsApp will prompt you if your number is re-registered on another device.
    • Enable “Show Security Notifications” for end-to-end encryption alerts. (thesun.co.uk)

Preventative Privacy Settings

1. Lock Down Who Sees Your Personal Information

  • Facebook:
    • Settings → Privacy → Who can see your friends, posts, and personal info → Set to Friends or Only Me.
    • Settings → Apps and Websites → Remove permissions for apps you no longer use. (timesofindia.indiatimes.com)
  • Instagram:
    • Settings → Privacy → Account Privacy → Toggle Private Account.
    • Settings → Privacy → Activity Status → Turn off if you don’t want people to know when you’re online.
  • WhatsApp:
    • Settings → Privacy → Last Seen, Profile Photo, About → Set to My Contacts (or Nobody).
    • Settings → Privacy → Status → Choose My Contacts (or customize). (timesofindia.indiatimes.com)

2. Limit Data Sharing with Third Parties

  • Facebook Off-Facebook Activity:
    • Settings → Your Facebook Information → Off-Facebook Activity → Clear and Manage future activity.
  • Instagram Data Sharing:
    • Settings → Security → Apps and Websites → Remove any suspicious integrations.
  • Minimize Permissions on WhatsApp:
    • Grant only essential permissions (contacts, storage). Revoke access to camera/microphone when not required.

Family & Friends: How to Protect Loved Ones

1. Educate About Social Engineering Tactics

  • Explain Common Scams:
    • “Dad impersonation” where hackers message younger relatives claiming to be family, asking for money.
  • Encourage Verification:
    • If someone sends unusual requests, call or video-chat to confirm authenticity.

2. Set Up Joint Security Measures

  • Shared Password Managers:
    • Families can use a shared vault folder in 1Password or Bitwarden to store emergency contacts and recovery codes.
  • Emergency Recovery Contacts:
    • On some platforms (e.g., Apple ID, Google Account), set trusted contacts who can help recover accounts.

3. Use Parental Controls & Screen Time

  • WhatsApp Family Safety Features (iOS 17.5+):
    • Check Usage Patterns under Settings → Family.
  • Instagram Activity Dashboard for Teens:
    • Parents can monitor time spent and the accounts their teen follows.

Comparing Security Features: Facebook vs. Instagram vs. WhatsApp

Feature Facebook Instagram WhatsApp
Two-Factor Authentication SMS, Authenticator app, Security key SMS, Authenticator app, Backup codes SMS, Email backup PIN
Passwordless Login Security keys (FIDO2), Magic links (in testing) Magic links (in testing), QR code login N/A
Encryption TLS in transit; optional Secret Conversations (end-to-end) TLS in transit; Direct Messages are encrypted End-to-end encryption by default
Authorized Apps Audit Yes (Apps & Websites) Yes (Apps & Websites) Linked Devices (log out remote sessions)
Privacy Controls Extensive (friends, public, custom lists) Private account, activity status toggle Last seen, profile photo, status privacy options
Security Alerts Unrecognized login alerts via email/SMS Login activity notifications via email Number re-registration alerts, encryption changes

Table: Comparing key security features for major social platforms. (bsi.bund.de, timesofindia.indiatimes.com)


Tools You Can Use: Password Managers & Security Apps


Frequently Asked Questions

1. What should I do if I can’t regain access to my social media accounts?

  • Contact Support Directly:
  • Provide Documentation:
    • Screenshot proof of ownership (e.g., ID, photos with the account).
    • Copies of previous posts or billing receipts if you’ve purchased ads.
  • Temporary Freeze:
    • If you suspect identity theft, report to the local authorities and request a freeze on any potential financial accounts linked to your social profiles.

2. Can hackers still access my social media if I change my phone?

  • If you enable 2FA properly and revoke all active sessions, switching devices severs hacker access immediately.
  • Always use a new device that’s malware-free when resetting credentials. (wired.com, americanbar.org)

3. How often should I change my passwords?

  • Sensitive Accounts (Email, Banking, Social Media): Every 3–6 months.
  • Less Critical Accounts: Every 12 months, unless you receive a breach notification.

4. Is SMS-based 2FA still safe?

  • SMS 2FA is better than no 2FA but is vulnerable to SIM swap attacks.
  • Whenever possible, prefer an authenticator app or a hardware security key. (thedefendopsdiaries.com, pulse.ug)

5. How can I check if my phone is truly clean after a hack?

  • Factory Reset as Last Resort:
    • Backup any photos/files that aren’t sensitive.
    • Perform a factory reset to wipe all malware.
    • Reinstall apps only from official app stores (Google Play, Apple App Store).
  • Use Mobile Security Scanners:
    • Install Bitdefender or McAfee mobile scanners to detect residual threats.
  • Regularly Monitor Unusual Battery Drain or Data Usage:
    • Malware often runs in the background, causing spikes.

6. My friend got hacked through a phishing link—how can I warn them?

  • Educate on Phishing Signs:
    • Misspelled URLs, poor grammar, unusual sender addresses, urgent requests for credentials.
  • Share Official Guides:

Conclusion

Locking down your social media after a phone hack requires swift, layered actions:

  • Immediate Damage Control: Disconnect, log out, and block your SIM.
  • Account Hardening: Change passwords, enable MFA, revoke sessions.
  • Ongoing Vigilance: Recognize phishing, audit apps, and monitor security alerts.

By following the practical steps outlined above—reinforced with high-CPC keywords like “social media account security”, “account hack recovery”, “secure Facebook account”, and “WhatsApp security tips”—you’ll dramatically reduce the risk of secondary attacks. Remember: it’s not just about recovery; it’s about establishing a security routine that deters future threats. Take control of your digital presence today, and stay one step ahead of hackers.

Creating viral short-form videos doesn’t require fancy cameras or big budgets. In this guide, you’ll discover how to leverage only your iPhone to craft Reels and TikToks that grab attention, drive engagement, and skyrocket your reach. We’ll cover pre-production planning, shooting techniques, on-device editing, posting strategies, and even collaboration tactics—each section packed with actionable insights, and contextual references to support your journey. Let’s dive in.

reels


Introduction: Why Your iPhone Is a Game-Changer

You might think that to produce eye-catching Reels or TikToks, you need DSLR rigs, external mics, or professional lighting. But the reality is: today’s iPhone cameras pack powerful sensors, sophisticated software, and native features that rival many dedicated video setups. Using your iPhone:

  • Keeps costs low—no need for extra gear.
  • Simplifies your workflow—film, edit, and post all from one device.
  • Delivers high-quality footage—4K video, cinematic mode, and Smart HDR all in your pocket.

And best of all, you can start right now. Whether you’re a solo creator, small business, or aspiring influencer, this blueprint will guide you step-by-step to produce scroll-stopping content that resonates with audiences across Instagram Reels and TikTok.


TikTok Marketing Strategy: Using iPhone Camera

Building a sound TikTok marketing strategy means more than just posting random clips. You need to understand how to captivate viewers within the first few seconds, harness TikTok’s algorithm, and incorporate trends effectively. Here’s how to align your approach around your iPhone’s capabilities:

1. Understand TikTok’s Algorithm and Trends

  • TikTok prioritizes videos that capture high watch time, quick engagement (likes, comments), and frequent shares.
  • Use trending sounds and challenges to signal relevancy. Every day, explore TikTok’s Creative Center to find trending audio—this can boost your chances of being pushed onto users’ For You Pages (FYP) (blog.hubspot.com, backlinko.com).
  • Aim to hook viewers in the first 2–3 seconds with a compelling visual or a provocative question. For example: “You won’t believe how I filmed this entire video with my iPhone—no tripod needed!”

2. Plan Viral-Friendly Content

  • Hook: Start with a surprising or bold statement. For instance, “This trick made my follower count explode overnight!”
  • Value: Deliver practical insights or entertainment. Teach a quick hack—like switching to 4K at 60fps for buttery smooth slow-mo.
  • Call-to-Action (CTA): Prompt users to like, comment, or share. Asking a simple question—“Which hack will you try first?”—drives interaction and signals engagement to the algorithm.

3. Leverage iPhone-Specific Features

  • Cinematic Mode (iPhone 13+/14/15 series): Achieve shallow depth-of-field (bokeh) for a professional look.
  • Smart HDR & Deep Fusion: Capture vibrant details, especially in mixed lighting.
  • QuickTake: When filming spontaneously, hold the shutter to record video without switching from Photo mode—perfect for unplanned moments.

4. Engage With Trends Strategically

  • Don’t chase every fad; pick trends that align with your niche and audience. If bright, energetic dances dominate, adapt them to your style—e.g., showcase a behind-the-scenes iPhone filming hack with trending music playing.
  • Use trending hashtags sparingly (3–5 max) to categorize your video without clutter (blog.hubspot.com, lifewire.com).

5. Post at Peak Engagement Times

  • Analyze your audience’s activity—if most followers are in Lagos (GMT+1), posting between 6 PM and 9 PM local time often yields higher initial views. Experiment and review analytics weekly to pinpoint your sweet spot.

By following these steps, your TikTok marketing strategy becomes a deliberate, data-driven process that leverages your iPhone’s strengths. The goal is to produce consistently engaging videos that the algorithm cannot ignore.


Social Media Marketing Strategy: Boosting Reach with Reels

Instagram Reels and TikTok content share many principles. Crafting a robust social media marketing strategy means repurposing content, cross-posting effectively, and leveraging each platform’s unique features to maximize exposure. Here’s how to integrate your iPhone-shot videos into a broader plan:

1. Repurpose Content Across Platforms

  • Shoot once, edit for Reels and TikTok separately. For instance, crop your vertical video slightly differently to suit Instagram’s format if necessary.
  • Use platform-specific intros: TikTok viewers respond to on-cam dialogue, while Instagram Reels often succeed with text overlays at the start.

2. Optimize Captions and Descriptions

  • Include relevant social media marketing keywords like “viral Reel tips,” “iPhone video editing,” and “short-form content strategy” naturally in captions.
  • On Instagram, use up to 30 hashtags but focus on niche tags (e.g., #PhoneVideography, #ReelsCreators). On TikTok, 3–5 highly relevant tags work best to avoid algorithm confusion (lifewire.com).

3. Cross-Promote on Stories and Other Channels

  • Tease your Reel or TikTok in Stories with a countdown sticker to build anticipation.
  • Embed your TikTok link in your Instagram bio and mention it in captions—drive traffic from one platform to another.
  • Post snippets on Facebook Stories, Twitter, or LinkedIn depending on your niche—each share expands reach.

4. Leverage Instagram Reels Features

  • Use native Reels tools: tempo adjustment, effects, and text overlays.
  • Experiment with AR filters—showcase a before/after iPhone filter hack to pique curiosity.
  • Stitch trending Reels by adding your own spin—collaboration with Reels trends can boost your visibility on Explore pages.

5. Track Analytics and Iterate

  • In Instagram’s Insights, note which Reels get highest reach and saves. On TikTok, check average watch time and completion rate.
  • Identify patterns—do behind-the-scenes shooting hacks outperform editing tutorials? Let data guide your content mix.

By embedding these principles into your social media marketing strategy, you’ll transform your iPhone content from isolated videos into a cohesive, omnipresent presence that engages audiences across multiple channels.


Social Media Advertising: Promoting Your TikToks Without Paid Ads

Paid ads can be effective, but as a creator on a budget, you need to rely on organic tactics to amplify your content. This section focuses on social media advertising without spending a dime, instead leveraging savvy organic strategies to get your iPhone-shot videos in front of more viewers.

1. Collaborate with Micro-Influencers

  • Identify micro-influencers (10K–100K followers) in your niche and offer to create co-branded content. They share your video to their audience, amplifying your reach.
  • Focus on influencers whose audience demographics align with yours—e.g., an iPhone photography micro-influencer who can showcase your editing tips.

2. Participate in Community Hashtags and Challenges

  • Join hashtag challenges early; TikTok’s Creative Center regularly updates trending cues. Use “#iPhoneVideography” or “#ReelsEditingTips” to tap into specific communities (aff.ninja, socialpilot.co).
  • Create your own micro-challenge—invite followers to recreate an effect you demonstrate, using your branded hashtag (e.g., #MyIPhoneReelHack). Reward top recreations with shout-outs.

3. Leverage User-Generated Content (UGC)

  • Encourage followers to duet or stitch your videos—especially when showcasing a unique iPhone filming or editing hack.
  • Offer a small prize (e.g., feature in your next video) for the best UGC submission; this motivates participation and multiplies organic reach.

4. Optimize Your Profile for Discoverability

  • On TikTok, set your profile to “Public” and switch on “Allow Duet & Stitch.” Use a clear profile photo, concise bio with keywords like “iPhone video tips,” and a link to your Instagram or YouTube.
  • On Instagram, switch to a Creator or Business account to access analytics. Add relevant keywords to your bio (e.g., “Viral Reels & TikTok Tips | iPhone Only”).

5. Engage Consistently and Authentically

  • Dedicate 15–30 minutes daily to interact with comments on your videos, reply to DMs, and engage with similar creators’ content. This boosts algorithmic favor and drives discoverability.
  • Pin your most engaging comments to the top—this signals to new viewers that your content fosters conversation.

By applying these social media advertising tactics organically, you’ll generate more impressions and engagement on your iPhone-shot Reels and TikToks without spending on ads. The key is consistent interaction, collaboration, and community participation.


Social Media Influencer Marketing: Collaborations for Greater Exposure

Collaborations can accelerate your content’s reach exponentially. In this section, we’ll explore how to leverage social media influencer marketing—even if you’re starting from zero followers—to get your iPhone videos seen by thousands more.

1. Identify the Right Influencers

  • Use TikTok Creator Marketplace or Instagram’s “Suggested” feature to find influencers with aligned niches and engagement rates above 5%.
  • Look for micro-influencers (10K–100K followers) who often have higher engagement rates and are more willing to collaborate for mutual benefit.

2. Craft a Win-Win Proposal

  • Offer value: Show them how your iPhone filming or editing hacks can add production value to their content. For instance, propose co-creating a “Behind-the-Scenes iPhone Cinematic Mode” Reel.
  • Suggest cross-promotion: You film a tutorial that they share to their followers, and they share it on their Story or TikTok compilation.

3. Use Duets & Stitches on TikTok

  • Create an initiating video that invites Duet or Stitch—e.g., “Stitch this if you can guess my next editing hack!” Micro-influencers will often respond with their own twist, creating free co-branded exposure (backlinko.com, blog.hubspot.com).
  • Provide a guide: Include in the caption exactly how to duet or stitch your video, reducing friction and encouraging participation.

4. Leverage Collaborative Reels on Instagram

  • Instagram’s Collab feature allows two accounts to co-author a Reel. Both creators’ names appear, and the content shows up on both feeds.
  • Pitch a simple concept: “iPhone vs. DSLR: Let’s show a side-by-side comparison using iPhone only.” This highlights your iPhone expertise while tapping into their audience.

5. Measure and Optimize

  • After the collaboration, analyze engagement spikes: track follower growth, profile visits, and website link clicks (if applicable).
  • Use those insights to refine your next collaboration pitch—target influencers whose audience responded best to the content style.

By integrating social media influencer marketing into your iPhone-based content blueprint, you’ll reach new communities and validate your expertise. Collaborations build credibility, trust, and significant organic reach—essential for achieving consistent virality.


iPhone Video Editing: Apps & Techniques for Viral Videos

Editing is where your raw footage becomes compelling storytelling. Using only your iPhone, you have access to powerful apps that make professional editing a breeze. In this section, we’ll compare top apps, share editing workflows, and provide tips to streamline your process.

H2: iPhone Video Editing

Popular Apps for On-Device Editing

Below is a comparison table outlining key features, cost (where applicable), and ideal use cases for each app:

App Key Features Cost Best For
iMovie • Simple timeline editing
• Built-in themes & transitions
• Titles, background music library Free Beginners wanting quick, clean edits
Ideal for basic cutting, adding text
InShot • Trim, split, merge clips
• Add music, filters, stickers, text
• Adjust video speed, aspect ratio Free (with watermark)
In-app purchases remove watermark Creators needing versatile tools
Good for social-media specific layouts
CapCut • AI effects, dynamic transitions
• Keyframe animations, speed ramping
• Advanced text and caption controls Free Intermediate to advanced edits
Perfect for viral-style transitions
KineMaster • Multi-layer editing (video, audio, text)
• Chroma key (green screen) support
• Detailed color grading tools Free (watermark)
Subscription removes watermark Professional-style edits on-the-go
Ideal for complex, multi-layer projects

Key Takeaways:

  • iMovie is great for beginners—clean interface, zero cost, and integrates seamlessly with iPhone’s camera roll.
  • InShot offers social-media-friendly presets, aspect ratios, and a simple UI for quick edits and uploads.
  • CapCut is favored by many TikTok creators for its advanced transition templates and AI-powered effects—ideal for stand-out viral content (finchley.co.uk, topview.ai).
  • KineMaster is best if you require multi-layer timelines, chroma key, or advanced color correction.

Editing Workflow: Step-by-Step

  1. Import and Organize Footage
    • Open your chosen app (e.g., CapCut).
    • Create a new project and import your clips—label them by scene or take (e.g., “Opening Hook,” “Transition Shot #1”).
  2. Create a Strong Hook (0–3 seconds)
    • Trim your first clip to start exactly at the action or statement that grabs attention—cut unnecessary lead time.
    • Use text overlay to reinforce your message (e.g., “iPhone 4K Cinematic Hack”).
  3. Assemble the Story Arc
    • Place your clips in chronological order: Hook → Content/Value → CTA/Outro.
    • Use jump cuts for fast-paced segments—this maintains energy and matches TikTok’s rapid scroll behavior.
  4. Add Text Overlays & Subtitles
    • Ensure your video is watchable on mute—over 69% of TikTok users watch without sound.
    • Use legible fonts and ensure text contrasts with the background (e.g., white text with black outline) (metricool.com, finchley.co.uk).
  5. Incorporate Transitions and Effects
    • In CapCut, leverage built-in “Dynamic” transitions—match the beat of trending audio to your edits.
    • For simple edits, iMovie’s “Slide” or “Dissolve” transitions work well without overcomplicating.
  6. Adjust Speed & Add Slow Motion
    • Experiment with speed ramping: speed up mundane segments and slow down key highlights.
    • On iPhone’s camera settings, shooting at 120-240fps for slow-mo gives smoother slow motion—export these segments to your editing app for emphasis (finchley.co.uk, growerse.com).
  7. Fine-Tune Color & Light
    • In apps like KineMaster or CapCut, tweak brightness, contrast, and saturation. Slight adjustments can make your footage pop.
    • Apply a subtle LUT (Lookup Table) if you want a consistent color grade across all clips.
  8. Select Trending Audio or Original Music
    • For TikTok: use native “Add Sound” feature in-app to find trending sounds. Then export your edited video and import it back into TikTok to align with the audio.
    • For Reels: add music within Instagram’s story editor—search for trending tracks or use royalty-free sources (e.g., Epidemic Sound).
  9. Final Export & Quality Check
    • Export at 1080×1920 (9:16) for both TikTok and Reels. If your iPhone supports 4K at 60fps and file size isn’t an issue, you can export in 4K for future repurposing.
    • Watch the full video on your iPhone before uploading—check for any glitches, text cut-offs, or abrupt audio sync issues.

By mastering this iPhone video editing workflow, you’ll produce polished, dynamic videos that keep viewers hooked and encourage shares. Consistency and attention to detail will set you apart and make your content more likely to go viral.


Social Media Content Marketing: Crafting Engaging Hooks & Stories

Behind every viral Reel or TikTok is a strong narrative. Social media content marketing isn’t just about posting pretty videos; it’s about connecting emotionally and offering value. Here’s how to infuse storytelling into your iPhone-shot content:

1. Identify Your Audience’s Pain Points

  • Are they struggling to learn smartphone cinematography? Help them film stable, well-lit videos without extra gear.
  • Do they want to grow on TikTok but lack editing knowledge? Show a step-by-step tutorial using InShot or CapCut.

2. Use the “Problem → Solution → Result” Structure

  • Problem: “Your videos look shaky and low-light?”
  • Solution: “Watch how I set my iPhone to 4K 60fps with proper lighting in under 2 minutes.”
  • Result: “Notice how crisp and stable this clip is—no tripod needed!”

This structure resonates because viewers instantly identify their problem and see a clear path forward—then an inspiring outcome that motivates them to try it themselves.

3. Incorporate User Feedback & Testimonials

  • If followers have messaged you about difficulties, reference their questions in your videos—“@username asked how to avoid shaky footage without a gimbal. Here’s my hack…” (shyftup.com, growerse.com).
  • Show UGC—feature a follower’s attempt at your hack, overlaying their clip with a reaction. This builds community and shows proof of concept.

4. Keep a Conversational Tone

  • Speak directly to “you” and “your.” Avoid jargon; explain technical terms clearly (e.g., “What is Smart HDR? It’s iPhone’s feature that balances bright and dark areas so your video looks vibrant.”).
  • Pause between lines—use natural breaks to let the information sink in.

5. Utilize “Show, Don’t Tell”

  • Instead of simply stating “My iPhone’s depth-of-field is amazing,” show a side-by-side comparison: one clip in Portrait mode, one in standard video mode.
  • Use screen recording to demo changing camera settings—viewers see exactly what to tap, reducing friction.

6. Drive Action with Clear CTAs

  • Ask viewers to “Save this Reel for later” if they want to revisit your iPhone editing tips.
  • Invite them to “Comment below your biggest filming challenge,” fostering engagement and feedback.

By centering your videos around solid social media content marketing principles—targeting pain points, telling a concise story, and speaking directly—you’ll create deeper connections with viewers. This authenticity often translates to higher shares, comments, and ultimately, virality.


Table: Comparing iPhone Settings for Viral Reels & TikToks

Below is a quick reference table that helps you decide which iPhone camera settings to use based on your style and lighting conditions:

Lighting Condition Resolution & Frame Rate Stabilization Additional Settings Best Use Case
Bright Outdoor Sunlight 4K @ 60fps Native Optical Stabilization Smart HDR ON, Lock AE/AF Fast-paced vlogs, outdoor tutorials
Indoor Soft Ambient 4K @ 30fps Native Optical Stabilization Smart HDR ON, Exposure +0.3EV Product demos, indoor tutorials, sit-down vlogs
Low Light / Night 1080p @ 60fps Use a tripod or gimbal Enable Night Mode (if available), Increase Exposure Nighttime routines, candlelight tutorials
Dramatic Slow Motion 1080p @ 120fps or 240fps Use a tripod or gimbal Lock AE/AF, Adjust Focus Manually Slow-motion reveals, dramatic transitions
Moving Action Shots 1080p @ 60fps for smoothness Use a gimbal (e.g., DJI OM 5) Smart HDR OFF (to avoid shifting exposure), Lock AE/AF Dance videos, fast transitions, fitness content

This table lets you quickly pick the optimal settings for different environments, ensuring your Reels and TikToks maintain high visual quality—critical for holding viewers’ attention and encouraging shares (topview.ai, finchley.co.uk).


Posting and Optimization: Timing, Hashtags, & Hashtag Research

Even the best videos need strategic posting to thrive. In this section, we’ll cover how to optimize your posting schedule, choose the right hashtags, and refine captions to maximize organic reach.

1. Determine Optimal Posting Times

  • Review analytics on Instagram and TikTok to see when your audience is most active. For Nigeria (Lagos, GMT+1), evenings (6 PM–9 PM) often see higher engagement as people unwind after work.
  • Post consistently: aim for 3–5 Reels/TikToks per week. Consistency signals the algorithm that you’re an active, reliable creator (lifewire.com, wordstream.com).

2. Conduct Hashtag Research

  • On TikTok: In the “Discover” tab, type in a broad term like “iPhone editing.” Note the hashtags with 100M+ views (e.g., #iPhoneVideography). Combine one or two high-volume tags with niche tags (e.g., #CapCutTutorial).
  • On Instagram: Use tools like Later or Metricool to identify trending Reel hashtags in your niche—aim for a mix of 10% high-competition, 30% medium-competition, and 60% low-competition tags. Monitor results monthly to adjust strategy.

3. Craft SEO-Friendly Captions

  • Start with a hook: “Want to film cinematic videos on your iPhone? Watch this.”
  • Embed keywords naturally: “Learn these iPhone video editing hacks to elevate your social media marketing strategy.”
  • Include a CTA: “Double-tap if you found this helpful and follow for more iPhone filming tips!”

4. Leverage TikTok’s “Add Sound” & Instagram’s “Music” Features

  • When you upload to TikTok, browse trending sounds within the app—choose one with rising traction but not yet oversaturated (look for sound usage under 500K).
  • For Instagram Reels, select a track labeled “Trending” to boost discoverability. Use “Search Music” to find genre or mood that matches your video’s vibe.

5. Enable Captions & Accessibility Features

  • Turn on auto-captions in TikTok or manually add subtitles in your editing app. Accessibility not only serves hearing-impaired viewers but also engages silent scrollers.
  • Use high-contrast text against backgrounds. For example, black text with a white border ensures readability across various scenes.

6. Pinning and Highlighting

  • Pin your most informative Reels or TikToks to the top of your profile—this ensures new visitors immediately see your best content.
  • Create Story Highlights (e.g., “iPhone Hacks,” “Editing Tips”) on Instagram to archive short tutorials that evergreen over time.

By rigorously optimizing every posting element—from timing to hashtags—you give your iPhone-shot videos the best chance to be discovered and shared organically. The combination of strategic posting and precise hashtag research is a cornerstone of any effective social media marketing strategy.


Advanced Tips: Leveraging Features & Staying Ahead of Trends

As platforms evolve, so should your approach. Here are some next-level strategies to keep your content fresh, relevant, and positioned for virality.

1. Experiment with TikTok’s New Features

  • TikTok LIVE: Host a live session showing behind-the-scenes iPhone setup. Engage viewers with live Q&A—this builds community and drives traffic to your prerecorded content.
  • Green Screen Effects: Record your subject in front of a plain background, then replace it with dynamic visuals—perfect for storytelling or quick tutorials.
  • Interactive Stickers on Reels: Use Polls or Quizzes in Reels Stories to gauge audience interest—then tailor your next video based on feedback.

2. Stay Updated on App Updates & Device Capabilities

  • When Apple releases iOS updates that add camera features (like Cinematic Mode in iOS 15), be among the first to create a tutorial—this positions you as an authority.
  • Follow credible tech blogs (e.g., MacRumors, 9to5Mac) to catch new feature rollouts. Link to these sources when referencing features (e.g., “Apple’s announcement of Cinematic Mode -– see details on 9to5Mac”) (lifewire.com, shyftup.com).

3. Analyze Competitor Successes

  • Track top creators in your niche—note which editing styles, hooks, and posting times correlate with high engagement.
  • Create an “inspiration” folder in your Notes app—clip ideas, storyboard templates, and trending hashtags from competitor videos. Over time, this becomes a personalized trend database.

4. Utilize Analytics Tools Beyond Native Insights

  • Tools like Metricool or SocialPilot can give deeper insights into hashtag performance, optimal post times, and audience demographics.
  • Set monthly targets: e.g., increase average watch time by 10%, boost follower growth by 15%. Use data to validate which video types resonate most.

5. Repurpose Popular Content into Multiple Formats

  • Turn a viral TikTok into a step-by-step blog post—embed the TikTok video, include screenshots of iPhone settings, and link to original sources for deeper reading.
  • Create a YouTube Short from your best Reels clips—include links back to full tutorials on Instagram or TikTok. This cross-channel synergy enhances overall reach.

By constantly monitoring platform updates, competitor strategies, and analytics, you’ll keep your content ahead of the curve. This proactive approach ensures your iPhone-based Reels and TikToks remain relevant, engaging, and primed for virality.


Resources & Tools: What You Need to Succeed

Below is a curated list of resources, tools, and accessories recommended for maximizing your iPhone-only Reels and TikToks:

  • Tripods & Stabilizers
    • DJI OM 5: Compact gimbal offering 3-axis stabilization—ideal for smooth walking shots.
    • JOBY GorillaPod: Flexible grip tripod for versatile shooting angles.
  • Lighting
    • Neewer Ring Light: Affordable, adjustable ring light for flattering illumination.
    • Lume Cube Panel GO: Portable LED panel with adjustable color temperature—great for on-the-go shoots.
  • Microphones & Audio
    • Rode VideoMicro: Mini shotgun mic that plugs into Lightning port—improves voice clarity.
    • Shure MV88+: Compact digital stereo condenser microphone for professional audio directly into your iPhone.
  • Editing Apps
    • CapCut: Free, feature-rich for creative transitions, keyframes, and effects.
    • InShot: User-friendly, best for quick trims, filters, and social-media-friendly exports.
    • LumaFusion: For those wanting near desktop-level editing power on iOS (paid but worth it for serious creators).
  • Analytics Tools
    • Metricool: Provides TikTok and Instagram Reels performance metrics—tracks best hashtags, posting times, and growth trends.
    • Later: Schedule Reels, find trending hashtags, and view Instagram analytics.
  • Music & Sounds
    • TikTok Creative Center: In-app resource for trending sounds—updated daily.
    • Epidemic Sound: Subscription-based library of royalty-free music for Reels, ensuring no copyright issues.

Use these resources to streamline your workflow, enhance production value, and maintain consistent growth. Having the right tools ensures you’re not limited by technology—your creativity is all that matters.


Case Studies: iPhone-Only Success Stories

Seeing real-world examples can be inspiring. Below are brief case studies of creators who used only their iPhones to achieve viral success:

1. @FilmWithFinn (TikTok)

  • Niche: Smartphone cinematography tutorials.
  • Strategy: Finn posted daily, each video demonstrating a new iPhone trick (e.g., “Lock AE/AF for smooth Fokus” from turn0search4 tips).
  • Results: One tutorial showcasing 4K 60fps Slow-Mo shot on iPhone 13 Pro received 5M+ views in 48 hours—followers jumped from 10K to 100K in a week (manychat.com, topview.ai).
  • Key Takeaway: Consistency and focusing on one platform (TikTok) allowed Finn to fine-tune his content for the algorithm.

2. @ReelsByRita (Instagram)

  • Niche: DIY styling and fashion hacks filmed on iPhone.
  • Strategy: Rita used natural daylight and a simple JOBY tripod. She emphasized authentic, conversational voiceovers—“Hey, I’m Rita, here’s how I style this top…”
  • Results: Within a month, her Reel on “3 ways to style a white shirt” hit 200K plays. She then repurposed the Reel into a blog post with embedded video, driving traffic back to Instagram.
  • Key Takeaway: Authentic, relatable storytelling combined with clear “how-to” structure drove engagement.

3. @ChefCharlieCreates (TikTok & YouTube Shorts)

  • Niche: Quick cooking tutorials using iPhone.
  • Strategy: Charlie filmed vertically, using overhead phone mounts (DIY stack of books hack) and natural light. Each TikTok began with “Stop scrolling—this 3-minute Pasta Hack will change your life!”
  • Results: The pasta hack went viral with 7M views. Charlie’s follower count soared from 5K to 75K. He then added value by posting full 10-minute YouTube videos showing behind-the-scenes.
  • Key Takeaway: A strong hook, combined with high-quality iPhone footage, can transcend platforms—viral TikToks drove YouTube growth.

These case studies highlight that iPhone-only content, when combined with strategic hooks, consistent posting, and authentic storytelling, can compete with high-budget productions.


Frequently Asked Questions (FAQs)

1. Can I really create viral videos using only my iPhone?
Absolutely. Modern iPhones support 4K video at 60fps, cinematic modes, Smart HDR, and high-quality audio recording. With the right shooting and editing techniques, you can produce content that rivals professional camera setups (finchley.co.uk, finchley.co.uk).

2. Which iPhone model is best for shooting Reels and TikToks?
While any recent iPhone (iPhone 11 or newer) can produce solid content, models like the iPhone 13 Pro, 14 Pro, and above offer Cinematic Mode, better low-light performance, and ProRes video recording capabilities—ideal for creators seeking top-tier quality.

3. Do I need extra equipment (tripod, microphone) to go viral?
Not necessarily, but certain accessories elevate production value:

  • A tripod or DIY stabilizer (books, tape, or a GorillaPod) prevents shaky footage.
  • An external microphone like the Rode VideoMicro improves clarity, especially if filming in noisy environments.
  • Simple lighting (ring light or window light) can make your videos look more polished without breaking the bank.

4. How do I choose trending sounds without cluttering my content?
In TikTok’s “Discover” tab, search for keywords related to your niche (e.g., “iPhone editing”). Filter by “Sounds” to find tracks that fit your topic. Choose sounds with moderate usage (<500K videos) to balance trend alignment without being buried in competition (blog.hubspot.com, socialpilot.co).

5. Should I edit directly in TikTok/Reels or use an external app like CapCut?

  • External apps like CapCut offer greater control over transitions, keyframes, and text placement—ideal for stand-out effects.
  • Native editing in TikTok or Instagram Reels is faster and ensures perfect audio sync. Some creators edit in CapCut, then re-import to TikTok for final tweaks (especially audio alignment). Choose the workflow that best suits your time and skill level.

6. How do I maintain consistent posting without burning out?

  • Batch film: Dedicate one day per week to shoot multiple short tutorial segments or content ideas.
  • Batch edit: Edit in chunks—spend another day editing all clips so posting becomes a simple upload process.
  • Use scheduling tools like Later or Metricool for Instagram Reels; TikTok now allows draft scheduling (select “Schedule” when uploading).

7. What metrics should I track to know if my strategy is working?

  • Views and Watch Time: High watch percentages indicate strong hooks and engaging content.
  • Engagement Rate: Monitor likes, comments, shares, and saves (especially on Instagram).
  • Follower Growth: Track weekly follower increases after new video drops.
  • Click-Through Rate (if you include external links): See how many viewers visit your bio link. Use UTM tags to measure effectiveness.

8. How important are captions and subtitles?
Very important. Over 69% of users watch with sound off. Providing on-screen captions ensures you don’t lose traction. It also improves accessibility, broadening your potential audience.

9. How often should I update my strategy based on analytics?
Review analytics at least monthly. Identify top-performing content themes, hashtags, and posting times. Adjust your content calendar accordingly—double down on what works, and iterate or discard what doesn’t.

10. Do I need a personal brand or niche to go viral?
While you don’t need a rigid niche, having a consistent style or theme helps. For example, “iPhone video hacks” or “budget filmmaking tips” give viewers a reason to follow you—knowing what to expect. Experiment within that theme until you find a style that resonates strongly.


Conclusion: Your Roadmap to Viral Success

Creating viral Reels and TikToks using only your iPhone is 100% achievable. By combining a solid TikTok marketing strategy with best practices in social media marketing, organic growth tactics, influencer collaborations, and on-device iPhone video editing, you’ll position yourself for maximum reach and engagement. Remember to:

  • Plan content around clear hooks, value, and CTAs.
  • Optimize posting times and hashtags through diligent research.
  • Leverage trending audio and platform features to stay relevant.
  • Collaborate authentically with micro-influencers for mutual growth.
  • Continuously track and refine your approach based on analytics.

Armed with this Creator’s Blueprint, you’ll elevate your iPhone-shot videos from simple clips to viral sensations—no extra gear required. Now it’s time to pick up your iPhone, press record, and start creating the next big sensation.

Happy filming!

Why Monetize iPhone Photography Skills?

You’ve invested in a top-of-the-line iPhone with an incredible camera—why let those high-resolution photos sit unused?

photography

By learning how to monetize iPhone photography skills, you can:

  • Generate passive income without heavy upfront costs or equipment
  • Tap into the booming stock photo market, where businesses crave “organic-looking” smartphone images (thesun.ie, nypost.com)
  • Leverage your creativity to build a brand, whether through prints, digital downloads, or teaching others
  • Enjoy flexibility—work from anywhere, on your own schedule

Many content creators and side hustlers have turned simple iPhone snapshots into thousands of dollars per month—so can you.

Top Ways to Earn Passive Income from iPhone Photos

Ready to dive in? Below are the most practical, high-ROI methods for how to earn passive income from iPhone photos. Each approach is actionable, so pick what resonates and start today.

Selling on Stock Photo Platforms

Selling on stock photo platforms remains one of the easiest and most scalable ways to monetize iPhone photography skills. Smartphone images are in high demand because they look authentic and relatable for modern marketing campaigns.

Key Steps to Get Started:

  1. Choose the right platform:
  2. Prepare photos professionally:
    • Shoot in RAW or the highest available JPEG quality
    • Ensure proper composition, exposure, and focus
    • Use editing apps like Lightroom Mobile or Snapseed to fine-tune color and remove distractions (swiftgalleries.com, yourphotoadvisor.com)
  3. Keyword and tag accurately:
    • Use descriptive keywords that match what buyers search (e.g., “urban landscape,” “food flat lay,” “portrait smiling millennial”)
    • Research popular keywords on each platform—this boosts discoverability and sales (elementor.com)
  4. Upload consistently:
    • Aim for 10–20 new photos per week to build a robust portfolio
    • Focus on in-demand subjects: travel, food, lifestyle, business, and seasonal themes
  5. Monitor performance and refine:
    • Check monthly analytics to see which images perform best
    • Adjust keyword strategy and shoot more of your top-selling styles

Below is a comparison table of popular stock platforms to help you pick where to start:

Platform Royalty Rate Payout Threshold Pros Cons
Shutterstock 15%–40% (increases with volume) $35 Massive customer base; recurring sales; easy-to-use contributor dashboard High competition; lower royalties at start
Adobe Stock 33% (standard); up to 35% if exclusive $25 Integrated with Adobe Creative Cloud; higher payouts for exclusive contributors Requires high-quality, unique images
iStock 15%–45% (depending on exclusivity) $100 Backed by Getty Images; potential for high earnings per image High quality bar; strict submission guidelines
Alamy Up to 50% £50 (~$65) High royalty rates; diverse licensing options (RF and RM) Smaller customer base; slower earnings

Table: Comparison of Top Stock Photo Platforms

Smartphone photos account for a growing percentage of stock image sales because they feel genuine and relatable. For example, TikToker “Jade” earns over £15,000 monthly by uploading iPhone shots to sites like Shutterstock and Adobe Stock—proof that high-quality iPhone photography can thrive in the stock market (thesun.ie, nypost.com).

Participating in Photo Contests and Challenges

Photo contests and challenges offer both cash prizes and invaluable exposure. While you won’t earn recurring royalties as with stock platforms, contests can boost your credibility and showcase your best work to potential clients.

Why Contests Matter:

  • Immediate Cash Rewards: Many contests offer anywhere from $100 to $10,000+ for winning images
  • Recognition & Networking: Winning or placing in contests can land you features on popular blogs, magazines, and social media channels (swiftgalleries.com)
  • Skill Improvement: Thematic challenges push you to refine composition, lighting, and storytelling

Top Photo Contests to Consider:

  • POY (Pictures of the Year International)—prestigious, high-stakes journalism and documentary categories
  • Sony World Photography Awards—recognizes everything from professional to open categories for smartphone photography
  • International Photography Awards (IPA)—offers cash prizes and publication in their annual book
  • Dronestagram Photo Contest—includes smartphone drone category for unique aerial shots

How to Maximize Success in Contests:

  • Read guidelines carefully—note image size, format, and theme requirements
  • Enter thematic categories that align with your strengths (landscape, portrait, street)
  • Write compelling captions and titles to connect emotionally with judges
  • Submit multiple images (if allowed) to increase your chances

Even if you don’t win top prizes, being a finalist or honorable mention can be used as a marketing point on your social media and website.

Creating and Selling Digital Downloads

Digital downloads have become a staple revenue stream for photographers. These can include:

  • High-resolution stock bundles (e.g., “5-pack of Autumn Landscapes”)
  • Lightroom Presets or Snapseed Filters tailored for iPhone photos
  • Photoshop Actions for quick editsphotography
  • Guides or Ebooks on beginner iPhone photography

Why Digital Downloads Are Lucrative:

  • Low Overhead: Once created, digital products sell repeatedly at no additional production cost (gelato.com)
  • Scalable: No inventory or shipping logistics—just upload to your store and promote
  • Perceived Value: Many buyers are willing to pay premium prices ($10–$50+) for curated presets or image bundles

Where to Sell Digital Downloads:

Tips for Creating High-Converting Digital Products:

  • Package items in themed bundles: e.g., “Summer Beach Presets for iPhone”
  • Offer a free sample to grow your email list (e.g., one free preset in exchange for email)
  • Write detailed product descriptions explaining benefits (e.g., “This preset enhances sunset tones, perfect for beach shots”)
  • Include “before & after” examples to showcase what buyers can achieve

By selling digital downloads, you’re not just selling photos—you’re selling convenience and expertise. Buyers pay for a fast, professional look without spending hours editing.

Launching Print-on-Demand Products

Print-on-demand (POD) services let you transform your iPhone photos into physical products—prints, canvases, mugs, phone cases, and more—without managing inventory.

How POD Works:

  1. Choose a POD platform:
  2. Upload high-resolution iPhone photos:
    • Minimum 300 DPI for print quality
    • Focus on subjects that look great on products (landscapes, abstracts, typography overlays) (reddit.com)
  3. Choose product types:
    • Wall art: posters, canvases, framed prints
    • Home decor: throw pillows, blankets, tapestries
    • Accessories: phone cases, stickers, tote bags
  4. Set pricing and descriptions:
    • Most platforms let you add a markup (typically 20%–40% above base cost)
    • Write product descriptions that highlight quality (e.g., “Printed on premium, archival-grade canvas”)
  5. Promote via social media & email newsletters:
    • Share mockups with lifestyle photos (e.g., your print hanging in a living room)
    • Offer limited-time discounts or seasonal collections

Benefits of POD:

  • No upfront investment in inventory or printing equipment
  • Automatic fulfillment—platform handles printing, packaging, and shipping
  • Global reach—most POD services ship worldwide

Challenges to Anticipate:

  • Lower margins compared to selling your own prints (platform fees + production cost)
  • High competition—many artists and photographers use the same platforms
  • Quality control—order samples to ensure prints meet your standards

Teaching Online Courses

If you’re confident in your iPhone photography skills and love teaching, creating an online course can be a highly profitable passive income stream.

Why Online Courses Are Profitable:

  • Evergreen content: Create once, sell repeatedly across multiple platforms
  • High perceived value: People pay $20–$200+ for comprehensive tutorials and walkthroughs (flickybounty.com)
  • Multiple sales channels: Host on Udemy, Skillshare, Teachable, or on your own website

Ideas for Course Topics:

  • iPhone Photography 101: Basics of exposure, composition, and lighting
  • Advanced iPhone Photo Editing: Deep dive into Lightroom Mobile, Snapseed, VSCO
  • Niche Styles: Portraits, food photography, street photography with iPhone
  • Monetization Strategies: How to sell on stock sites, build a photography business with your iPhone

Steps to Launch Your Course:

  1. Outline your curriculum:
    • Break content into modules (e.g., “Module 1: Camera Settings,” “Module 2: Editing Essentials”)
    • Include video tutorials, written guides, and downloadable resources
  2. Produce high-quality videos:
    • Use screen recording for editing tutorials
    • Film “talking head” segments to explain concepts in a personable way
    • Ensure clear audio—consider an external microphone if needed
  3. Host on a trusted platform:
  4. Market your course:
    • Leverage your social media (Instagram reels, TikTok tutorials) to drive traffic
    • Offer early-bird discounts to build initial momentum
    • Collaborate with influencers who can refer students
  5. Collect feedback and iterate:
    • Encourage student reviews and testimonials
    • Update content quarterly to reflect new iPhone features, apps, and best practices

Teaching not only generates direct revenue but also positions you as an authority—boosting trust when you promote other services like stock photo sales or print-on-demand products.

Starting a Photography Blog or Vlog

A photography blog or vlog can serve as your online hub—a place to showcase your portfolio, share tutorials, and monetize through ads, affiliate marketing, and sponsored content.

Why Blogging/Vlogging Works:

  • Builds a personal brand—people buy from creators they trust
  • Multiple revenue streams: Google AdSense, affiliate links (camera accessories, editing apps), sponsored posts
  • Showcases your work—use your blog as a portfolio to attract clients and collaborators

Key Steps to Launch:

  1. Choose a platform:
    • WordPress for blogs (self-hosted gives full control)
    • YouTube or Vimeo for vlogs; embed videos on your blog
  2. Plan content pillars:
    • Tutorials: How-to guides on iPhone photography techniques
    • Gear reviews: Best lenses, tripods, or editing apps for iPhone
    • Case studies: Behind-the-scenes of your top-selling stock images
    • Industry news: Updates on new iPhone camera features, app releases
  3. Optimize for SEO:
    • Use high CPC keywords in titles and subheadings (e.g., “Best iPhone Photography Apps 2025,” “Monetize iPhone Photography Passive Income”)
    • Write comprehensive, long-form posts (2,000+ words) to improve dwell time and rankings
    • Embed internal links to related posts to improve site navigation
  4. Monetize:
    • Google AdSense or Mediavine—display ads on your blog for passive revenue
    • Affiliate marketing: Link to Amazon or B&H for iPhone accessories (cases, tripods, lenses), Lightroom subscriptions, or course platforms (gelato.com, yourphotoadvisor.com)
    • Sponsored content: Partner with brands for product reviews, giveaways, or “sponsored by” segments
  5. Promote across channels:
    • Social media: Share snippets on Instagram, Facebook, Twitter to drive traffic
    • Email newsletter: Offer a freebie (e.g., a mini eBook, preset) to capture email subscribers and promote new blog posts

A well-executed blog or vlog offers compounding returns—older posts continue to rank and drive traffic while you create new content.

Step-by-Step Guide to Preparing Your iPhone Photos for Monetization

Before you start uploading or selling, you need a foolproof workflow to ensure your iPhone photos meet industry standards. The steps below guide you through capturing, editing, and tagging images for maximum profitability.

Choosing the Right iPhone Settings

Your iPhone already packs powerful cameras, but tweaking a few settings can significantly improve image quality.

  • Shoot in RAW or Apple ProRAW (iPhone 12 Pro and newer):
    • RAW files retain all sensor data, giving you more flexibility in editing (swiftgalleries.com)
    • Enable ProRAW in Settings > Camera > Formats (if available on your model)
  • Use the grid lines:
    • Turn on grid in Settings > Camera > Composition > Grid
    • Helps apply the rule of thirds for balanced compositions
  • Lock focus and exposure:
    • Tap and hold on your subject (until you see “AE/AF Lock”)
    • Prevents unwanted refocusing or exposure shifts before you snap the shot
  • Enable HDR or Smart HDR:
    • Automatic on newer models—captures multiple exposures, merges them into a balanced image
    • Useful for high-contrast scenes (bright sky + dark foreground)
  • Adjust exposure manually:
    • After tapping to focus, drag the sun icon up/down to lighten or darken the shot
  • Shoot in burst mode for action shots:
    • Hold down the shutter for a quick sequence—select the best frame afterwards

Investing a few minutes to set up your camera correctly yields higher-quality photos that sell better.

Editing Photos Professionally on iPhone

Great editing can transform a good shot into a best-selling image. Use these top-rated iPhone editing apps to polish your photos:

  • Adobe Lightroom Mobile (https://www.adobe.com/products/photoshop-lightroom-mobile.html) (flickybounty.com)
    • Supports RAW/ProRAW editing
    • Offers advanced adjustments: curves, HSL, selective edits
    • Syncs with desktop Lightroom if you subscribe
  • Snapseed (https://snapseed.online)
    • Free, intuitive interface with precise control
    • Tools: Tune Image, Selective, Healing Brush, HDR Scape
    • “Looks” feature offers one-tap filters for quick edits
  • VSCO (https://vsco.co)
    • Popular for film-like presets and manual settings
    • Built-in community allows inspiration and collaboration
  • Darkroom (https://darkroom.co)
    • Intuitive gestures for cropping, color grading, and curves
    • Batch editing to apply the same look across multiple images

Professional Editing Workflow:

  1. Crop and straighten:
    • Ensure your main subject is well-placed; remove distracting elements at edges
  2. Adjust exposure and white balance:
    • Use curves or slider tools to refine brightness and contrast
    • Correct color casts with white balance adjustments
  3. Enhance colors and details:
    • Increase vibrance or saturation moderately (avoid oversaturation)
    • Use “Sharpen” or “Structure” to bring out fine details (but be careful of noise)
  4. Remove imperfections:
    • Healing tools help erase dust spots, blemishes, or unwanted background objects (swiftgalleries.com)
  5. Apply finishing touches:
    • Add subtle vignettes or film grain for mood (optional)
    • Use selective edits to brighten faces or emphasize focal points
  6. Export at the highest quality:
    • Save as JPEG/PNG with minimal compression for stock platforms
    • Export a separate high-resolution file for print-on-demand products

Well-edited images command higher prices and stand out among millions of stock submissions.

Keywording and Tagging for Maximum Visibility

Even a stunning photo can go unsold if buyers can’t find it. Keywording and tagging help your images appear in relevant search results.

How to Craft Effective Keywords:

  • Start broad, then go specific:
    • Example: For a city skyline at sunset, begin with “city skyline,” then add “sunset,” “urban landscape,” “evening city lights”
  • Include mood and color terms:
    • “Serene,” “vibrant,” “black and white,” “minimalist”
  • Add location if recognizable:
    • “New York City skyline,” “Paris Eiffel Tower,” “Monterey Beach California” (nypost.com)
  • Think like a buyer:
    • If someone wants an image for a technology blog, they might search “technology background,” “digital devices on desk,” “work from home setup”
  • Use all available keyword slots:
    • Different platforms allow 20–50 keywords; utilize them all for maximum discoverability
  • Avoid keyword stuffing:
    • Keep keywords relevant—spammy or unrelated keywords can lead to rejections or lower rankings

Platform-Specific Tips:

  • Shutterstock: Prioritize the first 5 keywords—they carry more weight (elementor.com)
  • Adobe Stock: Include synonyms and alternative spellings (e.g., “gray” and “grey”)
  • iStock: Focus on niche-specific tags—buyers search by industry (e.g., “healthcare,” “finance”)

Remember: metadata is just as important as the image itself. Without proper keywording, even a top-notch photo can languish unused.

Building a Portfolio and Online Presence

A strong portfolio establishes credibility and attracts regular buyers, clients, or students. Even if your main income stream is passive, an online presence lends legitimacy.

Portfolio Essentials:

  • Select your best work:
    • Showcase 20–30 of your highest quality images, highlighting a consistent style or niche
  • Organize by category:
    • Separate galleries: “Travel & Landscapes,” “Food & Beverage,” “Lifestyle & People,” “Abstract & Minimalist”
  • Write concise captions:
    • Include context: “iPhone 13 Pro, ProRAW, Monterey Beach at sunset” (nypost.com)
  • Display pricing or licensing info (if applicable):
    • For direct clients, state rates or link to downloadable pricing guide
  • Include a strong “About” page:
    • Share your story: why iPhone photography, your editing style, and your mission

Building Your Online Hub:

  • Own your domain:
    • Use services like Squarespace or Wix for drag-and-drop portfolio sites
    • Consider a custom domain (e.g., YourNamePhotography.com) for professionalism
  • Link social media profiles:
    • Instagram: Post behind-the-scenes and use Stories/Reels to engage followers
    • TikTok: Short tutorials or before/after edits can go viral—see Jade’s success story (thesun.ie, nypost.com)
    • Pinterest: Great for sharing prints and driving traffic to your site
  • Collect testimonials and reviews:
    • Ask clients, students, or buyers to leave feedback—display these on your site to build trust
  • Maintain a blog section:
    • Write about your workflow, gear recommendations, editing tips, and success stories—this boosts SEO and positions you as an authority

A professional portfolio site not only showcases your talent but also serves as a central hub for all your monetization efforts—stock sales, courses, print-on-demand, and more.

Best Platforms to Sell Your iPhone Photos Online

Your success hinges on choosing platforms that match your style, audience, and revenue goals. Below are the most popular options for selling iPhone photos.

  1. Shutterstock (https://www.shutterstock.com)
    • Pros: Vast customer base, recurring sales, robust analytics dashboard (elementor.com)
    • Cons: High competition; initial royalty rates start at 15%
    • Ideal for: Beginners looking for consistent micro-royalties and easy submission process
  2. Adobe Stock (https://stock.adobe.com)
    • Pros: Integrated with Adobe Creative Cloud; royalties of 33% (up to 35% exclusive)
    • Cons: Requires high-quality, unique images; approval can be strict
    • Ideal for: Photographers already using Adobe products and willing to adhere to strict quality standards (elementor.com)
  3. iStock by Getty Images (https://www.istockphoto.com)
    • Pros: Higher-end client base, potential for exclusive royalties (27%–45%)
    • Cons: High rejection rate; must submit images that meet Getty’s premium standards
    • Ideal for: Intermediate to advanced photographers with a polished portfolio
  4. Alamy (https://www.alamy.com)
    • Pros: Up to 50% royalties, diverse licensing options (RF and RM) (elementor.com)
    • Cons: Smaller but specialized customer base; longer payout cycles
    • Ideal for: Photographers focusing on niche subjects or editorial images
  5. Etsy (https://www.etsy.com)
    • Pros: Perfect for selling physical prints, digital downloads, and preset bundles; built-in audience for creatives
    • Cons: Listing fees ($0.20 per item) and transaction fees (5% + payment processing)
    • Ideal for: Those who want full control over pricing, packaging, and branding
  6. Redbubble, Society6, Fine Art America
    • Pros: Easy print-on-demand integration; no upfront costs (reddit.com)
    • Cons: Lower profit margins; limited control over product presentation
    • Ideal for: Beginners testing print sales without inventory risk
  7. Your Own Website (Shopify/WooCommerce)
    • Pros: Full control over pricing, branding, and customer data; can integrate digital downloads and print orders
    • Cons: Requires ongoing maintenance, hosting fees, and marketing efforts
    • Ideal for: Established photographers ready to scale and build a dedicated audience

When selecting platforms, consider your comfort level with self-promotion, desired control over pricing, and ability to handle customer service. A mixed approach—stock sites + POD + own site—often yields the best results.

How to Price Your iPhone Photos for Maximum Profit

Setting the right price strikes a balance between attracting buyers and ensuring you’re fairly compensated. Below are strategies to help you price effectively.

  1. Understand Platform Commission Structures:
    • Shutterstock: Tiered royalties (15%–40%) based on lifetime earnings
    • Adobe Stock: 33% for non-exclusive, up to 35% for exclusives
    • Alamy: 50% for direct sales, 40% for agency sales (elementor.com)
    • Etsy: You set your own price; be aware of platform fees
  2. Research Comparable Images:
    • Search for images similar to yours on the platform—note average prices and number of downloads
    • Pay special attention to subject matter, composition, and resolution
  3. Consider Licensing Options:
    • Royalty-Free (RF): Flat fee, unlimited usage—sell more for smaller payouts per image
    • Rights-Managed (RM): Pricing varies based on usage, duration, and exclusivity—higher payouts per license but more complex to manage (elementor.com)
  4. Add Value with Bundles:
    • Offer photo sets (e.g., “Sunset Beach Collection – 5 Images”) at a discounted bundle price
    • Attract buyers looking for theme-based content, increasing average order value
  5. Adjust Pricing Seasonally:
    • Increase prices for seasonal images (e.g., holiday scenes, Valentine’s Day) when demand is high
    • Use “limited-time” offers or discounts to clear older inventory
  6. Use Psychological Pricing:
    • Price at $19.99 instead of $20 to appear more affordable
    • Highlight “Best Seller” or “Top-Rated” on certain images to justify higher pricing
  7. Factor in Production Costs (for POD):
    • Calculate base cost (printing + shipping) and add a 20%–40% markup for profit
    • Keep pricing competitive—research similar products on Redbubble or Society6

Example Pricing Table for Stock Platforms:

Usage Type Shutterstock Price Range Adobe Stock Price Range iStock Price Range Alamy Price Range
Web Only (Small) $1.50–$5 $1–$4 (non-exclusive) $3–$7 $8–$15
Print Up to 8×10″ $10–$30 $10–$35 $20–$50 $30–$60
Editorial Use $20–$50 $20–$45 $25–$60 $40–$80
RM Exclusive (1yr) N/A N/A $100–$500 $150–$600

Table: Pricing Ranges on Popular Stock Platforms (elementor.com)

Setting the right price takes ongoing experimentation. Monitor sales and adjust accordingly to find the sweet spot where demand meets profitability.

Marketing Strategies to Boost Your iPhone Photography Sales

Even the best images need visibility. Use these marketing tactics to drive traffic to your portfolio, shop, or course landing page.

  1. Optimize for SEO:
    • Write keyword-rich blog posts (e.g., “Best iPhone Photography Apps 2025”) that link back to your portfolio
    • Use long-tail keywords: “monetize iPhone photography passive income”
    • Add alt text to every website image with descriptive phrases to improve search ranking
  2. Leverage Social Media:
    • Instagram Reels & Stories: Behind-the-scenes of your editing process; quick tip videos attract engagement (thesun.ie, nypost.com)
    • TikTok Tutorials: Short, 15–60 second videos showcasing how you edit or shoot on iPhone—potential to go viral
    • Pinterest Boards: Pin your best images with links to your site—Pinterest functions as a visual search engine
  3. Collaborate with Influencers:
    • Partner with micro-influencers (10k–50k followers) in travel, lifestyle, or small business niches to feature your prints or presets
    • Offer them a commission-based affiliate link for any sales generated
  4. Email Marketing:
    • Offer a free download (e.g., one free Lightroom preset) in exchange for email sign-ups
    • Send a weekly or bi-weekly newsletter featuring:
    • New portfolio additions or prints
    • Blog highlights (e.g., “Top 5 iPhone Editing Tips”)
    • Limited-time discounts or bundle offers
  5. Join Online Communities & Forums:
    • Engage in Facebook groups like “iPhone Photography School” or Reddit communities such as r/iPhoneography—share your expertise and link back to your work when appropriate (reddit.com)
    • Post in photography forums (e.g., DPReview, Photo.net) under signature with links to your portfolio
  6. Run Paid Ads Strategically:
    • Use Facebook Ads or Instagram Ads targeting specific interests (e.g., “travel photography,” “stock photo buyers”)
    • Set a small budget ($5–$10 per day) to test different audiences and ad creatives
  7. Offer Exclusive Deals to Your Network:
    • Run a “Friends & Family” sale—give your first 50 email subscribers a 20% discount on any print or digital download
    • Encourage them to share with friends, offering them an additional discount for referrals
  8. Guest Posting & Podcast Appearances:
    • Pitch guest posts to popular photography and tech blogs (e.g., YourPhotoAdvisor.com) on topics like “How to Make Money with iPhone Photos” (yourphotoadvisor.com)
    • Appear on photography or entrepreneur podcasts to discuss your journey, linking back to your online store or course

Combining organic tactics (SEO, social media) with selective paid promotions ensures a steady stream of new eyeballs on your work.

Tools and Apps to Enhance Your iPhone Photography Business

Equip yourself with the best tools and apps to streamline workflows, improve image quality, and manage your growing business.

  1. Photo Management & Editing:
    • Adobe Lightroom Mobile—industry-standard for color correction, presets, and RAW support (flickybounty.com)
    • Snapseed—powerful and free, with advanced tools like Curves, Healing, and Selective adjustments
    • VSCO—renowned for its film-inspired presets and clean editing interface
  2. Keyword Research & SEO:
    • Google Keyword Planner—find high CPC keywords for blog posts and image titles
    • Ahrefs or SEMrush—conduct competitor analysis to discover which keywords drive the most traffic in photography niches
  3. Website & Portfolio Platforms:
    • Squarespace—easy-to-use templates tailored for photography portfolios, built-in SEO tools
    • WordPress + Elementor—full control over design, integrate WooCommerce for selling prints and digital downloads (elementor.com)
    • Shopify—ideal for e-commerce needs; integrates with print-on-demand apps like Printful
  4. Social Media & Content Scheduling:
    • Buffer or Later—schedule Instagram and Pinterest posts to maintain consistent posting schedules
    • Canva—create engaging social media graphics, blog banners, and email headers
  5. Email Marketing:
    • Mailchimp—user-friendly, free plan for up to 2,000 contacts; customizable templates
    • ConvertKit—designed for creators; offers automation flows for onboarding new subscribers
  6. Analytics & Tracking:
    • Google Analytics—track website traffic, user behavior, and conversion sources
    • Platform-specific dashboards: Shutterstock’s Contributor Dashboard, Adobe Stock’s Seller Dashboard for income and download metrics
  7. Payment & Invoicing:
    • PayPal and Stripe—secure payment gateways for courses, direct client sales, and digital downloads
    • Wave—free invoicing and accounting software, helpful if you freelance or do custom client work

Having the right toolkit not only elevates the quality of your work but also streamlines operations, letting you focus more on capturing and monetizing stunning iPhone images.

Legal Considerations and Licensing for iPhone Photos

Before you start earning passive income, ensure you’re legally protected and compliant with licensing requirements.

  1. Model Releases & Property Releases:
    • Model release: Needed if your photos feature recognizable faces—ensures you have permission to use or sell images for commercial purposes
    • Property release: Required for images featuring private properties, artwork, or trademarks if used commercially (elementor.com)
    • Use apps like Easy Release or Photo Model Release to manage and store signed forms
  2. Understanding Licensing Terms:
    • Royalty-Free (RF): Buyer pays once and can use the image multiple times without additional fees—often non-exclusive
    • Rights-Managed (RM): Customized license based on usage type, duration, territory—higher fees for exclusivity or special usage
    • Creative Commons (CC0): Public domain; no royalties, but you don’t earn money when these images are used (en.wikipedia.org)
  3. Copyright Ownership:
    • By default, you own the copyright to images you capture—no need to register unless you plan to litigate infringements
    • Consider registering with the U.S. Copyright Office (or your country’s equivalent) if you want added protection and ability to seek statutory damages
  4. Avoiding Infringement:
    • Don’t include trademarked logos, signage, or copyrighted artwork in commercial photos without permission
    • When capturing cityscapes, be mindful of building trademarks (e.g., Disney castle, sports team logos)
    • If you shoot public events (parades, concerts), check venue policies for photography and commercial use restrictions
  5. Tax Implications:
    • Track income from all sources: stock royalties, print sales, course revenue, etc.
    • In many countries, earnings over a certain threshold require you to register as a freelancer or small business—e.g., in the UK, you must inform HMRC if earnings exceed £1,000 annually (thesun.ie)
    • Keep receipts for expenses (apps, equipment, marketing) to offset taxable income
    • Consult a local accountant or tax advisor to ensure compliance with self-employment taxes, VAT/GST, and estimated quarterly payments
  6. Privacy and Data Protection:
    • If you collect email addresses for newsletters, comply with data protection laws (e.g., GDPR for EU subscribers)
    • Implement a clear privacy policy on your website, specifying how you store and use subscriber data

By addressing legal considerations upfront, you protect your work, maintain credibility, and avoid costly disputes down the line.

Frequently Asked Questions

Q: Can I really make money selling iPhone photos, or do I need a professional camera?
A: Absolutely. Smartphone cameras have advanced significantly—brands like Apple offer ProRAW and multiple lenses, making iPhone images competitive on stock platforms. Many users report earning thousands per month by selling iPhone shots, especially travel and lifestyle images (thesun.ie, nypost.com, thesun.co.uk).

Q: What types of iPhone photos sell best?
A: The most in-demand categories include:

  • Travel & Landscapes: Scenic beach sunsets, city skylines at golden hour, mountain vistas (nypost.com)
  • Food & Beverage: Flat lays of coffee, brunch spreads, artisanal desserts
  • Lifestyle & People: Candid portraits, remote work setups, fitness and wellness scenes
  • Business & Technology: Modern office setups, flat lays of gadgets, hands typing on iPhones
  • Seasonal & Holidays: Christmas decor close-ups, summer beach scenes, Halloween costumes

Q: How many photos do I need to start earning significant passive income?
A: It varies, but most contributors recommend at least 100+ high-quality images across platforms to see consistent micro-royalty income. As you upload more (200–500 images), your portfolio’s depth increases discoverability and earnings (elementor.com).

Q: Do I need to edit every photo before uploading?
A: Ideally, yes. Even minor edits (exposure, color correction, cropping) can drastically improve your image’s appeal. Use apps like Lightroom Mobile or Snapseed to polish every shot before submission to stock sites or print-on-demand platforms (swiftgalleries.com, yourphotoadvisor.com).

Q: How long does it take to start seeing income?
A: You might earn your first $1–$50 within days if you pick trending subjects. However, building a portfolio that generates $100–$500 per month can take 3–6 months of consistent uploads and marketing efforts (flickybounty.com, elementor.com).

Q: What’s the difference between exclusive and non-exclusive licensing on stock sites?
A:

  • Exclusive: You agree not to sell that image anywhere else—earn higher royalty rates (up to 45% on iStock) but limit potential distribution.
  • Non-Exclusive: You can sell the same image across multiple platforms—lower per-sale royalties but wider exposure and potentially more volume (elementor.com).

Q: How do I stay motivated if my photos aren’t selling immediately?
A:

  • Treat it like building any other business—upload consistently, refine your craft, and market actively.
  • Track which images perform well; focus on similar subjects or styles.
  • Engage with photography communities for feedback and new ideas—Reddit’s r/iPhoneography or photo contest forums are great places to learn and stay inspired (reddit.com).

Q: Is it worth teaching an online course if I’m just starting to monetize my photos?
A: You don’t need to be a “Master Photographer” to teach fundamentals. Many beginners look for straightforward, actionable advice—if you can explain concepts clearly, there’s a market for entry-level courses. Consider starting with a mini-course on “iPhone Camera Settings for Beginners” and expand from there as you gain experience.

Conclusion

You now have a comprehensive roadmap for how to monetize iPhone photography skills and earn passive income. By leveraging a mix of stock platforms, digital products, print-on-demand, online courses, and strategic marketing, you can transform your passion into profit—no expensive equipment required.

Action Steps:

  • Pick one strategy (e.g., stock photography) and upload your first 20–30 edited images this week
  • Create a simple portfolio site or Etsy shop to start selling digital downloads or prints
  • Set up social media profiles dedicated to your photography—post at least 3 times per week with strong calls to action
  • Join photography communities to learn from peers, get feedback, and stay motivated

Remember:

  • Consistency is key. Upload regularly, promote daily, and refine your approach based on data.
  • Quality over quantity—invest time in editing and keywording each image.
  • Stay adaptable—as trends shift, be ready to pivot to new niches or platforms.

Your iPhone is far more than a communication device—it’s a revenue-generating tool. Start implementing these strategies today, and watch how your everyday snapshots become a source of passive income tomorrow. Good luck!

Transforming your everyday devices into a high-earning content creation studio is more achievable than ever. With powerful software, affordable accessories, and AI-driven tools at your fingertips, you can start producing professional-grade videos, podcasts, blogs, and social media content right from your laptop and mobile phone. In this comprehensive guide, you’ll discover step-by-step how to set up your workspace, choose the best  tools, optimize your workflow, and monetize your content in 2025. Let’s dive in!

content


Table of Contents

  1. Why Turn Your Laptop & Phone into a Content Studio?
  2. Best Video Editing Software for Laptop and Mobile
  3. Top Cloud Hosting Services to Streamline Workflow
  4. Must-Have Content Creation Tools and Accessories
  5. Affordable Lighting and Audio Gear for Professional Quality
  6. Essential Project Management Software for Content Planning
  7. Leveraging AI-Powered Tools for Faster Creation
  8. Secure Cloud Storage Solutions to Protect Your Files
  9. Optimizing Your Home Office: Ergonomic Setup Tips
  10. How to Monetize Your Content Studio: Tips & Strategies
  11. Frequently Asked Questions
  12. Conclusion

Why Turn Your Laptop & Phone into a Content Studio?

In 2025, content creation is no longer confined to expensive studios or bulky equipment. You already have two of the most powerful tools in your pocket: your laptop and mobile phone. By leveraging free or affordable software, AI capabilities, and minimal accessories, you can produce:

  • High-quality videos for YouTube, TikTok, or Instagram Reels.
  • Professional podcasts with near-studio audio clarity.
  • Engaging social media posts, graphics, and short-form clips.
  • SEO-optimized blog posts that earn consistent ad revenue and affiliate commissions.

Why It Matters

  • Low startup costs: Avoid spending thousands on cameras and lighting.
  • Flexibility: Create anywhere—at home, a coffee shop, or even outdoors.
  • Monetization potential: With high-CPC (cost per click) niches and affiliate marketing, each piece of content can generate revenue.
  • Scalability: Start small and gradually upgrade as your audience and income grow.

By focusing on practicable, actionable insights, you’ll see that you don’t need a full studio to compete with professional creators. You need the right mindset, the best tools, and a clear workflow.


Best Video Editing Software for Laptop and Mobile

Choosing the right editing software is crucial for producing professional content. In 2025, AI-driven and cross-platform tools dominate the market, enabling you to edit on both your laptop and phone seamlessly.

Adobe Premiere Rush

Adobe Premiere Rush is a streamlined, cross-device video editor that suits creators at any skill level.

  • Platforms: Windows, macOS, iOS, Android
  • Key Features:
    • AI-powered audio mixing that balances voices and background music automatically.
    • Auto reframe to convert widescreen footage into vertical or square formats for social platforms.
    • Built-in transitions, effects, and color presets to give your videos a polished look.
    • Cloud sync ensures your project is updated on all devices.

“Premiere Rush allows me to play out my thoughts and make reels on the go. It functions well across different devices.” — A content manager’s testimonial on user experience (ceros.com)

Pricing:

  • Free tier with limited features.
  • Paid plan starts at $9.99/month (includes Adobe Creative Cloud integration).

Why You Need It:

  • Ease of use: Intuitive interface for beginners.
  • Cross-platform: Start editing on your phone, finish on your laptop (or vice versa).
  • Professional results: Built-in tools rival desktop-only alternatives.

CapCut

CapCut is the go-to mobile editing app for TikTokers, YouTubers, and short-form video creators.

  • Platforms: iOS, Android, Windows, macOS (desktop beta)
  • Key Features:
    • AI-driven background removal and auto-captioning.
    • Extensive library of templates, transitions, music tracks, and stickers.
    • Color correction and video upscaling powered by AI for 4K content.
    • Collaborative workspaces, so teams can edit together in real time.

“CapCut is one of those AI content creation tools serving both beginner and intermediate users.” (Planable)

Pricing:

  • Free to use.
  • Optional upgrade to CapCut Pro (enhanced e-commerce features, priority cloud processing).

Why You Need It:

  • Free: No subscription required for basic features.
  • AI tools: Background removal and auto-captions save hours of manual work.
  • Mobile-first: Ideal for editing on the go and posting quickly.

DaVinci Resolve

DaVinci Resolve is a powerhouse desktop editor with a free tier that rivals paid competitors.

  • Platforms: Windows, macOS, Linux
  • Key Features:
    • Advanced color grading tools used by professional studios.
    • Fusion VFX integration for visual effects and motion graphics.
    • Fairlight audio suite for multi-track mixing and mastering.
    • Cut page for fast editing workflows, ideal for YouTubers and Vloggers.

Pricing:

  • Free version with robust features.
  • Studio version at $295 (one-time purchase).

Why You Need It:

  • Professional-grade editing without subscription fees.
  • Comprehensive toolset: Color, audio, and VFX in one app.
  • Future-proof: Many pros use Resolve in studios; learning it now pays dividends.

Final Cut Pro (Mac Only)

For Apple users, Final Cut Pro is still the gold standard in 2025.

  • Platform: macOS
  • Key Features:
    • Magnetic Timeline for seamless editing.
    • AI Smart Conform automatically reframes clips for different aspect ratios.
    • Optimized for M-series chips, delivering blistering performance on MacBook Pro with M4 Pro.
    • Multi-cam editing with automatic syncing based on audio waveforms.

Pricing:

  • One-time purchase at $299.99.
  • Free trial available for 90 days.

Why You Need It:

  • Performance: Unmatched speed on the latest Mac hardware.
  • Ecosystem: Tight integration with other Apple apps (Motion, Compressor).
  • Professional reputation: Used by Hollywood editors and YouTubers alike.

Top Cloud Hosting Services to Streamline Workflow

When creating content, you need reliable hosting for websites, blogs, and portfolios. High-CPC niches like “best cloud hosting providers” pay $15–$50 per click (champsera.com), so building authority around hosting content can be lucrative.

Hosting Service Starting Price/Month Key Features Ideal For
Bluehost $3.95 One-click WordPress install, 24/7 support Beginners, bloggers
SiteGround $6.99 Free CDN, daily backups, managed WordPress Small businesses, agencies
WP Engine $20 Premium managed WordPress, staging sites High-traffic sites
Cloudways $12 Pay-as-you-go, multiple cloud providers Developers, agencies
Hostinger $2.29 Ultra-fast Servers, free domain (1st year) Budget-conscious creators

Table: Comparison of Top Cloud Hosting Services (2025)

  • Bluehost offers a seamless setup for WordPress blogs, perfect for content creators who want to focus on writing and SEO without server hassles.
  • SiteGround includes a free CDN and daily backups, ensuring your content is fast and secure.
  • WP Engine is pricier but delivers unmatched performance and staging environments for high-traffic, revenue-driven sites.
  • Cloudways lets you choose from Amazon AWS, Google Cloud, DigitalOcean, or Linode—ideal for developers who want granular control.
  • Hostinger is the most affordable, with features like a free domain in the first year and reliable speeds.

Pro Tip: If you’re starting a blog to earn ad revenue from high-CPC keywords like “cloud hosting services” ($15–$50 CPC), link to authoritative hosting comparison articles to build trust and attract affiliates (champsera.com).


Must-Have Content Creation Tools and Accessories

Beyond software, certain tools and accessories elevate your content quality. In 2025, these items remain essential for creators on the move and at home:

1. Portable Microphones

Crisp audio is crucial. Here are top picks for both laptop and mobile:

  • Rode VideoMic Me-L (iOS, Lightning port): Compact shotgun mic for iPhone.
  • Rode Wireless Go II (laptop & mobile): Dual-channel wireless mic pack that works with cameras, laptops, and phones.
  • Audio-Technica AT2020USB+ (laptop): USB condenser mic for podcasts and voiceovers.
  • Shure MV5C (laptop & mobile): A digital condenser mic with built-in headphone output, ideal for streaming and video calls.

“Audio quality is just as important as visuals. Investing in the right microphone ensures your content is clear and professional.” (Nyongesa Sande)

2. Tripods & Stabilizers

Stable footage looks polished. Choose based on your workflow:

  • Joby GorillaPod 3K (mobile & laptop setups): Flexible legs wrap around objects—great for vlogging.
  • Manfrotto Befree Advanced (laptop & DSLR): Lightweight, sturdy tripod for static shots.
  • DJI Osmo Mobile 6 (mobile): Advanced gimbal with ActiveTrack 5.0 for smooth moving shots.
  • DJI Ronin-SC (laptop & mirrorless camera): Compact gimbal for cinematic movements.

3. Portable Power & Charging

Running out of battery mid-shoot kills momentum. Invest in:

  • Anker PowerCore 26800: High-capacity power bank for multiple device charges.
  • Anker Nano II 65W Charger: Compact, multi-port charger that powers laptops (via USB-C) and phones simultaneously.
  • Anker 521 Portable Power Station (256Wh): For outdoor shoots—powers laptops, lights, and more for hours. (Anker)

4. Lenses & Phone Mounts

Get more creative with smartphone cameras:

  • Moment Lenses: Wide, Tele, and Anamorphic lenses that clip onto most phones—impressive for cinematic shots.
  • BeastGrip Pro: Universal smartphone rig with cold shoe mounts for lights- and mic-attachments.

5. Graphic Tablets & Drawing Tools

For social media creators who sketch or illustrate:

  • Wacom Intuos Pro (laptop): Industry-standard tablet for drawing, photo editing, and design.
  • iPad Pro + Apple Pencil (mobile & laptop sync): The iPad Pro’s power rivals laptops; with Procreate, you can create stunning visuals.

Affordable Lighting and Audio Gear for Professional Quality

Good lighting and audio separate amateur content from professional productions. You don’t need a full studio—just strategic purchases and proper setup.

Lighting Essentials

  • Ring Lights:
    • Neewer 18-inch Ring Light: Adjustable brightness and color temperature. Ideal for beauty tutorials, live streams, and close-up shots.
    • Diva Ring Light Super Nova: Includes softbox diffuser and stand—expensive but unmatched in quality for portrait work.
  • Softbox Kits:
    • Godox SL-60W: LED continuous light with Bowens mount. Great for YouTube shoots, interviews, and product videos.
    • Neewer 700W Softbox Kit: Budget-friendly kit with two softboxes—perfect for small studio setups.
  • LED Panels:
    • Aputure Amaran 200d: Powerful, daylight-balanced LED. Can attach to laptop or power station for outdoor shoots.
    • GVM 800D-RGB: RGB output allows creative color accents.

Audio Essentials

  • Lavalier Microphones:
    • Rode Lavalier II: Omnidirectional mic for interviews and on-the-go recording.
    • BOYA BY-M1 Pro: Budget Lavalier compatible with cameras, laptops, and phones.
  • USB Audio Interfaces:
    • Focusrite Scarlett Solo (3rd Gen): Connect XLR mics to your laptop for uncompromising audio.
    • PreSonus AudioBox iTwo: Portable interface for laptops—perfect for podcasts.
  • Portable Audio Recorders:
    • Zoom H6: Portable, multi-track recorder with interchangeable mic capsules.
    • Tascam DR-05X: Budget handheld recorder great for interviews and ambient sound.

Quick Setup Tip: Position lights at a 45° angle to your face to eliminate harsh shadows. Use a softbox or diffuser for softer light. Keep microphones 6–12 inches from your mouth for clear audio without clipping.


Essential Project Management Software for Content Planning

A clear plan avoids last-minute scrambles and missed opportunities. In 2025, project management tools integrate seamlessly with content calendars, team workflows, and analytics.

Trello

Trello uses boards, lists, and cards to visualize your entire content pipeline.

  • Features:
    • Drag-and-drop cards for each content piece (e.g., Blog Post Draft, Editing, Published).
    • Checklist integration to ensure you don’t miss steps like SEO optimization, thumbnail design, or CTA placement.
    • Power-ups: Integrate Google Drive, Slack, and calendar views.

“Trello is a must-have tool to keep your content creation organized.” (Asclique Innovation and Technology)

Pricing:

  • Free tier with 10 boards and 1 Power-up per board.
  • Business plan starts at $10/month per user.

Asana

Asana helps you create timelines, dependencies, and automate repetitive tasks.

  • Features:
    • Timeline view: See deadlines and project progress.
    • Automation rules: Automatically move tasks when a status changes.
    • Portfolios: Combine multiple projects to track overall performance.

Pricing:

  • Free tier with basic boards and timelines.
  • Premium at $10.99/month per user.

Notion

Notion is the ultimate all-in-one workspace: notes, databases, Kanban boards, and more.

  • Features:
    • Customizable templates for content calendars, briefs, and style guides.
    • Collaboration: Real-time editing and commenting.
    • Databases: Track performance metrics, affiliate links, and publication schedules.

Pricing:

  • Free personal plan.
  • Plus plan at $8/month per user for advanced features and unlimited file uploads.

Monday.com

Monday.com offers highly visual workflows with automation and integrations.

  • Features:
    • Custom boards: Track content from ideation to publishing.
    • Automation: Receive notifications when deadlines approach or tasks are completed.
    • Integration: Connect with Google Analytics, WordPress, and Slack for streamlined updates.

Pricing:

  • Basic at $8/month per seat.
  • Standard at $10/month per seat.

Leveraging AI-Powered Tools for Faster Creation

AI is revolutionizing content workflows. In 2025, using AI tools for copywriting, video editing, and SEO is non-negotiable if you want to stay ahead.

Jasper AI (Copywriting Assistant)

Jasper AI helps you generate high-quality, SEO-optimized text in minutes.

  • Use Cases:
    • Blog outlines and first drafts: Save hours on research and writing.
    • Social media captions: Generate catchy hooks for Instagram, Facebook, and LinkedIn.
    • Ad copy: Create Google Ads headlines and descriptions that convert.

“Jasper helps users brainstorm ideas, write captions, or even draft entire blog posts.” (muntasirmahdi.com)

Pricing:

  • Starts at $49/month.
  • Business and custom plans available.

Descript (Audio & Video Transcription and Editing)

Descript offers transcription, AI-driven video editing, and “Overdub” voice cloning.

  • Features:
    • Transcription: Edit your audio/video as easily as editing text.
    • Studio Sound: AI across audio tracks to remove noise and enhance vocals.
    • Screen recording & editing: Perfect for tutorials and webinars.

Pricing:

  • Free tier with limited transcription minutes.
  • Creator plan at $12/month.

MidJourney & DALL·E (AI Art Generators)

Generate custom thumbnails, social media graphics, and visual assets with AI.

  • Use Cases:
    • Custom YouTube thumbnails: Eye-catching visuals that boost click-through rates.
    • Social media graphics: Unique illustrations and memes to stand out.
    • Blog post feature images: Engaging visuals that match your brand style instantly.

Pricing:

  • MidJourney: Subscription starts at $10/month.
  • DALL·E: Pay-as-you-go credits.

VidIQ (YouTube Optimization)

VidIQ provides AI-powered keyword research, SEO scores, and competitor analysis for YouTube creators.

  • Features:
    • Tag suggestions based on high-CPC and high-volume keywords.
    • SEO score to help optimize titles, descriptions, and tags.
    • Trend alerts: Know which topics are gaining traction in your niche.

Pricing:

  • Free plan with limited features.
  • Pro plan at $7.50/month.

“VidIQ helps optimize titles, tags, and descriptions for better visibility.” (Asclique Innovation and Technology)


Secure Cloud Storage Solutions to Protect Your Files

Your content, scripts, raw footage, and graphics need safe storage. In 2025, file security and easy access from any device are paramount.

Google Drive

  • Free Tier: 15 GB shared across Drive, Gmail, and Photos.
  • Google One: 100 GB at $1.99/month, 2 TB at $9.99/month.
  • Key Features:
    • Real-time collaboration on Google Docs and Sheets.
    • Offline access for selected files.
    • AI-powered search to find files quickly.

Dropbox

  • Free Tier: 2 GB.
  • Plus Plan: 2 TB at $9.99/month.
  • Key Features:
    • Smart Sync: Keep files online-only to save local space.
    • Version history: Recover previous file versions up to 30 days.
    • Dropbox Paper: Collaborate on notes and outlines.

Microsoft OneDrive

  • Free Tier: 5 GB.
  • Microsoft 365 Personal: 1 TB at $69.99/year (includes Office apps).
  • Key Features:
    • Seamless integration with Windows 11 and Office suite.
    • Ransomware detection and recovery.
    • File Requests: Collect files from others directly.

iCloud Drive (Apple Users)

  • Free Tier: 5 GB.
  • 50 GB Plan: $0.99/month; 200 GB at $2.99/month.
  • Key Features:
    • Optimized Storage: Offload older files to iCloud.
    • iCloud Private Relay: Encrypt traffic for privacy.
    • Family Sharing: Share storage with up to six members.

Security Tip: Use two-factor authentication (2FA) on all cloud accounts. Encrypt sensitive files with tools like VeraCrypt before uploading.


Optimizing Your Home Office: Ergonomic Setup Tips

A comfortable, efficient workspace boosts productivity and reduces strain. Whether you’re creating content from home or traveling, here are ergonomic essentials:

1. Laptop & Phone Stands

  • Adjustable Laptop Stand: Raises your laptop screen to eye level to prevent neck strain. Popular model: Roost Laptop Stand (foldable, lightweight).
  • Mobile Phone Tripod Stand: Holds your phone at eye level for video calls and recording. Budget option: UBeesize Phone Tripod.

2. External Keyboard & Mouse

  • Mechanical Keyboard: TKL (tenkeyless) models like Keychron K2 offer tactile feedback and compact design.
  • Ergonomic Mouse: The Logitech MX Master 3 provides custom buttons, thumb rest, and multi-device pairing.

3. Chair & Desk

  • Ergonomic Office Chair: Look for adjustable lumbar support, armrests, and tilt tension. A top pick: Herman Miller Aeron or budget alternative Hbada Ergonomic Office Chair.
  • Standing Desk: Convert between sitting and standing. The Flexispot E7 height-adjustable desk suits varying postures.

4. Monitor & Dual-Screen Setup

  • External Monitor: A larger screen reduces eye strain. Ideal size: 24″–27″ with IPS panel for color accuracy.
  • Dual-Screen Setup: Use a second monitor or foldable portable monitor (e.g., ASUS ZenScreen). Dual screens facilitate multitasking—editing on one screen, referencing scripts or analytics on the other.

5. Cable Management & Lighting

  • Cable Organizers: Cable sleeves and clips keep your desk tidy.
  • Task Lighting: Adjustable desk lamps like the BenQ e-Reading LED Desk Lamp reduce eye fatigue.

Pro Tip: Use a blue light filter on monitors and phones (e.g., f.lux or Night Shift) to minimize eye strain during long sessions.


How to Monetize Your Content Studio: Tips & Strategies

Creating content is just the first step. To build a profitable studio, you must monetize effectively. Let’s explore multiple revenue streams:

1. Ad Revenue (YouTube & Websites)

  • YouTube Partner Program: Monetize videos through ads once you hit 1,000 subscribers and 4,000 watch hours in the past 12 months.
    • High-CPC Niches: Tech tutorials, cloud computing, and software reviews tend to attract higher-paying ads (e.g., “cloud hosting services” at $20–$40 CPC (muntasirmahdi.com)).
    • Optimization: Use VidIQ to research high-CPC keywords for titles and tags.
  • Display Ads on Blog/Website: Google AdSense or Mediavine
    • High-CPC Keywords: Incorporate keywords like “video editing software” ($20–$70 CPC (champsera.com)) and “cloud hosting providers”.
    • SEO Strategy: Publish long-form, keyword-rich blog posts (2,000+ words) to rank higher in Google and attract premium ads.

2. Affiliate Marketing

  • Amazon Associates: Share affiliate links for gear like microphones, ring lights, and laptops.
  • Software Affiliates: Many software tools (e.g., Adobe Premiere Pro, CapCut Pro, Trello) offer 20–50% commissions for referrals.
  • Hosting Affiliates: Bluehost, SiteGround, and WP Engine have lucrative affiliate programs (up to $100 per sign-up).

Actionable Tip: Create review and “best of” articles (e.g., “Best Budget Microphones 2025”) with affiliate links.
Example: “If you’re serious about audio quality, the Audio-Technica AT2020USB+ is my top pick for under $150.”

3. Sponsored Content & Brand Partnerships

  • Sponsored Posts/Reels: As your audience grows, brands will pay you to showcase their products or services.
  • Long-term Ambassadorships: Partner with a brand (e.g., camera manufacturers, software companies) to create recurring content.
  • Pitching: Use a media kit detailing your audience demographics, engagement rates, and past collaborations to secure sponsorships.

4. Digital Products & Online Courses

  • E-Books & Guides: Sell downloadable guides (“How to Use DaVinci Resolve for Beginners”).
  • Online Courses: Platforms like Teachable or Thinkific allow you to host video-based courses (e.g., “Complete Mobile Video Editing with CapCut”).
  • Webinars & Workshops: Charge for live, interactive workshops teaching specific skills (e.g., “Studio-Lighting on a Budget”).

5. memberships & Patreon

  • Patreon: Offer exclusive content, early access, and behind-the-scenes perks to paying members.
  • YouTube Memberships: Once you hit 30,000 subscribers, enable channel memberships for monthly recurring revenue.
  • Private Discord or Community: Host paid membership groups for direct mentoring, critiques, and networking.

Frequently Answered Questions

Q1: What Laptop Specs Do I Need to Run Video Editing Software in 2025?

  • Processor (CPU): At least an Intel Core i7 (13th Gen) or Apple M4 Pro for smooth 4K editing.
  • RAM: Minimum 16 GB (32 GB ideal for complex projects).
  • Storage: SSD (512 GB minimum; 1 TB preferred). Consider an external NVMe SSD for additional scratch disk.
  • GPU: Dedicated GPU (NVIDIA RTX 3050/3060 or Apple M4 Pro GPU) for faster rendering.
  • Display: 1080p IPS at minimum; 4K or high-color-accuracy (100% sRGB) is better.

Top Picks:

  • Apple MacBook Pro 16-inch (M4 Pro): Excellent performance, color accuracy, and battery life. (TechRadar)
  • Asus ProArt P16 (2025): 16″ OLED, strong performance for Windows users.

Q2: Can I Edit Professional Videos Solely on My Mobile Phone?

Yes! Modern mobile apps are incredibly powerful:

  • CapCut: Free, AI-driven editing, background removal, and upscaling. Ideal for short-form. (Planable)
  • Adobe Premiere Rush: Cross-platform; basic edits on your phone synchronized to desktop. (ceros.com)
  • LumaFusion (iOS only): Professional multi-track editing, color correction, and keyframing.
  • KineMaster: Layer-based editing with transitions, effects, and chroma-key.

Tip: Use a phone with at least 8 GB RAM and 128 GB storage to handle large video files.

Q3: How Do I Choose Between Free vs Paid Editing Software?

  • Free Software (e.g., DaVinci Resolve, CapCut):
    • Pros: No cost, robust feature set, AI tools in free tiers.
    • Cons: Steeper learning curve, occasional watermark (in some apps), limited customer support.
  • Paid Software (e.g., Adobe Premiere Pro, Final Cut Pro):
    • Pros: Advanced features (multi-cam editing, VR tools), faster performance, priority updates.
    • Cons: Subscription (Premiere Pro) or one-time cost (Final Cut Pro), steeper investment.

Recommendation: Start with free tools (DaVinci Resolve, CapCut) and upgrade when your projects demand more advanced features.

Q4: How Can I Optimize My Content for SEO in 2025?

  • Keyword Research: Use tools like Ahrefs, SEMrush, or free options like Ubersuggest to identify high-CPC, high-volume keywords (e.g., “video editing software” $20–$70 CPC (champsera.com)).
  • On-Page SEO:
    • Include primary keyword in the first 100 words.
    • Use H2/H3 headings with secondary keywords.
    • Optimize meta titles (60 characters) and meta descriptions (155 characters).
    • Add alt text to images with descriptive keywords.
  • High-Quality Backlinks:
    • Guest post on authority sites (e.g., tech blogs, photography forums).
    • Collaborate with influencers and exchange link placements.
  • Page Speed & Mobile-First:
    • Use Google PageSpeed Insights to optimize loading times.
    • Ensure responsive design—mobile content consumption continues to rise.

Q5: Which Accessories Offer the Best ROI for Beginners?

  • Ring Light (Neewer 18″): Affordable ($50–$70) and instantly improves video quality.
  • USB Condenser Microphone (Audio-Technica AT2020USB+): Under $150, massive upgrade over built-in mics.
  • GorillaPod 3K: $40–$50 for flexible mounting options.
  • External SSD (Samsung T7): $100 for 1 TB. Speeds up read/write times and keeps laptop storage free.

Budget Bundle: For under $300 total, you can get a ring light, microphone, tripod, and portable SSD—enough to start creating high-quality content immediately.


Conclusion

By now, you see that turning your laptop and mobile phone into a profitable content creation studio in 2025 is not only possible but also cost-effective. With AI-driven software like CapCut and Adobe Premiere Rush, powerful project management apps like Trello and Notion, and affordable accessories (microphones, lighting, tripods), you can produce professional content anywhere.

Key Takeaways

  • Invest in the right software: Start free (DaVinci Resolve, CapCut) and scale to paid solutions (Final Cut Pro, Premiere Pro) as needed.
  • Leverage AI: Tools like Jasper AI and Descript speed up writing and editing.
  • Optimize your workspace: Ergonomic chairs, laptop stands, and good lighting make a difference in productivity and quality.
  • Choose high-CPC niches: Focus on content around “video editing software,” “cloud hosting services,” and “content marketing tools” to maximize ad revenue.
  • Monetize wisely: Combine ad revenue, affiliate marketing, sponsorships, and digital products for multiple income streams.

Remember, your audience cares most about authenticity and value. Use these 2025 tech secrets to create content that educates, entertains, and engages—and the profits will follow. It’s time for you to unlock the full potential of your laptop and mobile phone. Start today, and watch your content studio flourish!


Frequently Answered Questions (Recap)

  1. What Laptop Specs Do I Need?
    • Intel Core i7 (13th Gen) or Apple M4 Pro, 16–32 GB RAM, SSD storage, dedicated GPU, and color-accurate display.
  2. Can I Edit Videos Solely on My Phone?
    • Yes! Use CapCut or [LumaFusion] for full-fledged mobile editing.
  3. Free vs Paid Software—Which to Choose?
    • Start free (DaVinci Resolve, CapCut), upgrade to paid (Final Cut Pro, Premiere Pro) when you need advanced features.
  4. How Do I Optimize for SEO?
    • Conduct keyword research (focus on high-CPC terms), optimize on-page elements, and build quality backlinks.
  5. Which Accessories Offer the Best ROI?
    • Ring lights, USB microphones, flexible tripods, and portable SSDs yield the most bang for your buck.

By following this guide and implementing these actionable strategies, you’ll be well on your way to creating a six-figure content creation studio using just your laptop and mobile phone. Here’s to your success in 2025 and beyond!

Are you tired of feeling chained to your desk or worrying about missing an important file when you’re away? In today’s digital age, knowing how to access computer remotely and remotely access your phone can revolutionize the way you work, travel, and collaborate. Whether you’re a freelancer, a small business owner, or part of a global team, mastering remote desktop software is essential for staying productive.

ultimate

In this blog post, you’ll discover:

  • Why remote access apps for Android and iOS matter.
  • How to set up secure connections that protect your data.
  • Step-by-step guides for using top tools like TeamViewer, AnyDesk, Chrome Remote Desktop, and RustDesk.
  • Best practices for endpoint security remote work, including VPN recommendations.
  • Actionable insights for troubleshooting and optimizing your remote setup.

We’ll dive deep into each topic, integrating credible sources to back up our insights and embedding hyperlinks in relevant keywords to guide you to further expertise. You’ll find user-friendly tables for quick comparisons, bullet points for easy scanning, and a conversational style that speaks directly to you. By the end, you’ll have everything you need to manage your phone or computer from anywhere in the world—no tech jargon, just practical steps.

(NinjaOne, The Digital Verdict)


H2: Best Remote Desktop Software 2025

If you want to access computer remotely, choosing the right remote desktop software is crucial. Here are the top contenders for 2025:

  1. TeamViewer
    • Widely recognized for its robust features.
    • Supports Windows, macOS, Linux, Android, and iOS.
    • Offers file transfer, remote printing, and integrated chat.
    • Enterprise-grade security with AES-256 encryption. (The Digital Verdict, Wikipedia)
  2. AnyDesk
    • Lightweight and optimized for speed via DeskRT codec.
    • Cross-platform support (Windows, macOS, Linux, Android, iOS).
    • VPN functionality and unattended access.
    • Two-factor authentication keeps connections secure. (NinjaOne, Wikipedia)
  3. Chrome Remote Desktop
    • Free solution from Google requiring a Chrome browser or app.
    • Simple setup: link your Google account, and install host extensions.
    • Secure connections via your Google credentials, ideal for casual or personal use. (Wikipedia)
  4. RustDesk
    • Open-source alternative to TeamViewer and AnyDesk.
    • Runs on Windows, macOS, Linux, Android, and iOS.
    • Peer-to-peer connections without requiring third-party servers.
    • Actively developed, with the latest release in February 2025. (Wikipedia)
  5. Microsoft Remote Desktop (RDP)
    • Built into Windows Pro and Enterprise editions.
    • Direct RDP connection to Windows machines—no additional software needed.
    • Leverage Azure Virtual Desktop for cloud-hosted sessions.
    • Almost negligible latency on local networks. (Wikipedia)

Each of these tools excels in different scenarios. If you need enterprise-level features and scalability, TeamViewer or AnyDesk might be your best pick. For a budget-friendly or open-source option, RustDesk makes it easy to set up private servers. Meanwhile, Chrome Remote Desktop remains an excellent free choice if you already use a Google ecosystem.


H2: Secure Remote Access Solutions

Your data’s security is non-negotiable. When you remotely access your phone or computer, follow these security best practices:

  • Enable Two-Factor Authentication (2FA) on every service.
    • Adds an extra layer beyond just a password.
    • Prevents unauthorized login even if credentials are compromised. (Wikipedia, Wikipedia)
  • Use End-to-End Encryption (E2EE) whenever possible.
    • Ensures no third party can intercept your session.
    • Both TeamViewer and AnyDesk offer AES-256 encryption for connections. (The Digital Verdict, Wikipedia)
  • Implement a VPN for Remote Access.
    • A VPN hides your IP and encrypts all network traffic.
    • Top VPNs for 2025 include NordVPN, ExpressVPN, and Surfshark. (New York Post)
  • Set Up Whitelisting and IP Restrictions.
    • Only allow specific IP addresses to connect to your remote desktop.
    • Both TeamViewer Tensor and AnyDesk Business plans support whitelisting. (Wikipedia, Wikipedia)
  • Keep Software Updated.
    • Always install the latest patches and updates.
    • Attackers exploit known vulnerabilities—staying current is your best defense. (Wikipedia, Wikipedia)
  • Utilize Endpoint Protection.
    • Run a reputable antivirus or endpoint detection tool on both host and client devices.
    • Combine this with firewalls to block unwanted traffic. (New York Post)

By incorporating these practices, you safeguard your devices from cyber threats. Whether you connect via RDP, TeamViewer, or a self-hosted RustDesk server, security should remain your top priority.


H2: How to Access Computer Remotely: Step-by-Step Guides

Below, you’ll find step-by-step instructions for setting up the most popular remote access apps:

1. Access Computer Remotely with TeamViewer

  1. Download and Install
    • Visit the TeamViewer website to download the client. (Wikipedia)
    • Install the software on both host (the machine you’ll control) and client (the machine you use to connect).
  2. Set Up Unattended Access
    • On the host device, go to “Extras” > “Options” > “Security.”
    • Set a strong password under “Personal Password.”
    • Under “Grant Easy Access,” link your TeamViewer account.
  3. Connect from Anywhere
    • On the client device, open TeamViewer.
    • Enter the host ID (numeric code) and click “Connect.”
    • Provide the personal password or use your linked account for quick access.
  4. Transfer Files and Chat
    • Use the toolbar at the top of the remote session to open “File Transfer.”
    • Drag and drop files or use chat to collaborate in real time. (Wikipedia, The Digital Verdict)

2. Access Computer Remotely with AnyDesk

  1. Download AnyDesk
  2. Note Your AnyDesk Address
    • Upon launching, you’ll see a unique nine-digit address on the host device.
    • On the client, enter that address into the “Remote Desk” field and press “Connect.”
  3. Grant Permissions
    • On your host device, approve the incoming connection request.
    • Choose whether to allow actions like clipboard syncing, file transfer, and remote control. (Wikipedia, The Digital Verdict)
  4. Configure Unattended Access
    • Go to “Settings” > “Security” on the host device.
    • Enable “Allow Unattended Access,” then set a secure password.
  5. Explore Features
    • Use the “File Transfer” tab to move files.
    • Use “Remote Print” to send documents to a locally connected printer. (NinjaOne, Wikipedia)

3. Access Computer Remotely with Chrome Remote Desktop

  1. Install Chrome and Extension
  2. Set Up Remote Access
    • Under “Set up remote access,” click “Turn On.”
    • Download and install the Host installer when prompted.
    • Choose a name for your computer and set a 6-digit PIN.
  3. Connect from Any Device
    • On a different computer or mobile device, open Chrome Remote Desktop.
    • Select the target machine and enter the PIN.
    • Now you’re connected. (Wikipedia)
  4. Use Mobile Apps
    • Install the “Chrome Remote Desktop” app from Google Play or the App Store.
    • Sign in with your Google account and connect using the same PIN.

4. Access Computer Remotely with RustDesk

  1. Download RustDesk
  2. Run RustDesk on Both Ends
    • Install on the host machine and the client device.
    • Launch RustDesk—note the unique ID displayed on the host.
  3. Self-Hosted or Default Server
    • By default, RustDesk uses public relay servers.
    • For greater control, set up your own relay and rendezvous server (detailed instructions on their GitHub). (Wikipedia)
  4. Establish Connection
    • On the client, enter the host ID and press “Connect.”
    • Accept the incoming request on the host device.
    • Once connected, you can control the host’s screen and transfer files. (Wikipedia, The Digital Verdict)
  5. Adjust Settings
    • Under “Settings,” configure display resolution, network performance, and security options.
    • For unattended access, click “Set Password” and create a strong passphrase. (Wikipedia, Wikipedia)

H2: Remote Access Apps for Android & iOS

More than ever, you need to remotely access your phone from another device or access your computer from your phone. Here are the top remote access apps for mobile devices:

  • AirDroid (Android & iOS)
    • Mirror your phone’s screen on a computer.
    • Remote file transfer, SMS management, and screen recording.
    • Secure via end-to-end encryption and required permissions. (Lifewire, New York Post)
  • Vysor (Android & iOS)
    • Cast your phone screen to Windows, macOS, or Linux.
    • Control your mobile apps with mouse and keyboard.
    • Requires USB debugging on Android devices. (Lifewire, Wikipedia)
  • Microsoft Remote Desktop (Android & iOS)
    • Access Windows Professional and Enterprise PCs.
    • Leverage Azure Virtual Desktop for virtualized work environments.
    • Supports multi-touch gestures, secure connections via Azure AD. (Wikipedia, New York Post)
  • Splashtop Personal (Android & iOS)
    • High-definition remote desktop streaming.
    • Easy setup with device code, no inbound firewall changes needed.
    • Free for local network use; premium plans for remote access over the internet. (New York Post, Wikipedia)
  • TeamViewer QuickSupport (Android & iOS)
    • Provides remote technical support for mobile devices.
    • Users share their screen and grant control with a session ID.
    • Enterprise edition supports mass deployments and device whitelisting. (Wikipedia, Lifewire)
  • AnyDesk Mobile (Android & iOS)
    • Full control of remote desktops from your phone.
    • Integrated file manager to move documents to/from mobile.
    • Lightweight footprint ensures fast connections even on cellular data. (Wikipedia)

By installing these apps, you can seamlessly switch between devices, respond to urgent tasks on the go, and ensure you never leave a file or presentation behind.


H2: VPN for Remote Access: Top Picks for 2025

A VPN for remote access not only encrypts your traffic but also lets you bypass geo-restrictions when traveling. Here are the top VPNs that balance security, speed, and usability:

VPN Service Monthly Cost (USD) Key Features Platforms Supported
NordVPN $3.59 Double VPN, CyberSec ad blocker, 5,500+ servers Windows, macOS, Linux, Android, iOS (New York Post)
ExpressVPN $4.99 High-speed servers, split tunneling, 24/7 live chat Windows, macOS, Linux, Android, iOS (New York Post)
Surfshark $1.99 Unlimited devices, CleanWeb ad blocker, MultiHop Windows, macOS, Linux, Android, iOS (New York Post)
Private Internet Access (PIA) $2.03 Vast server network, built-in MACE ad/malware blocker Windows, macOS, Linux, Android, iOS (New York Post)
ProtonVPN $4.99 Zero-logs, Secure Core servers, free tier available Windows, macOS, Linux, Android, iOS (New York Post)
Hotspot Shield $6.66 Catapult Hydra protocol for faster speeds, free tier Windows, macOS, Linux, Android, iOS (New York Post)
  • Why Use a VPN?
    • Encrypts your traffic on public Wi-Fi.
    • Masks your IP address so websites and hackers can’t track you.
    • Resolves geo-blocking issues when accessing company networks abroad. (New York Post, Wikipedia)
  • How to Set Up a VPN
    1. Sign up for a VPN service of your choice.
    2. Download and install the app on both host and client devices.
    3. Log in with your credentials.
    4. Connect to a server—ideally one closest to your physical location for best speed.
    5. Once connected, launch your remote desktop software as usual. (New York Post, NinjaOne)

Using a VPN protects every bit of data sent between your devices—passwords, financial info, and corporate files—making it a must-have for any serious remote worker.


H2: Endpoint Security Remote Work

Even with encryption and 2FA, your endpoints (phones, laptops, desktops) can be vulnerable. Here’s how to lock them down:

  • Install Reputable Antivirus/EDR
    • Solutions like Bitdefender, CrowdStrike, or SentinelOne detect malware and zero-day exploits.
    • Enable real-time scanning and auto-updates for maximum protection. (New York Post)
  • Enable Built-In Firewalls
    • Windows Firewall or macOS Firewall blocks unauthorized inbound connections.
    • Restrict applications from listening on unnecessary ports. (Wikipedia)
  • Apply Multi-Layered Authentication
    • Besides 2FA, consider hardware tokens or biometric authentication (fingerprint or face ID).
    • This is especially critical if you’re using Microsoft Remote Desktop via Azure AD. (Wikipedia)
  • Enforce Regular OS Patching
    • Set your devices to install updates automatically.
    • Patch vulnerabilities like PrintNightmare, BlueKeep, and any zero-day advisories promptly. (Wikipedia)
  • Educate Your Team or Family
    • Teach best practices for password hygiene—unique, complex passwords changed regularly.
    • Warn about phishing emails that might install remote access malware (e.g., Remote Utilities scams). (Lifewire, Wikipedia)

Securing every endpoint ensures that even if someone gains network access, they can’t easily compromise your devices or data.


H2: Remote Work Tools 2025: Beyond Remote Access

Remote work isn’t just about controlling your devices; it’s the entire ecosystem that keeps you productive:

  • Collaboration Platforms
    • Slack or Microsoft Teams for team messaging, file sharing, and video calls. (Wikipedia)
    • Use Google Workspace or Microsoft 365 for cloud-based document editing and real-time collaboration. (Wikipedia)
  • Project Management
    • Trello or Asana for task tracking with Kanban boards.
    • Jira for software development teams needing advanced ticketing. (The Digital Verdict)
  • Cloud Storage & Synchronization
    • Dropbox or Google Drive to ensure all team members have the latest files.
    • Leverage OneDrive integrated with Windows for seamless file access. (Wikipedia)
  • Time Tracking & Productivity
    • Toggl for tracking billable hours.
    • RescueTime for analytics on app usage and focus times. (New York Post)
  • Password Management
    • LastPass, 1Password, or Bitwarden for securely storing and sharing credentials. (New York Post)
  • Virtual Meeting Tools

When you combine these tools with remote access apps, you build a robust, end-to-end workflow that keeps you connected, organized, and secure—no matter where you are.


H2: Comparison Table: Top Remote Access Solutions

To make choosing easier, here’s a quick comparison of key features and pricing for the leading remote access solutions in 2025:

Feature / Tool TeamViewer AnyDesk Chrome Remote Desktop RustDesk Microsoft RDP
Platforms Windows, macOS, Linux, Android, iOS (Wikipedia, The Digital Verdict) Windows, macOS, Linux, Android, iOS (Wikipedia, NinjaOne) Windows, macOS, Linux, Android, iOS (Wikipedia) Windows, macOS, Linux, Android, iOS (Wikipedia, The Digital Verdict) Windows Pro/Enterprise; macOS client available (Wikipedia, New York Post)
Free Version For personal use only For personal use only Free Free Built into Windows Pro/Enterprise
Unattended Access Yes (paid plans) Yes (free + paid options) Yes (Google account + PIN) Yes (set password) Yes (if configured in system settings)
File Transfer Yes Yes No native (use Google Drive) Yes Yes (via RDP clipboard/file redirection)
Security AES-256, 2FA AES-256, 2FA E2EE via Google account AES-256, self-hosting option RDP encryption; Azure AD integration
Pricing (Per Month) $49+ for Business plans $10.99+ for Business plans Free Free (self-hosted) Windows OS license required; Azure costs may apply
Mobile App Yes Yes Yes Yes Yes
Ease of Setup Moderate Easy Very easy Moderate (self-hosting more complex) Moderate (port forwarding, firewall rules)

Note: Pricing and feature sets may vary by region and promotional offers. (The Digital Verdict, New York Post)


H2: Use Keywords to Drive Traffic

When crafting content, integrating keywords is essential for monetization. Here are some effective keywords and how to weave them naturally:

  • “Remote desktop software”:
    • Example: “Choosing the right remote desktop software ensures you can work uninterrupted from any location.”
    • Why it works: CPC often ranges from $5–$20, targeting IT managers and tech-savvy professionals. (The Digital Verdict)
  • “Secure remote access”:
    • Example: “Implementing secure remote access prevents unauthorized logins and keeps your data safe.”
    • Why it works: Security keywords typically yield high CPC since businesses prioritize cybersecurity. (New York Post)
  • “Access computer remotely”:
    • Example: “Here’s how you access computer remotely without worrying about data breaches.”
    • Why it works: Appeals to professionals needing quick solutions, with CPC around $8–$15. (NinjaOne)
  • “Remote access apps for Android”:
    • Example: “Take advantage of the best remote access apps for Android to stay connected on the go.”
    • Why it works: Mobile-centric keywords have high CPC because advertisers target app developers and enterprise users. (Lifewire)
  • “Remote work tools 2025”:
    • Example: “These remote work tools 2025 will transform how teams collaborate and stay productive.”
    • Why it works: Timely, forward-focused keywords rank well in year-based searches, attracting B2B buyers. (Wikipedia)
  • “VPN for remote access”:
    • Example: “Pairing a robust VPN for remote access with your remote desktop software is non-negotiable.”
    • Why it works: VPN services often pay $10–$30 per click due to demand for privacy tools. (New York Post)

By strategically using these keywords as H2 headings and within the body, you boost your article’s SEO potential and ad revenue.


H2: Troubleshooting Common Remote Access Issues

Even with the best tools, issues can arise. Below are frequent problems and actionable fixes:

  1. Connection Timed Out
    • Cause: Network latency or firewall blocking.
    • Solution:
      • Check that both devices have stable internet.
      • Ensure your router’s firewall isn’t blocking port 3389 (RDP) or specific TeamViewer/AnyDesk ports.
      • For Chrome Remote Desktop, confirm that you’re signed into the same Google account on both ends. (Wikipedia, Wikipedia)
  2. Slow Performance or Lag
    • Cause: High-resolution settings or limited bandwidth.
    • Solution:
      • Lower the resolution and color depth in remote desktop settings.
      • Use a VPN server near your physical location to reduce latency.
      • Pause large file transfers during screen sharing. (NinjaOne, New York Post)
  3. Authentication Failed
    • Cause: Incorrect password, 2FA not set up, or expired license.
    • Solution:
      • Double-check credentials and update any expired passwords.
      • If using 2FA, ensure your authenticator app is synced.
      • For TeamViewer/AnyDesk, confirm your subscription is active if you rely on a business plan. (Wikipedia, Wikipedia)
  4. File Transfer Not Working
    • Cause: Permissions issue or outdated client version.
    • Solution:
      • Grant full disk access to the remote access app in system settings.
      • Update both host and client to the latest version.
      • On Windows, enable clipboard redirection under RDP settings. (Wikipedia, The Digital Verdict)
  5. Mobile App Crashes
    • Cause: OS incompatibility or insufficient resources.
    • Solution:
      • Keep your mobile OS updated (Android 12 or iOS 16+ recommended).
      • Close background apps to free memory.
      • Reinstall the remote access app if crashes persist. (Lifewire, New York Post)

By diagnosing these issues quickly, you can maintain a seamless remote work experience without extended downtime.


H2: Tips for Maximizing Remote Access Performance

Using remote work tools 2025 effectively means optimizing performance:

  • Use Wired Connections When Possible
    • Ethernet is more stable than Wi-Fi, minimizing packet loss.
    • If you must use Wi-Fi, position yourself near the router or use a mesh network. (Wikipedia, NinjaOne)
  • Adjust Bandwidth Settings
    • In TeamViewer/AnyDesk settings, choose “Optimize speed” or “Reduce quality” if your network is slow.
    • On RDP, lower color depth to 16-bit instead of 24/32-bit. (Wikipedia, Wikipedia)
  • Disable Unnecessary Features
    • Turn off remote audio if you don’t need sound.
    • Disable background sync on cloud drives during critical sessions. (Wikipedia, The Digital Verdict)
  • Keep Devices Cool
    • Overheating slows processors; use a laptop cooling pad if needed.
    • Ensure proper ventilation for desktop PCs. (New York Post, Wikipedia)
  • Use Wideband or 5G Connections for Mobility
    • If you work on the go, switch to a 5G hotspot for faster, more reliable mobile internet.
    • Many carriers now include unlimited 5G data plans that support remote desktop sessions. (New York Post, Wikipedia)

Implementing these optimizations ensures that you spend less time troubleshooting and more time getting work done.


H2: Comparison of Free vs. Paid Remote Access Plans

Feature Free Version Paid Version
Usage Restrictions Limited to personal/non-commercial use Commercial use allowed—quotas and device limits increase
File Transfer Speed Throttled after certain data thresholds Full speed and prioritized server connections
Unattended Access Basic (requires manual accept for each session) Advanced (set passwords, grant persistent access)
Support & SLAs Community forums and documentation 24/7 dedicated support, guaranteed response times
Advanced Features Minimal (screen sharing, basic chat) Remote printing, session recording, API integrations
Security Controls Standard encryption (no whitelisting/IP filtering) Enterprise-grade controls like whitelisting, 2FA enforcement
User Seats 1–2 devices Scalable seats (10, 25, 50+, depending on plan)
  • When to Choose Free
    • You’re an individual or student needing occasional remote access.
    • Budget constraints make paid plans unfeasible.
    • You can manually grant access every session.
  • When to Upgrade to Paid
    • You run a small or large business requiring multiple concurrent connections.
    • You need features like remote printing, API access, and priority support.
    • Your team demands higher data transfer limits and more robust security controls.

Understanding these differences helps you pick a plan that aligns with your requirements and budget.


H2: Best Practices for Managing Remote Devices

Securing remote work involves more than just establishing a connection. Follow these best practices to keep your digital life organized, safe, and efficient:

  • Maintain an Inventory of Devices
    • Track all computers and phones that have remote access enabled.
    • Label each device with a clear, unique name (e.g., “Office-Laptop-John” or “Home-PC-Sarah”).
    • Update your inventory whenever you add or retire a device. (Wikipedia, Wikipedia)
  • Regularly Rotate Passwords and Access Tokens
    • Change unattended access passwords every 30–60 days.
    • Revoke old tokens and reissue new ones in Time-based One-Time Password (TOTP) apps. (Wikipedia, New York Post)
  • Segment Your Network
    • Place remote-access-enabled devices on a separate VLAN or network segment.
    • Restrict access to critical infrastructure (servers, databases) from your remote session. (Wikipedia, The Digital Verdict)
  • Schedule Periodic Security Audits
    • Quarterly, review logs for unusual login attempts or failed authentications.
    • Audit user accounts to ensure only authorized personnel have access. (Wikipedia, New York Post)
  • Use Role-Based Access Control (RBAC)
    • Assign permissions based on roles (Admin, Support, Viewer) to reduce risk.
    • Ensure junior staff or external contractors only get limited, time-bound access. (Wikipedia, The Digital Verdict)
  • Enable Automatic Wake-On-LAN (WOL)
    • If your hardware supports it, enable WOL so you don’t leave devices powered on 24/7.
    • Combine WOL with scheduled maintenance windows to apply updates when devices wake. (Wikipedia, Wikipedia)

Adopting these practices reduces security risks and ensures that managing multiple remote devices remains streamlined and under control.


H2: DIY Self-Hosted Remote Access with RustDesk

If you prefer not to rely on third-party servers, RustDesk offers an open-source, self-hosted approach. Here’s how to set it up:

  1. Provision a VPS (Virtual Private Server)
    • Choose a Linux-based VPS from providers like DigitalOcean, Linode, or AWS Lightsail.
    • Minimum specs: 1 vCPU, 1GB RAM, 20GB SSD—enough for small teams. (Wikipedia, New York Post)
  2. Install RustDesk Server Components
    sudo apt update
    sudo apt install docker.io docker-compose -y
    mkdir ~/rustdesk-server && cd ~/rustdesk-server
    
    # docker-compose.yml
    version: '3'
    services:
      hbbs:
        image: rustdesk/rustdesk-server:latest
        ports:
          - "21115:21115"
          - "21116:21116"
        restart: always
      hbbr:
        image: rustdesk/rustdesk-server:latest
        command: hbbr
        ports:
          - "21117:21117"
          - "21118:21118"
        restart: always
    
    docker-compose up -d
    ``` :contentReference[oaicite:80]{index=80}
    
    
  3. Configure DNS and SSL
    • Point a subdomain (e.g., remote.yourdomain.com) to your VPS IP.
    • Use Let’s Encrypt with Certbot to obtain SSL certificates for secure connections. (Wikipedia, Wikipedia)
  4. Connect RustDesk Clients to Your Server
    • Open RustDesk on your devices.
    • Go to “Settings” > “Advanced” and set your Rendezvous server to remote.yourdomain.com:21115 and Relay server to remote.yourdomain.com:21117.
    • Once saved, your devices will communicate through your VPS instead of public servers. (Wikipedia, The Digital Verdict)
  5. Monitor and Scale
    • Use Docker logs to monitor connection statuses (docker logs hbbs).
    • If performance dips, upgrade your VPS resources or distribute the load across multiple servers. (New York Post, Wikipedia)

By self-hosting, you maintain full control over data routing, ensuring maximum privacy and reducing reliance on third-party infrastructure.


H2: Frequently Asked Questions

1. Can I access my work computer from my phone?

  • Absolutely. You can use apps like TeamViewer Mobile, AnyDesk Mobile, or Microsoft Remote Desktop on Android or iOS.
  • Ensure your work computer is left on, has the remote access software installed, and you have the correct credentials. (Wikipedia, Wikipedia)

2. Is remote access safe over public Wi-Fi?

  • It can be risky if you don’t use a VPN. Public Wi-Fi often lacks encryption, making it easy for hackers to intercept data.
  • Always connect via a reputable VPN (e.g., NordVPN or ExpressVPN) before starting a remote desktop session. (New York Post, Wikipedia)

3. What’s the difference between TeamViewer vs. AnyDesk?

  • TeamViewer offers a more extensive feature set—remote printing, session recording, and integrated whiteboard.
  • AnyDesk focuses on speed (DeskRT codec) and has a smaller footprint. Both support cross-platform connections. (The Digital Verdict, Wikipedia)

4. Can I transfer files while in a remote session?

  • Yes. Most remote access tools feature built-in file transfer functionality.
  • In TeamViewer or AnyDesk, use the “File Transfer” tab. In RDP, use clipboard/file redirection. (Wikipedia, Wikipedia)

5. How do I troubleshoot a “Connection Timed Out” error?

  • Check for firewall restrictions (port 3389 for RDP, specific TeamViewer/AnyDesk ports).
  • Ensure both devices have stable internet.
  • Verify your remote access tool is updated to the latest version. (Wikipedia, NinjaOne)

6. Is it possible to access a computer that’s behind a NAT or firewall?

  • Yes. Tools like AnyDesk and RustDesk can work behind NAT without port forwarding.
  • For RDP, you may need to configure port forwarding on your router or use a VPN to bypass NAT restrictions. (Wikipedia, Wikipedia)

7. Do I need multiple licenses if I want to control multiple computers?

  • For TeamViewer and AnyDesk, yes—each concurrent connection typically requires a separate license or seat.
  • Some solutions offer unlimited simultaneous sessions for enterprise plans, so check pricing details. (The Digital Verdict, Wikipedia)

8. Can remote access software wake a sleeping computer?

  • If your device supports Wake-on-LAN (WOL), remote tools like TeamViewer can send a wake signal.
  • Ensure WOL is enabled in your device’s BIOS/UEFI and connected via Ethernet. (Wikipedia, Wikipedia)

9. How do I keep my remote sessions secure?

  • Always enable two-factor authentication (2FA).
  • Use end-to-end encryption and update your software promptly.
  • Restrict access by IP whitelisting and enforce strong, unique passwords. (Wikipedia, New York Post)

10. What is the most cost-effective way to set up remote access?

  • For personal use, Chrome Remote Desktop or the free tier of AnyDesk works excellently.
  • If you’re tech-savvy, self-hosting RustDesk on a low-cost VPS can be nearly free, aside from nominal server costs. (Wikipedia, The Digital Verdict)

Conclusion

By now, you have a comprehensive roadmap on how to remotely access and manage your phone or computer from anywhere in the world. From selecting the best remote desktop software 2025 to implementing secure remote access solutions and endpoint security remote work, each step in this guide equips you with actionable insights.

Remember to:

  • Research and choose the tool that best fits your needs—whether that’s TeamViewer, AnyDesk, Chrome Remote Desktop, or RustDesk.
  • Prioritize security through VPNs, 2FA, and encryption.
  • Troubleshoot common issues quickly to minimize downtime.
  • Leverage remote access apps for Android and iOS for ultimate flexibility.

Use the comparison tables and step-by-step guides to streamline setup, and keep this post as your go-to reference for maintaining a robust, secure, and high-performing remote work environment in 2025 and beyond.

Now, it’s your turn: pick a tool, apply these best practices, and embrace the freedom to work from anywhere without compromise. Your productivity and peace of mind are just a remote click away.

Happy remote working!

In an era where companies and governments track every click, swipe, and message, you need more than simple “privacy settings” to keep your personal data safe. You deserve to know how to completely anonymize your phone and computer usage. In this comprehensive guide, you’ll discover the top privacy tools—ranging from VPNs and browsers to secure messaging apps and data removal services—to take back control of your digital life.

anonymize


We’ll explain why each tool matters, how to set it up, and when to use it. You’ll find actionable tips, comparison tables, and plenty of embedded resources. Wherever possible, we’ve linked you directly to trustworthy sources so you can dig deeper. By the end of this post, you’ll have a step-by-step plan to fortify your privacy and keep snoopers at bay.

Use this post as your roadmap. Bookmark it. Share it. But most importantly, put these tools to work today.

Understanding Digital Privacy: Why You Need to Anonymize Your Devices

Every app on your phone, every website you visit, and every message you send leaks data. Advertisers compile profiles to target you. Hackers exploit gaps to steal from you. Even your own government may monitor your browsing.

Consider these realities:

  • Your internet service provider (ISP) can see every unencrypted site you visit.
  • Social networks collect data on your interests and location, then sell it to third parties.
  • Many free apps embed trackers that follow you across the web.
  • Stolen or leaked credentials expose your accounts, leading to identity theft.

When you don’t actively guard against surveillance, you trade your personal information for “free” services. But you don’t have to accept this trade. With the right tools, you can:

  • Hide your IP address and browsing history.
  • Encrypt files and communications so no one else can read them.
  • Block trackers, ads, and malicious scripts.
  • Remove your data from broker websites that profit off your identity.

This guide focuses on practicable, actionable insight—tools and steps you can implement right now. We’ll break down each category, explain why it matters, and give you clear, step-by-step instructions.

Let’s start with the foundation: masking your IP address via VPNs.

Best VPN for Privacy in 2025

Why You Need a VPN

A Virtual Private Network (VPN) creates an encrypted tunnel between your device and the VPN server, hiding your real IP address from websites, your ISP, and potential snoopers. When you connect to a VPN:

  • You browse under the VPN server’s IP address—no one can link your online activity back to your home.
  • All data between your device and the VPN server is encrypted, so your ISP can’t see which pages you visit.
  • You bypass regional restrictions and censorship by routing traffic through servers in other countries.

Without a VPN, you expose your true location and identity every time you connect to the internet (unless you use tools like Tor, which we’ll cover later). A VPN should be your first line of defense.

How to Choose the Best VPN for Privacy

When evaluating a VPN, look for:

  • No-logs policy – The provider doesn’t store your browsing history or connection data.
  • Jurisdiction – Companies based in privacy-friendly countries (e.g., Switzerland) face fewer legal pressures to hand over data.
  • Military-grade encryption – AES-256 or equivalent for strong data protection.
  • Dedicated apps – User-friendly clients for Android, iOS, Windows, macOS, and Linux.
  • Kill switch – Automatically blocks internet access if the VPN connection drops, preventing accidental leaks.
  • Speed & reliability – Fast, stable servers in locations you need.
  • Transparent audits – Third-party audits prove the no-logs claims.
  • Extra privacy features – Things like Multi-Hop, RAM-only servers, or split tunneling.

Top Contenders in 2025

Below are four top VPNs that meet these criteria. We’ve gathered details from official websites and independent sources to help you decide.

VPN Provider Jurisdiction No-Logs Audit Encryption Kill Switch Multi-Hop Platforms Pricing (per month)
Proton VPN Switzerland Audited by Sia Partners (2024) AES-256 Yes Yes Windows, macOS, Linux, Android, iOS From $5 – $10 (returns to CHF)
ExpressVPN British Virgin Is. Audited by PwC (2023) AES-256 Yes No Win, macOS, Linux, Android, iOS, routers From $6.67 – $12.95
NordVPN Panama Audited by VerSprite (2024) AES-256 Yes Yes Win, macOS, Linux, Android, iOS From $3.29 – $11.99
Mullvad Sweden Privately audited (2024) AES-256, ChaCha20 Yes Yes Win, macOS, Linux, Android, iOS Flat €5 (~$5.50)
  • Proton VPN – Headquartered in privacy-friendly Switzerland, Proton VPN implements a strict no-logs policy and stores no user data. In 2024, independent auditors confirmed their servers run on RAM only, wiping all data on every reboot. You’ll find advanced features like Secure Core (Multi-Hop through Switzerland and Iceland) and Tor over VPN. Learn more on their Proton VPN site.
  • ExpressVPN – Based in the British Virgin Islands, ExpressVPN boasts a no-logs policy audited by PwC in 2023. All servers run in RAM mode; they can’t store data on disk. You get fast speeds ideal for streaming, robust apps for every platform, and a Threat Manager to block trackers. Check details on ExpressVPN.
  • NordVPN – Panama-based NordVPN passed a verified no-logs audit by VerSprite in 2024. It offers specialty servers (Obfuscated, Onion over VPN, Double VPN), CyberSec to block ads and malware, and reliable apps. Visit NordVPN for features and pricing.
  • Mullvad – Operating from Sweden, Mullvad uses an anonymous account number system—no email required. Their 2024 audit confirmed a strict no-logs stance. At a flat €5/month, you can connect up to five devices. Advanced features include WireGuard support and port forwarding. More at Mullvad.

Actionable Tip: Sign up for a VPN plan that fits your budget, but don’t use a free VPN. Free services often monetize by selling your data or injecting ads, which defeats the whole purpose.

Setting Up Your VPN

  1. Choose a plan – Go to your preferred VPN’s website. Pick a monthly or annual subscription. Longer commitments usually reduce cost.
  2. Download the app – Install the VPN client on your phone (Android, iOS) and computer (Windows, macOS, Linux).
  3. Enable kill switch & leak protection – Within the settings, turn on the kill switch and DNS leak protection.
  4. Connect to a server – Select a nearby server for speed, or choose a privacy-focused location (e.g., Switzerland, Iceland, or Panama).
  5. Test for leaks – Visit ipleak.net with the VPN on to confirm your real IP isn’t exposed.
  6. Auto-launch on startup – If you’re serious about privacy, configure the app to start automatically when your device boots.

Remember: Use the VPN any time you browse web pages, use public Wi-Fi, or send emails. Constant usage protects against unexpected tracking.

Top Anonymous Browsing Tools

Even with a VPN, your browser can reveal identifying details through cookies, browser fingerprinting, and tracking scripts. Here’s how to mask your activity:

  • Tor Browser
    • Routes traffic through the Tor network (three random nodes) so no single entity can link you to your destination.
    • Encrypts data in multiple layers—hence “The Onion Router.”
    • Blocks browser fingerprinting and resists most surveillance methods.
    • Slower speeds due to multi-hop routing. Use it for highly sensitive tasks (e.g., whistleblowing, bypassing censorship).
    • Download from Tor Project.
  • Brave Browser
    • Built on Chromium, it blocks ads, trackers, and third-party cookies by default.
    • Offers built-in Tor tabs for private windows (routes selected tabs through Tor).
    • Shields protect against fingerprinting.
    • Earns BAT rewards for opting into privacy-respecting ads (optional).
    • Grab it at Brave.
  • DuckDuckGo Privacy Browser
    • Automatically enforces HTTPS encryption where available.
    • Blocks hidden trackers before they load.
    • “Fire Button” clears all tabs and data in one click.
    • Global Privacy Control (GPC) enabled by default, signaling websites not to sell your data.
    • Get the mobile app on Android and iOS from DuckDuckGo.
      According to WIRED, DuckDuckGo’s GPC helps you opt out under GDPR and CCPA. (WIRED)

Privacy-Focused Browsers vs. Standard Browsers

Feature Standard Browser Brave Browser DuckDuckGo Browser Tor Browser
Blocks 3rd-party trackers No Yes (default) Yes (default) Yes
HTTPS Everywhere Optional extension Built-in Built-in Built-in
Fingerprinting protection Low High High Very High
Tor integration No Private windows No Core functionality
Data retention (logs) Varies by provider Chromium-based (may collect minimal data) Doesn’t store user data No logs, ephemeral
Speed Fast Fast-moderate Fast-moderate Slow

Privacy-Focused Browsers You Should Use

Besides Tor, Brave, and DuckDuckGo, consider these browsers to minimize tracking:

  • Firefox with Privacy Add-Ons
    • Use Firefox and install extensions like uBlock Origin (blocks ads), Privacy Badger (blocks trackers), HTTPS Everywhere (forces encryption), and Decentraleyes (locally serves common libraries).
    • Go to Settings > Privacy & Security and set Enhanced Tracking Protection to “Strict.”
    • Regularly clear cookies and site-data.
  • Ungoogled Chromium
    • A Chromium fork without Google integration.
    • Removes all telemetry, runtime requests to Google servers, and built-in Google services.
    • Download from Ungoogled Chromium.
  • Iridium Browser
    • Focuses on privacy tweaks within Chromium’s codebase.
    • Disables features like DNS prefetching and WebRTC by default (prevents IP leaks).
    • Find it at Iridium.

Actionable Tip: Whatever browser you choose, enable Do Not Track, disable autofill, and review site permissions (camera, microphone, location).

Best Data Encryption Tools for Phone and Computer

Encrypting your files and messages ensures that even if someone steals or intercepts them, they can’t read a thing. Encryption transforms readable data (plaintext) into scrambled data (ciphertext) that only you can unlock with a password or key.

Full Disk Encryption vs. File/Folder Encryption

  • Full Disk Encryption – Encrypts everything on your drive, including operating system files and temporary data. Examples:
    • Windows BitLocker (built into Windows Pro/Enterprise).
    • macOS FileVault (built into macOS).
    • Linux LUKS (Linux Unified Key Setup).
  • File/Folder Encryption – Encrypts only specific files or folders. Portable and often easier for casual users. Examples:
    • VeraCrypt – Creates virtual encrypted disks (volumes) or encrypts entire partitions.
    • Cryptomator – Encrypts cloud storage folders (Dropbox, Google Drive) locally before syncing.
    • AxCrypt – Integrates with Windows Explorer to encrypt individual files on the fly.

Top Data Encryption Tools

  1. VeraCrypt (Free, open-source)
    • Uses AES, Twofish, and Camellia ciphers.
    • Creates an encrypted container file or encrypts full partitions.
    • Offers plausible deniability via hidden volumes.
    • Supports Windows, macOS, Linux, Raspberry Pi.
    • Download at VeraCrypt.
  2. Cryptomator (Free for personal use; paid business plans)
    • Encrypts individual folders before uploading to cloud services.
    • AES-256 encryption, zero-knowledge design (no one but you has the key).
    • Apps available for Windows, macOS, Linux, Android, iOS.
    • Learn more at Cryptomator.
  3. AxCrypt (Freemium)
    • Integrates directly into Windows Explorer.
    • Encrypts files using AES-128 or AES-256.
    • Offers secure sharing and password management features.
    • Visit AxCrypt.
  4. BitLocker (Windows Pro/Enterprise)
    • Built into Windows—no extra install needed.
    • Uses AES-128 or AES-256 with XTS mode.
    • Store recovery key in your Microsoft account or on a USB drive.
    • Access details on Microsoft BitLocker.
  5. FileVault 2 (macOS)
    • Built into macOS; activates with a few clicks in System Preferences > Security & Privacy.
    • Uses XTS-AES-128 encryption.
    • Stores recovery key in your iCloud account or offline.
    • More at Apple FileVault.
  6. LUKS / dm-crypt (Linux)
    • Standard for full disk encryption on Linux.
    • Use commands like cryptsetup luksFormat /dev/sdX to encrypt partitions.
    • Supports multiple key slots and passphrase changes.
    • Read the Linux documentation at LUKS documentation.

Pro Tip: Use full disk encryption on any device that stores sensitive data. If you ever lose your phone or laptop, your data stays safe.

Disk Encryption Software: Tools to Secure Your Drives

Tool Type Platforms Encryption Strength Ease of Use Pricing
VeraCrypt File/Partition Win, macOS, Linux AES-256, Twofish Moderate to Advanced Free
BitLocker Full Disk (OS-level) Windows Pro/Enterprise AES-128/256 Easy (built-in) Included with Windows
FileVault 2 Full Disk (OS-level) macOS AES-128 Easy (built-in) Included with macOS
LUKS Full Disk (OS-level) Linux AES-256 Advanced (command line) Free
Cryptomator Folder/Cloud Vault Win, macOS, Linux, iOS, Android AES-256 Easy (GUI-based) Free (personal); Paid (business)
AxCrypt File Windows, Android, iOS AES-128/256 Very Easy Free (basic); Paid (premium)

Secure Messaging Apps for Anonymity

Modern messaging apps harvest metadata – who you text, when, for how long, even if the contents are encrypted. To stay truly anonymous, choose apps that:

  • Offer end-to-end encryption by default.
  • Collect minimal metadata (or none).
  • Don’t require a phone number or email to sign up.
  • Store nothing on their servers once messages are delivered.

Recommended Secure Messaging Apps

  1. Signal (Free, open-source)
    • Runs on a minimal-data model: only stores the date you joined.
    • Uses the Signal Protocol for end-to-end encryption.
    • Disappearing messages, screen security, and passphrase unlock options.
    • Available on Android, iOS, Windows, macOS, Linux.
    • See Signal.
  2. Threema (Paid, one-time fee)
    • Doesn’t require phone number or email; you get a random Threema ID for true anonymity.
    • Based in Switzerland, protected by strict local privacy laws.
    • Zero metadata collection—no logs of who you message or when.
    • End-to-end encryption for text, voice calls, files, and group chats.
    • Learn more at Threema. (GIS user technology news)
  3. Wire (Free for personal; paid business plans)
    • Designed for both individual and enterprise use, with GDPR compliance.
    • Offers ephemeral messaging, timed messages, and secure file sharing.
    • Requires minimal user data (email only).
    • Encryption covers messages, calls, and files.
    • Available on Android, iOS, Windows, macOS, Linux, and web.
    • Explore at Wire.
  4. Session (Free, open-source)
    • Built on a decentralized network of Service Nodes—no central servers to seize metadata.
    • Doesn’t require phone number or email.
    • Uses onion routing to hide IP addresses.
    • Perfect for truly anonymous, censorship-resistant messaging.
    • Get Session at Session.
  5. Telegram (Secret Chats) (Free)
    • Cloud-based but offers optional “Secret Chats” with end-to-end encryption.
    • You must manually start a Secret Chat for encryption to apply.
    • Offers self-destructing messages.
    • Limited metadata storage (device IDs, phone numbers).
    • Visit Telegram.

Actionable Tip: For everyday private conversations, use Signal. If you need total anonymity without a phone number, turn to Threema or Session. Always verify safety numbers when establishing a new contact.

Privacy-Focused Operating Systems

Standard operating systems (Windows, macOS, mainstream Android) collect telemetry, phoning home to vendors. For the highest degree of anonymity, use a privacy-focused OS:

  • Tails OS (Free, live-boot Linux)
    • Boots from a USB stick or DVD—leaves no trace on your computer’s hard drive.
    • Routes all traffic through Tor.
    • Includes cryptographic tools, PGP, secure file-sharing options.
    • Perfect for one-off secure sessions (e.g., handling sensitive documents).
    • Download at Tails.
  • Qubes OS (Free, Xen-based hypervisor)
    • Uses “security by compartmentalization” – each app runs in its own virtual machine (VM).
    • Severely limits the damage if one component is compromised.
    • Offers Whonix-based VMs for Tor integration.
    • Steep learning curve but unmatched isolation for power users.
    • Get Qubes at Qubes OS. (marielandryceo.com)
  • Whonix (Free, Debian-based, VM-centric)
    • Divided into two VMs: Gateway (routes traffic through Tor) and Workstation (isolated environment).
    • All internet connections pass through Tor—no leaks.
    • Requires virtualization (VirtualBox, QEMU).
    • Download instructions at Whonix.
  • GrapheneOS (Free, Android-based)
    • Focuses on privacy and security for Android phones (Pixel devices).
    • Hardened kernel, strong sandboxing, and no Google Play Services by default.
    • You install sandboxed Google apps if needed, but they run isolated.
    • Ideal for secure mobile browsing and messaging.
    • Learn more at GrapheneOS.
  • CalyxOS (Free, Android-based)
    • Android fork that replaces Google’s core services with MicroG (open-source alternative).
    • Pre-installed with Privacy Guard and other privacy tools.
    • Works on a growing list of devices.
    • Visit CalyxOS.

Pro Tip: Before switching operating systems, back up all your data. Learn basic Linux commands if you choose Tails, Qubes, or Whonix. For mobile, GrapheneOS offers one of the best balances between daily usability and privacy.

Anonymous Email Services for Maximum Privacy

Email is a goldmine for trackers, targeted ads, and data breaches. If you need a private, anonymous email, consider:

  • ProtonMail (Free – Paid Plans)
    • Based in Switzerland; protected by strict Swiss privacy laws.
    • End-to-end encryption of emails between ProtonMail users.
    • Zero-access encryption—ProtonMail cannot read your emails.
    • Supports self-destructing messages and “Send Zero” to external recipients (they get a link to decrypt).
    • Open-source code audited by security experts.
    • Sign up at ProtonMail.
  • Tuta Mail (Free – Paid Plans)
    • Also offers end-to-end encryption by default, including email headers and subject lines.
    • Doesn’t require personal info or phone number for signup.
    • Built-in tracking blockers for emails, calendars, and contacts.
    • 1 GB free storage; paid plans start at €3/month.
    • Check out Tuta. (Geekflare)
  • CTemplar (Paid)
    • Based in Iceland; encrypts subject, body, attachments, and metadata.
    • Zero-knowledge setup—no logs, no trackers.
    • Offers self-destructing emails and PGP support.
    • Plans start at $5/month.
    • Learn more at CTemplar.
  • Mailfence (Free – Paid Plans)
    • Belgium-based, end-to-end encrypted email suite.
    • Includes calendars, contacts, and documents.
    • No third-party ad integration—your data stays private.
    • Free accounts with 500 MB, paid plans from $2.50 – $24.95/month.
    • Visit Mailfence.
  • ProtonMail Bridge (For Desktop Clients)
    • If you prefer using Outlook or Thunderbird, ProtonMail Bridge encrypts and decrypts emails locally.
    • Available on Windows, macOS, and Linux.
    • Details at ProtonMail’s official site.

Actionable Tip: Always enable two-factor authentication (2FA) on your email accounts. Even with end-to-end encryption, someone could try brute-forcing your password.

Data Removal Services to Protect Your Privacy

Even if you lock down your browsers, VPNs, and messaging, your data often lurks on data broker websites—spreading your address, phone number, and even your family tree. Data removal services scan dozens (sometimes hundreds) of broker sites and file removal requests on your behalf.

Why You Need a Data Removal Service

  • Data brokers sell your personal info to marketers, scammers, and identity thieves.
  • Manually checking each broker (Spokeo, Whitepages, PeopleFinder) is time-consuming and frustrating.
  • Most services offer automated scheduling—monthly or quarterly scans to keep your info offline.
  • Some even help remove your info from social media leak archives.

Top Data Removal Services in 2025

Service Subscription Cost Coverage (# of Sites) Key Features Trial Period/Free Scan
Incogni From $12.98/month 50–200+ Automated removal requests, monthly scans, US/CA focus Free initial consultation
DeleteMe From $10/month 750+ Human-curated reports, monthly updates, family accounts Free phone/email consultation
Kanary From $9.95/month 300+ Transparent data policy, easy interface, US/UK focus 7-day free trial
Optery From $7.50/month 150+ Flexible pricing tiers, ideal for small businesses Free scan
PrivacyDuck From $15/month 200+ Focus on deep web and criminal records removal Free site audit

Incogni got a top score of 9.2/10 from Security.org (Jan 31, 2025) for its fast, easy UI and affordable pricing. (Security.org)

  • Incogni – Swiss-based automation with a US-centric removal focus. Pricing starts at $12.98/month. They begin working immediately to remove your data from the biggest broker sites.
  • DeleteMe – For under $10/month, you get thorough human-driven removal covering over 750 sites. They send quarterly reports so you know exactly where your data was removed.
  • Kanary – Offers solid removal services for under $10/month with a focus on transparency and customer service.
  • Optery – Best for smaller budgets at $7.50/month, removing your info from 150+ sites. Good for individuals or startups.
  • PrivacyDuck – Premium service starting at $15/month, focusing on deeper removals (criminal records, financial databases).

Actionable Tip: Start with a free scan or trial to see where your data appears online. Then pick a service based on how many sites they cover and how hands-on you want their help to be.

Additional Privacy Tools and Tips

Beyond VPNs, browsers, encryption tools, messaging apps, and OSs, several other tools and best practices can close remaining gaps:

Privacy-First Password Managers

A strong, unique password for every account is your first defense. Password managers help you generate and store complex passwords so you don’t have to memorize them. Look for:

  • Zero-knowledge encryption (the provider cannot see your data).
  • Support for multi-factor authentication (MFA).
  • Cross-platform apps and browser extensions.

Top Choices:

  • Bitwarden (Free – Paid Plans) – Open-source, audited, stores encrypted vault on your server or theirs.
  • 1Password (Paid) – User-friendly, Travel Mode to hide sensitive vaults when crossing borders.
  • Dashlane (Paid) – Built-in VPN, dark web monitoring, and secure sharing.

Actionable Tip: Enable the built-in password generator to replace weak or reused passwords across all your accounts.

Two-Factor Authentication (2FA) Apps

2FA adds a second layer—typically a time-based one-time password (TOTP)—when you log in. Always avoid SMS-based 2FA if possible (SIM swapping risk). Use:

  • Authy – Backups and multi-device sync.
  • Aegis Authenticator – Open-source, Android-only, supports multiple account profiles.
  • Google Authenticator – Simple, widely supported but no backup feature.

Actionable Tip: Wherever possible, use hardware tokens (YubiKey, Titan Security Key) for the highest security.

Ad-Blockers and Anti-Tracker Extensions

Ad networks track you across the web. Block them at the browser level:

  • uBlock Origin (Free, open-source) – Blocks ads, trackers, and malicious domains.
  • Privacy Badger (Free, EFF) – Learns and blocks unseen trackers automatically.
  • Decentraleyes (Free, open-source) – Locally serves common scripts to prevent CDN tracking.

Pro Tip: Don’t rely on “built-in” ad-blocking—choose robust, regularly updated extensions.

Secure File Sharing & Backup

Even encrypted files need safe transport. Use these tools:

  • OnionShare (Free) – Run a local web server over Tor to share files directly; no intermediaries hold your data.
  • Tresorit (Paid) – End-to-end encrypted cloud storage with zero-knowledge policy.
  • SpiderOak One (Paid) – “No Knowledge” cloud backup and sharing.

Actionable Tip: Never email sensitive attachments. Use encrypted file-sharing services or send over a secure messaging app.

Privacy Pro Subscription Services

DuckDuckGo now offers a Privacy Pro plan (US only) combining:

  • Built-in VPN (no logs).
  • Data broker removal tool (powered by Removaly).
  • Identity-theft insurance.

At $9.99/month or $99.99/year, it’s ideal if you already rely on DuckDuckGo’s search and browser for basic privacy. (WIRED)

Privacy Checklist: Step-by-Step Action Plan

Use this checklist to ensure you implement every tool and practice covered above. Check off each item as you go.

  1. Install & activate a top-tier VPN (e.g., Proton VPN, ExpressVPN).
    • Enable the kill switch and leak protection.anonymize
    • Test for IP/DNS/WebRTC leaks at ipleak.net.
  2. Switch to a privacy-focused browser (e.g., Brave, DuckDuckGo, Tor Browser).
    • Install uBlock Origin and Privacy Badger.
    • Enable HTTPS Everywhere.
    • Clear cookies and site data weekly.
  3. Encrypt your device
    • Turn on BitLocker (Windows) or FileVault (macOS) for full disk encryption.
    • For Linux, configure LUKS/dm-crypt during installation or with cryptsetup.
    • Create a VeraCrypt container for highly sensitive files.
  4. Adopt secure messaging
    • Register on Signal.
    • Create a Threema or Session ID for truly anonymous chats.
    • Enable disappearing messages and screen security.
  5. Use a privacy-focused operating system (optional for advanced users)
    • Download Tails on a USB drive for occasional anonymous sessions.
    • Test Qubes OS or Whonix in a virtual machine for daily compartmentalization.
    • For mobile, install GrapheneOS or CalyxOS on a compatible device.
  6. Set up an anonymous email
    • Create a ProtonMail or Tuta Mail account with a burner phone or anonymous payment (e.g., crypto).
    • Enable 2FA using a secure authenticator app or hardware token.
  7. Remove your data from broker sites
    • Run a free scan with Incogni or DeleteMe.
    • Subscribe to a data removal service—schedule automated scans.
  8. Improve overall privacy hygiene
    • Switch to a zero-knowledge password manager like Bitwarden or 1Password.
    • Enable 2FA on all critical accounts (email, banking, social media).
    • Use ad-blockers (uBlock Origin, Privacy Badger) and anti-fingerprinting extensions.
    • Regularly review app permissions on mobile devices—disable location, camera, or microphone access for unneeded apps.
    • Avoid using public USB charging stations—carry a USB data blocker (“USB condom”).
    • Use secure file-sharing tools (OnionShare, Tresorit) for sensitive documents.

Frequently Asked Questions

1. What’s the difference between a VPN and Tor?
A VPN routes your traffic through a single encrypted server, hiding your IP from websites and encrypting data to your ISP. Tor routes your traffic through at least three volunteer-run nodes (entry, relay, exit), offering stronger anonymity but slower speeds. Use a VPN for daily streaming and browsing; use Tor for highly sensitive tasks (e.g., whistleblowing) or when you need maximum anonymity.

2. Will using a VPN make my internet faster?
No. A VPN adds overhead by encrypting your data and routing it through another server, so you’ll see a slight speed hit. Choose a VPN with nearby servers or a provider known for fast infrastructure (e.g., ExpressVPN, NordVPN). If speed is critical, connect to the closest server, avoid multi-hop setups, or use WireGuard-based servers when available.

3. Can I remain anonymous with my smartphone?
Yes, but it requires extra effort. Start by installing a privacy-focused OS like GrapheneOS or CalyxOS. Avoid Google Play Services and use F-Droid for open-source apps. Install a reputable VPN and a privacy-focused browser. Use Signal or Session for messaging. Disable unnecessary sensors (location, Bluetooth) when not needed. Regularly review app permissions and remove bloatware.

4. Are free VPNs safe to use?
Most free VPNs monetize by selling your data or injecting ads, which defeats the purpose of privacy. Some reputable free options exist (e.g., Proton VPN’s free tier, Windscribe’s limited free plan), but they often restrict speed, bandwidth, or server locations. If you rely on a free VPN, trust it only for basic tasks. For real security, invest in a paid VPN with a strict no-logs policy.

5. How often should I run a data removal scan?
Data brokers constantly gather new information, so run automated scans at least quarterly. Some services (Incogni, DeleteMe) include monthly or bi-monthly scans. If you frequently change addresses or phone numbers, consider monthly checks. Always review the removal reports and ensure your data stays offline.

6. Will encrypted messaging apps protect me from subpoenas?
Encrypted messaging apps like Signal and Threema ensure message contents remain private. However, they may still collect minimal metadata (e.g., date joined, last IP used). If authorities subpoena the company, they might hand over this metadata but not message contents. For maximum protection, choose apps with zero-metadata policies (Threema, Session).

7. Can data removal services remove my social media data?
Most data removal services target data broker websites, not social media platforms. To remove your social media footprint:

  • Manually delete old posts and photos.
  • Adjust privacy settings to restrict data collection (e.g., limit who sees your profile, turn off location sharing).
  • For advanced cleanup, use services like Jumbo Privacy to auto-clean certain apps.

8. Is it legal to anonymize my online activity?
Yes, in most countries, using privacy tools is legal. However, some authoritarian regimes ban or throttle VPNs and Tor. Always check local laws before using these tools. “Anonymity” itself is not a crime; using it for illegal acts is. In democratic nations, you have the right to privacy and encryption.

9. How do I verify that my tools are working correctly?

  • VPN: Visit ipleak.net or dnsleaktest.com while the VPN is on. Confirm your IP and DNS servers match the VPN.
  • Tor: Check check.torproject.org to confirm you’re using the Tor network.
  • Disk Encryption: Try removing your primary drive and plugging it into another machine. It should be unreadable without your password.
  • Encrypted Messaging: Send a message to a friend and verify encryption keys. Apps like Signal show a “safety number” you can compare.

10. What else can I do to improve my privacy?

  • Regularly update all software to patch vulnerabilities.
  • Use burner phones or secondary devices for sensitive tasks.
  • Cover your webcam and disable microphones when not in use.
  • Use a Faraday bag if you need to isolate your phone from all signals.
  • Consider hardware wallets for cryptocurrency transactions to avoid browser-based phishing.

Conclusion: Take Control of Your Privacy Today

Digital privacy isn’t a one-and-done setting. It’s a continuous process of use, review, and improvement. With the tools in this guide, you can:

  • Mask your IP and browsing habits with a top VPN.
  • Block trackers and ads, and browse anonymously with Tor, Brave, or DuckDuckGo.
  • Encrypt all sensitive data and communications so no one else can read them.
  • Use secure messaging apps to chat without fear of eavesdropping.
  • Leverage privacy-focused OSs to isolate your activities from prying eyes.
  • Remove your personal data from broker sites so strangers can’t profile you.

Implement these tools step by step, following our checklist. Each layer—VPN, encryption, secure OS, private messaging—builds on the last. The stronger your digital fortress, the harder it is for advertisers, hackers, or even governments to invade your personal space.

Privacy is a fundamental right, not a luxury. You’ve invested in your devices—now protect them. Start with a VPN. Then move on to browser setup, encryption tools, and so on. Bookmark this guide and revisit the checklist whenever you suspect a gap.

Take back control of your phone and computer usage right now. Your data is yours alone—guard it fiercely.

Note: All product links in this post direct you to official websites or trusted sources. Always verify you’re downloading from an authentic site to avoid malware or phishing scams.

Are you tired of intrusive ads interrupting your browsing, slowing down your apps, and draining your battery?
You’re not alone. In 2025, with smartphones being our primary window to the digital world, ad clutter can be more than just annoying—it can put your privacy at risk, hog your data, and even expose you to malware.

Ad blocker

Fortunately, you don’t need to root your Android or jailbreak your iPhone to enjoy an ad-free experience. We’ve researched the latest and greatest mobile ad blockers that actually work in 2025—so you can reclaim your screen space, surf faster, and protect your privacy without complex technical tweaks.

In this comprehensive, actionable guide, we’ll walk you through:

  • Why you need a mobile ad blocker in 2025
  • Key selection criteria for reliable, no-root/no-jailbreak ad blockers
  • Top 10 ad-blocking apps for Android and iOS, complete with features, pricing, and installation tips
  • A comparison table to help you choose the perfect solution
  • Step-by-step setup instructions for both platforms
  • Tips and tricks to optimize your ad-blocking experience
  • A Frequently Asked Questions (FAQ) section to address your burning questions

Whether you’re working from your home office, streaming videos on the go, or simply trying to read an article without pop-ups, we’ve got you covered. Let’s dive in and help you take control of your digital life.


Why You Need an Ad Blocker on Your Mobile Device

1. Eliminate Annoying Interruptions

Ads pop up unexpectedly—during your favorite YouTube video, while reading news articles, or even in your social apps. This constant interruption can be frustrating and can break your flow whether you’re working, studying, or relaxing.

2. Speed Up Page Load Times

Ads often load large scripts and heavy media files, significantly slowing down page rendering. By blocking ads, you can make web pages load faster, which is especially noticeable on data-limited plans (Tom’s Guide, Avast).

3. Conserve Data Usage

Every ad you see (or don’t) consumes data. Eliminating them helps you stay within monthly data caps—essential if you’re on a metered plan or traveling abroad.

4. Extend Battery Life

Ads run in the background, consume CPU cycles, and keep your display active longer. An effective ad blocker reduces these tasks, helping your battery last longer between charges (99rdp.com, Avast).

5. Protect Your Privacy

Many ads include tracking scripts that monitor your browsing habits to build a profile for targeted advertisements. A good ad blocker won’t just remove visual clutter—it will block trackers and protect your digital footprint.

6. Reduce Malware Risks

Malvertising (malicious advertising) can infect your device with malware, ransomware, or phishing attempts. By filtering out ads at the network or browser level, ad blockers reduce exposure to these threats (TechBloat, AdGuard).


How We Selected the Top 10 Ad Blockers

Before presenting our top picks, here’s a peek into how we evaluated each app to ensure you get the best possible experience without rooting or jailbreaking:

  1. No Root / No Jailbreak Required
    • Must work seamlessly on stock Android and iOS devices.
    • Utilizes DNS filtering, local VPN, or browser extension methods to block ads.
  2. Reliable Filtering & Privacy Protection
    • Blocks a wide variety of ad formats (banners, pop-ups, video ads).
    • Includes tracker-blocking capabilities to safeguard user data.
  3. Ease of Installation & Use
    • Straightforward setup with minimal user input.
    • Intuitive interfaces for quick adjustments or whitelist exceptions.
  4. Performance Impact
    • Lightweight on system resources (CPU, memory, battery).
    • Minimal latency introduced by DNS or local VPN processes.
  5. Regular Updates & Community Support
    • Actively maintained block lists and security patches.
    • Responsive developer teams or open-source communities.
  6. Cross-Platform Availability (where possible)
    • Apps that offer both Android and iOS versions provide consistent experiences if you use both ecosystems.
  7. Pricing & Value
    • Free, freemium, and paid options considered, with transparent pricing and upgrade paths.
  8. User Reviews & Expert Recommendations
    • Aggregating insights from authoritative tech publications, community forums, and app store reviews.

Top 10 Ad Blockers for Android & iOS (2025)

Below, we list our top 10 picks. Each entry includes:

  • Name & Platform
  • Key Features
  • Pricing
  • Installation & Setup Tips
  • Pros & Cons
  • Hyperlinked References to official sources and expert reviews

1. AdGuard (Android & iOS)

Platforms: Android (No Root), iOS (Safari Extension)
Why It Made the List:
AdGuard remains one of the most popular, full-featured ad blockers for 2025. It protects you across apps and browsers, offers advanced filtering, and runs on stock devices without requiring root or jailbreak (AdGuard, AdGuard).

Key Features

  • Local VPN Filtering (Android)
    Routes your traffic through a local VPN interface to block ads at the network layer—no root required.
  • Safari Content Blocker (iOS)
    Integrates with Safari, filtering ads and trackers with optimized filters for Apple’s content blocker API.
  • Custom Filter Lists
    Choose from AdGuard’s default filters, third-party lists (EasyList, Peter Lowe’s, etc.), or add your own rules (AdGuard).
  • Privacy Protection
    Blocks trackers, phishing sites, and malicious domains with “Browsing Security” and “Tracking Protection” filters.
  • Parental Controls
    Lock settings with a PIN to prevent kids from disabling ad blocking or accessing blocked categories.
  • DNS Privacy Options
    Use DNS-over-HTTPS (DoH) or DNS-over-TLS (DoT) to encrypt DNS queries, preventing ISP tracking.
  • Stealth Mode & Whitelisting
    Prevents WebRTC leaks, hides your IP, and allows you to whitelist trusted sites easily.

Pricing

  • Free Version (Android): Basic ad and tracker blocking in browsers.
  • Premium (Android & iOS):
    • Single platform license: $2.50/month (billed annually)
    • Family package (up to 9 devices): $17.99/year
    • Lifetime license: Starting at $39.99 per platform

Installation & Setup

  1. Android (No Root):
    • Download the AdGuard APK from the official AdGuard website (App isn’t in Google Play Store due to policy).
    • Enable “Install from Unknown Sources” in Settings → Security.
    • Open AdGuard, grant VPN permission, and toggle protection on.
  2. iOS (Safari Extension):
    • Install AdGuard from the App Store.
    • Open Settings → Safari → Content Blockers → Toggle AdGuard on.
    • Launch AdGuard app to configure filters.

Pros

  • Blocks both in-app and browser ads comprehensively.
  • Lightweight, minimal performance impact (AdGuard, AdGuard).
  • Regular filter updates; active development.
  • Family & parental controls.

Cons

  • Android version requires sideloading outside Google Play.
  • iOS version limited to Safari; other browsers not supported.

2. Blokada (Android)

Platforms: Android (No Root)
Why It Made the List:
Blokada stands out as a free, open-source, non-root ad blocker with a straightforward interface. It uses DNS filtering to block ads, trackers, and malware, making it ideal for users who want robust privacy without complex setup (99rdp.com, IconicTechs).

Key Features

  • DNS-Based Filtering:
    Uses custom DNS servers (e.g., Adaway hosts, NextDNS, or Blokada’s own) to block ad domains at the DNS resolution stage.
  • Open-Source & Community-Driven:
    Maintained on GitHub, with frequent updates and community contributions.
  • System-Wide Ad Blocking:
    Blocks ads and trackers across all apps and browsers.
  • Blokada Plus:
    Optional paid upgrade for a built-in VPN service, content blocking on HTTPS connections, and faster block list updates.
  • Battery & Data Efficient:
    Lightweight; uses minimal resources, ensuring you get an ad-free experience without sacrificing performance.

Pricing

  • Free: Core ad blocking via DNS servers.
  • Blokada Plus (Optional): $0.99/month or $4.99/year for enhanced DNS-over-HTTPS, global VPN, and faster updates.

Installation & Setup

  1. Download from F-Droid or Official Site:
    • F-Droid: Search “Blokada” and install.
    • Official: Visit blokada.org and download the APK.
  2. Grant VPN Permission:
    • Open Blokada → Tap “Start Blocking.”
    • Allow VPN permission when prompted.
  3. Select Blocklists:
    • Go to Settings → DNS → Choose default or custom DNS (e.g., “AdAway Hosts”).
    • Toggle “Block Ads” and “Block Trackers.”

Pros

  • Completely free for basic use.
  • No root needed; easy installation via F-Droid.
  • Ad blocking across apps & browsers (99rdp.com, IconicTechs).
  • Custom DNS options for advanced users.

Cons

  • Doesn’t support iOS.
  • Occasional compatibility issues with new Android updates.

3. DNS66 (Android)

Platforms: Android (No Root)
Why It Made the List:
DNS66 is another popular DNS-based ad blocker that’s completely free and open-source. It creates a local VPN to filter out ad domains, offering a straightforward experience for budget-conscious users (99rdp.com, ToptrMobile).

Key Features

  • Local VPN Filtering:
    Routes DNS queries through a VPN interface to block ad servers before they resolve.
  • Custom Hosts Selection:
    Allows you to choose from multiple hosts files (e.g., StevenBlack, AdAway, Yoyo) or add your own for tailored blocking.
  • Lightweight & Simple:
    Minimalist UI; quickly toggle services on or off without clutter.
  • No Root Required:
    Works equally well on stock Android without root.

Pricing

  • Free: Open-source, no paid tiers.

Installation & Setup

  1. Download APK from F-Droid or GitHub:
    • F-Droid: Search and install “DNS66.”
    • GitHub: Visit the DNS66 Releases page and download the latest APK.
  2. Configure Hosts:
    • Open DNS66 → Go to “Hosts” → Choose default or add custom hosts file URLs.
    • Go back to “Start” and enable the local VPN.
  3. Block Ads:
    • Once enabled, ads and trackers are blocked automatically.

Pros

  • Free, open-source, no hidden fees.
  • Blocks system-wide ads and trackers (ToptrMobile, IconicTechs).
  • Simple UI, quick setup.

Cons

  • UI is very basic; no advanced features.
  • Requires manual updates for hosts files.
  • Occasionally less effective against HTTPS-embedded ads.

4. AdLock (Android & iOS)

Platforms: Android (No Root), iOS (Safari/Browser Extensions)
Why It Made the List:
AdLock specializes in both browser and in-app ad blocking. Its iOS version uses a content blocker extension, while Android leverages local VPN filtering. The app also bolsters security by alerting you to phishing sites and malicious domains (IconicTechs, vpnMentor).

Key Features

  • Browser Extension (iOS Safari):
    Blocks ads, pop-ups, and video ads within Safari.
  • Local VPN Filtering (Android):
    Filters at the network level to block in-app and browser ads.
  • Malware & Phishing Protection:
    Alerts you if you attempt to visit known malicious or phishing domains.
  • Custom Filter Lists:
    Use built-in filters or add third-party lists for enhanced blocking.
  • Lightweight & Fast:
    Minimal impact on performance; blocks ads without significant battery drain.

Pricing

  • Free Version: Basic ad blocking in browsers only.
  • Premium (Android & iOS):
    • Monthly: $1.99
    • Yearly: $9.99
    • Lifetime: $19.99

Installation & Setup

  1. Android (No Root):
    • Download from Google Play Store.
    • Open AdLock → Grant VPN permission → Toggle “Protection” on.
    • Configure filter lists in Settings → “Ad Blocking.”
  2. iOS (Safari Extension):
    • Install AdLock from the App Store.
    • Go to Settings → Safari → Content Blockers → Toggle AdLock on.
    • Open AdLock to choose your filter lists.

Pros

  • Dual-platform support; consistent UI on Android & iOS.
  • Built-in malware and phishing alerts.
  • Customizable filters.

Cons

  • Full functionality behind paywall; free version limited to browsers.
  • Less community support compared to open-source alternatives.

5. RethinkDNS + Firewall (Android)

Platforms: Android (No Root)
Why It Made the List:
RethinkDNS is more than an ad blocker—it’s a combined DNS-based ad blocker and firewall that gives you granular control over internet access on a per-app basis. Perfect for users who want advanced features without root (droidcrafts.com).

Key Features

  • DNS-Based Ad & Tracker Blocking:
    Blocks ads, trackers, and malicious domains using DNS filtering.
  • Advanced Firewall:
    Block apps from accessing the internet entirely or selectively (e.g., block background data but allow foreground).
  • Custom DNS & Hosts:
    Choose from default RethinkDNS servers or configure custom DNS servers (DoH/DoT).
  • Activity Log & Stats:
    View real-time logs of blocked domains, data usage, and app-specific network activity.
  • No Root Required:
    Operates via local VPN; doesn’t require root or system modifications.

Pricing

  • Free: Fully functional ad blocking and firewall for basic features.
  • Pro Upgrade: $0.99/month (optional) for advanced DNS encryption (DoH/DoT), priority support, and extra customization.

Installation & Setup

  1. Download from Google Play Store:
  2. Enable Ad Blocking:
    • In Main Dashboard → Toggle “DNS Blocking” ON.
    • Select default or custom DNS servers in Settings → “DNS.”
  3. Configure Firewall Rules (Optional):
    • Go to “Firewall” tab → Choose apps to block or allow.
    • Set “Block” or “Allow” for individual apps based on your needs.

Pros

  • Combines ad blocking and firewall functions.
  • Detailed logs help you understand network activity.
  • Completely free for basic features.

Cons

  • Advanced firewall features may overwhelm casual users.
  • Doesn’t support iOS.

6. NetGuard (Android)

Platforms: Android (No Root)
Why It Made the List:
NetGuard is primarily a no-root firewall, but it doubles as an effective ad blocker by restricting internet access for ad-heavy or suspicious apps. It’s perfect if you want to control data usage and block ads simultaneously (ToptrMobile, IconicTechs).

Key Features

  • Per-App Internet Control:
    Block or allow internet access for individual apps over Wi-Fi and/or mobile data.
  • Optional Ad Blocking via Hosts File:
    Leverage built-in DNS hosts to block known ad/tracker domains.
  • Lightweight & Battery-Friendly:
    Uses Android’s VPN API without routing traffic through an external server, keeping performance impact minimal.
  • Usage Statistics & Logs:
    Monitor data usage per app and view blocked connection attempts.

Pricing

  • Free: Core firewall and ad blocking features via hosts.
  • Premium Add-On: $2.49 (one-time) for advanced features like IPv6, Tor support, and custom DNS (ToptrMobile).

Installation & Setup

  1. Download from Google Play:
  2. Grant VPN Permissions:
    • Open NetGuard → Toggle “Enable NetGuard.”
    • Allow VPN permission.
  3. Enable Ad Blocking via Hosts:
    • Go to Settings → “Manage Hosts” → Choose default or add custom hosts file URLs.
    • Return to main screen; NetGuard will block apps that attempt to reach hosts in that file.

Pros

  • No root required; robust firewall + ad blocking.
  • Detailed per-app control over data usage.
  • Free with optional low-cost premium features.

Cons

  • Not a traditional ad blocker; blocking is indirect via hosts.
  • Requires manual configuration for optimal ad blocking.

7. Brave Browser (Android & iOS)

Platforms: Android, iOS
Why It Made the List:
Brave Browser isn’t just a browser—it’s a built-in ad blocker and privacy powerhouse. Available on both Android and iOS, Brave blocks ads and trackers out of the box, offers a tor-like private mode, and even pays you in BAT (Basic Attention Token) if you opt into privacy-respecting ads (TrueTech Technology Magazine, Lifewire).

Key Features

  • Built-In Ad & Tracker Blocking:
    Blocks ads, trackers, and third-party cookies without extensions.
  • HTTPS Everywhere & Fingerprinting Protection:
    Forces secure connections and minimizes browser fingerprinting.
  • Brave Rewards (Opt-In):
    Earn BAT tokens for viewing privacy-respecting ads and support your favorite publishers.
  • Private Browsing with Tor:
    Offers a Tor-like experience for extra anonymity (only available on desktop/laptop currently; mobile private tabs are still more private than mainstream browsers).
  • Speed & Battery Efficiency:
    Fewer trackers & ads translate to faster page loads and longer battery life.

Pricing

  • Free: Full functionality without hidden costs.

Installation & Setup

  1. Android:
    • Install Brave from Google Play Store.
    • Launch Brave → Explore settings to enable Torch panel features (e.g., “Block Ads & Trackers”).
  2. iOS:
    • Install Brave from App Store.
    • Open Brave → Tap the lion icon → Ensure “Block Ads, Tracking, Scripts” is ON.

Pros

  • Totally free; no subscriptions.
  • Blocks ads & trackers out of the box.
  • Supports cross-platform sync for passwords/bookmarks.

Cons

  • You trade your default browser for Brave; bookmarks & extensions need to be reconfigured.
  • Brave Rewards system requires wallet setup if you choose to earn BAT.

8. 1Blocker (iOS)

Platforms: iOS (Safari Content Blocker)
Why It Made the List:
1Blocker is tailored for iOS users who want highly customizable ad blocking within Safari. With advanced rule creation, whitelisting, and iCloud sync, it’s ideal for power users who need nuanced control (Digital Trends, vpnMentor).

Key Features

  • Customizable Blocking Rules:
    Create tailored rules to block ads, trackers, social widgets, cookie notices, and more.
  • Category Filters:
    Prebuilt categories for easy toggles (ads, trackers, cryptocurrencies, forms, social, pop-ups).
  • iCloud Sync:
    Sync your rules across iPhone, iPad, and Mac automatically.
  • Whitelist & Exceptions:
    Easily allow trusted sites while blocking everything else.
  • Regular Filter Updates:
    Built on top of popular filter lists like EasyList, Peter Lowe’s, and others.

Pricing

  • Free Version: Limited to one category at a time.
  • Premium Subscription: $14.99/year for full access to all categories and iCloud sync.

Installation & Setup

  1. Download 1Blocker from App Store:
  2. Enable Content Blocker:
    • Go to Settings → Safari → Content Blockers → Toggle “1Blocker.”
  3. Customize Rules in 1Blocker App:
    • Open 1Blocker → Grant permission → Choose categories to block and set custom rules.
    • Enable iCloud sync in Settings to keep rules consistent across your Apple devices.

Pros

  • Highly granular control; power user-friendly.
  • Seamless iCloud synchronization.
  • Effectively blocks a wide variety of content types.

Cons

  • iOS only; no Android version.
  • Premium subscription relatively pricey.

9. Wipr (iOS)

Platforms: iOS (Safari Content Blocker)
Why It Made the List:
Wipr is a simple, no-frills ad blocker for Safari that focuses on efficiency and minimal configuration. It auto-updates filter lists twice a week, ensuring up-to-date protection with virtually no manual maintenance (Digital Trends, Avast).

Key Features

  • Automatic Filter Updates:
    Filters are updated every 7 days in the background, eliminating manual list management.
  • Minimal UI:
    “Set and forget” approach—toggle Wipr on in Settings, and you’re done.
  • Blocks Ads, Trackers, Crypto-Miners, GDPR Notices & Cookie Banners:
    Provides a cleaner, faster browsing experience.
  • Privacy-Focused:
    Doesn’t collect or store any user data; open-source block lists.

Pricing

  • One-Time Fee: $1.99 (no recurring fees)

Installation & Setup

  1. Purchase & Install from App Store:
  2. Enable Wipr in Safari Content Blockers:
    • Settings → Safari → Content Blockers → Toggle “Wipr.”
  3. Let It Run in the Background:
    • Wipr auto-updates its filter list; no configuration required.

Pros

  • Affordable one-time purchase.
  • Lightweight and fast; no battery drain.
  • Blocks an array of unwanted content beyond typical ads.

Cons

  • Limited customization; no whitelisting in app.
  • iOS only; no Android support.

10. Firefox Focus (Android & iOS)

Platforms: Android, iOS
Why It Made the List:
Firefox Focus is a privacy browser from Mozilla, featuring built-in ad and tracker blocking. While it’s not a standalone system-wide ad blocker, it offers a seamless, privacy-first browsing experience for those who primarily want to surf the web without distractions (Permission, Permission).

Key Features

  • Automatic Ad & Tracker Blocking:
    Blocks most ads, analytics trackers, and social trackers by default.
  • Auto-Erase Browsing Data:
    Clears cookies, history, and passwords when you exit the app, ensuring no residual tracking.
  • Minimalist Interface:
    One-tap browsing; tap the mask icon to view what’s been blocked on each site.
  • Lightweight & Fast:
    Focuses on speed by loading fewer third-party scripts.

Pricing

  • Free: Fully functional without in-app purchases.

Installation & Setup

  1. Install from Google Play or App Store:
  2. Open & Browse:
    • Launch Firefox Focus → Begin browsing; ad blocking is enabled by default.
  3. View Blocked Trackers:
    • Tap the number in the shield icon to see how many trackers or scripts were blocked.

Pros

  • Truly private browsing; no data stored.
  • Free and easy-to-use; ideal for quick, focused sessions.
  • Blocks ad scripts and trackers effectively within the browser.

Cons

  • Only applies to browsing sessions within Firefox Focus.
  • Doesn’t block in-app ads or system-wide network ads.

Comparison Table: Top 10 Ad Blockers (2025)

Below is a quick comparison of the top 10 ad blockers, summarizing their key characteristics for easy reference.

# App Platform(s) Main Blocking Method Custom Filters Price (Basic → Premium) Other Highlights
1 AdGuard Android, iOS Local VPN (Android), Safari Extension (iOS) Yes Free → $2.50/mo (annual), $39.99 Lifetime DNS Privacy (DoH/DoT), Parental Controls
2 Blokada Android DNS Filtering (Local VPN) Yes Free → $0.99/mo (Blokada Plus) Open-Source, Battery-Friendly
3 DNS66 Android DNS Filtering (Local VPN) Basic Hosts Only Free Open-Source, Simple UI
4 AdLock Android, iOS Local VPN (Android), Safari Extension (iOS) Yes Free → $1.99/mo, $9.99/yr, $19.99 lifetime Malware & Phishing Protection
5 RethinkDNS Android DNS Filtering + Firewall Yes Free → $0.99/mo (Pro) Advanced Firewall, Logs/Stats
6 NetGuard Android Hosts File + Firewall Basic Hosts Only Free → $2.49 (one-time) Per-App Data Control, Tor Support
7 Brave Android, iOS Browser-Built Blocking No Free BAT Rewards, Tor-like Private Tabs
8 1Blocker iOS Safari Content Blocker Extensive Free → $14.99/yr iCloud Sync, Custom Rule Builder
9 Wipr iOS Safari Content Blocker No $1.99 (one-time) Auto Filter Updates, Lightweight
10 Firefox Focus Android, iOS Browser-Built Blocking No Free Auto Erase Data, Tracker Count Display

How to Install & Configure Ad Blockers on Android

Below is a general guide to help you set up Android ad blocker apps—no root required. Specific steps can vary slightly based on the app, but the core process remains consistent.

  1. Enable Installation from Unknown Sources (If Needed)
    • Settings → Security → Install Unknown Apps
    • Toggle on the browser or file manager you’ll use to install APKs (for Blokada, DNS66, AdGuard).
  2. Download & Install the App
    • Blokada / DNS66: Use F-Droid (a reputable open-source app store) or official website.
    • AdGuard: Download APK from adguard.com.
    • RethinkDNS, NetGuard: Available directly on Google Play Store.
  3. Grant Necessary Permissions
    • Upon first launch, most ad blockers ask for VPN permission—this is required to filter traffic at the network layer.
    • Accept/allow this request to let the app create a local VPN tunnel.
  4. Choose Blocklists / Hosts Files
    • Blokada & DNS66:
      • Go to Settings → DNS or Hosts → Select “Default” or custom hosts file (e.g., AdAway, StevenBlack).
      • Toggle features like “Block Ads” and “Block Trackers.”
    • AdGuard:
      • Open AdGuard → Go to “Protection” → Toggle “Ad Blocking.”
      • In Settings → “Filters,” enable or add filter lists (EasyList, EasyPrivacy, etc.).
    • RethinkDNS:
      • Open RethinkDNS → Go to “DNS Settings” → Select recommended DNS or custom (NextDNS for advanced blocking).
      • Under “Firewall,” configure app-specific rules for extra control.
    • NetGuard:
      • Open NetGuard → Settings → “Manage Hosts” → Choose a hosts file (e.g., “StevenBlack” or “AdAway”) to block ad domains.
  5. Fine-Tune Whitelists & Exceptions
    • Most ad blockers let you whitelist certain apps or domains if you want to support specific publishers.
    • AdGuard / AdLock: Navigate to “Whitelist” in settings and add domains or apps you trust.
    • Blokada / DNS66: Use the “Whitelist” section to exclude certain domains from being blocked.
  6. Verify & Test
    • Visit an ad-heavy site (like news outlets or video platforms) to ensure ads are blocked.
    • For DNS66 / Blokada, check logs (in the app) to see how many domains are being blocked.
  7. Keep Filters Updated
    • Some apps (e.g., Blokada Plus, AdGuard Premium) auto-update lists.
    • Others (DNS66) require manual host file updates; revisit the “Hosts” section weekly.

How to Install & Configure Ad Blockers on iOS

Getting ad blockers set up on your iPhone or iPad is usually as simple as installing from the App Store and enabling the extension in Safari. Here’s a step-by-step:

  1. Choose an Ad Blocker
    • Popular options: AdGuard, AdLock, 1Blocker, Wipr.
    • All are available on the App Store; some may have free trial periods or limited free functionality.
  2. Install from App Store
    • Open the App Store → Search for your chosen ad blocker → Tap “Get” → Install.
  3. Enable Content Blocker in Safari
    • Go to Settings → Safari → Content Blockers → Toggle on your ad blocker (e.g., “AdGuard,” “1Blocker,” “Wipr,” or “AdLock”).
  4. Configure Filter Lists & Custom Rules
    • AdGuard / AdLock:
      • Launch the app → Grant necessary permissions → Choose filter lists (EasyList, AdGuard Base, Spyware Protection).
      • Optional: Enable DNS privacy (DoH/DoT) in app Settings for extra security.
    • 1Blocker:
      • Open 1Blocker → Grant permission → Enable categories (Ads, Trackers, Social, Cryptominers, etc.).
      • Use “Custom Rules” to block or allow specific URLs.
      • Enable iCloud Sync (Settings → 1Blocker → iCloud Sync) to keep rules consistent across devices.
    • Wipr:
      • After enabling Wipr in Safari Content Blockers, no further configuration is needed.
      • Wipr auto-updates its filters every 7 days.
    • AdLock:
      • Open AdLock → Grant permission → Enable filters → Toggle “Block Pop-ups,” “Block Tracking,” etc.
  5. Test Ad Blocking
    • Open Safari → Visit ad-heavy websites (e.g., a news site or large e-commerce page).
    • You should see significantly fewer ads, and trackers will be blocked as indicated by stats or icons (in 1Blocker or AdGuard).
  6. Whitelist Trusted Sites (Optional)
    • If a site asks you to turn off your ad blocker (for example, to support content creators), you can whitelist it:
      • AdGuard / AdLock / 1Blocker: In-app “Whitelist” section, add the domain.
      • Wipr: Tap the Wipr icon (if using a separate keyboard extension) to disable on that page.

Tips & Best Practices for Optimal Ad-Blocking

  1. Use a Combination of Tools (When Necessary)
    • On Android, pairing a DNS-based blocker (Blokada or DNS66) with a browser that has built-in blocking (Brave or Firefox Focus) offers layered protection.
    • On iOS, choose a content blocker (Wipr or 1Blocker) plus Brave/Firefox Focus for private sessions.
  2. Prioritize DNS-Over-HTTPS/TLS
    • If your chosen app supports encrypted DNS (e.g., AdGuard, RethinkDNS), enable it to prevent ISPs or malicious actors from spying on your DNS queries (AdGuard, droidcrafts.com).
  3. Whitelist Thoughtfully
    • Support websites you trust by whitelisting them; this helps content creators continue producing free articles.
    • Only whitelist domains you absolutely trust to avoid reintroducing privacy risks.
  4. Monitor Performance Metrics
    • Keep an eye on your ad blocker’s dashboard or logs:
      • Blokada / RethinkDNS: Shows number of ads/trackers blocked and data saved.
      • NetGuard: Tracks per-app data usage and blocked connections.
      • 1Blocker / Wipr: Displays count of elements blocked per site.
  5. Keep Block Lists Updated
    • Many premium services auto-update (Blokada Plus, AdGuard Premium).
    • For apps like DNS66 or NetGuard, set a reminder to refresh hosts files weekly.
  6. Experiment with Filter Lists
    • Some lists are more aggressive (e.g., “Fanboy’s Ultimate List”), while lighter lists may block fewer “acceptable” ads.
    • Find a balance between blocking obnoxious ads and letting harmless banner ads through—especially for websites you want to support.
  7. Use Built-In “Element Picker” (Where Available)
    • AdGuard’s “Element Picker” allows you to manually select and block unwanted page elements.
    • 1Blocker’s “Custom Rules” let you target specific CSS classes or domains for advanced blocking.
  8. Be Cautious with VPN Conflicts
    • Since many ad blockers rely on local VPNs, you can’t run two VPN apps concurrently.
    • If you need a full VPN (e.g., NordVPN, ExpressVPN), use an ad blocker that supports upstream proxy setups (AdGuard) or switch to a VPN with built-in ad blocking.

Frequently Asked Questions (FAQ)


1. Are ad blockers legal to use on Android & iOS?

Yes. Using an ad blocker is completely legal in most countries. You’re simply filtering out content from your own device. However, be aware of some websites’ “anti-ad blocker” measures that may restrict access until you disable your blocker temporarily.


2. Will using an ad blocker slow down my device?

Actually, the opposite is true. By blocking ads and trackers, you reduce the number of tons of scripts and media files that need to load. The result? Faster page loads, reduced CPU usage, and longer battery life (99rdp.com, Avast).


3. Can I still watch YouTube videos without ads?

On Android, ad blockers like AdGuard or Blokada can filter ads even inside YouTube’s in-app player by blocking ad-related domains. On iOS, Safari content blockers won’t affect the native YouTube app—you’d need a separate solution like a dedicated ad-blocking YouTube client or in-browser viewing via Brave or Firefox Focus.


4. What’s the difference between DNS-based and VPN-based ad blocking?

  • DNS-Based (e.g., Blokada, DNS66):
    • Blocks ads at the DNS resolution level by preventing your device from resolving known ad domains.
    • Typically more battery-efficient and no external VPN server involved.
    • Doesn’t block ads embedded directly in apps via IP addresses.
  • VPN-Based (e.g., AdGuard, AdLock, RethinkDNS):
    • Routes your traffic through a local VPN on your device, where the app inspects and filters DNS/HTTP requests.
    • Can block ads within apps that use hardcoded IP addresses or complex CDN networks.
    • Slightly higher battery usage but more comprehensive blocking.

5. Will an ad blocker protect me from malware and phishing?

Many top ad blockers (AdGuard, AdLock) include “Browsing Security” features that block known malicious domains. While they’re not a replacement for full-fledged antivirus or anti-malware apps, they provide an extra layer of security by preventing you from visiting infected ad networks or phishing sites (AdGuard, vpnMentor).


6. Do I need to update my ad blocker regularly?

Absolutely. The ad ecosystem changes constantly—new ad servers pop up, trackers evolve, and malicious actors find workarounds. Premium services often auto-update filters, but if you use open-source tools like DNS66 or Blokada (free tier), check for host file updates weekly.


7. How do I whitelist a site without disabling my entire ad blocker?

Most ad blockers let you whitelist individual domains or apps:

  • AdGuard / AdLock: In the app’s “Whitelist” section, add domains you trust.
  • Blokada / DNS66: Tap “Whitelist” in the app and input the domain.

On iOS, Safari content blockers (1Blocker, Wipr) currently don’t support per-site whitelisting inside Safari’s settings—so you’ll need to disable the content blocker temporarily if a site blocks you.


8. Does using an ad blocker hurt website revenue?

Yes and no. Ads fund many websites, allowing creators to offer free content. If you block all ads everywhere, it can hurt smaller publishers. Consider whitelisting the sites you trust and want to support. Some ad blockers allow “acceptable ads”—non-intrusive ads that meet certain criteria.


9. Will these ad blockers work on all Android versions?

Most no-root ad blockers (Blokada, DNS66, AdGuard, RethinkDNS, NetGuard) are compatible with Android 6.0 (Marshmallow) and above. However, new Android updates can sometimes break VPN-based features temporarily—keep an eye on GitHub or official app forums for patches.


10. Can I use these ad blockers on Wi-Fi hotspots & public networks?

Yes. DNS-based and VPN-based ad blockers work independently of your network. Once installed, they filter traffic across all Wi-Fi, cellular, or hotspot connections.


Conclusion

Interruptive ads, intrusive trackers, and potential malware threats shouldn’t be part of your everyday mobile experience. In 2025, you don’t need to root your Android or jailbreak your iPhone to block ads effectively.

Our top 10 list offers solutions tailored to a variety of needs:

  • Android-Only, Free & Open-Source: Blokada, DNS66, RethinkDNS, NetGuard
  • Cross-Platform, Premium Options: AdGuard, AdLock, Brave Browser, Firefox Focus
  • iOS-Exclusive, Premium Content Blockers: 1Blocker, Wipr

Each app featured here has been rigorously selected based on its ad-blocking efficacy, ease of use, performance impact, and ongoing maintenance.

To recap:

  1. AdGuard (Android & iOS) – Full-featured, DNS privacy, parental controls, paid upgrade for advanced features.
  2. Blokada (Android) – Free, open-source, DNS filtering, battery-friendly.
  3. DNS66 (Android) – Free, simple DNS-based ad blocking via local VPN.
  4. AdLock (Android & iOS) – Malicious site protection, custom filters, paid plans.
  5. RethinkDNS + Firewall (Android) – Combines ad blocking with advanced firewall rules.
  6. NetGuard (Android) – Privacy-friendly firewall + hosts-based ad blocking.
  7. Brave Browser (Android & iOS) – Built-in ad blocking, privacy rewards, free.
  8. 1Blocker (iOS) – Highly customizable Safari blocker, iCloud sync.
  9. Wipr (iOS) – “Set and forget” content blocker, one-time cost.
  10. Firefox Focus (Android & iOS) – Privacy browser with built-in ad/tracker blocking.

No matter which platform you prefer, there’s an ad blocker here to suit your skill level, budget, and privacy needs. Implement one (or a combination) today, and enjoy:

  • Smooth, interruption-free browsing
  • Faster page loads & app performance
  • Reduced data usage & extended battery life
  • Enhanced privacy & fewer trackers
  • Added security against malvertising & phishing threats

Reclaim your screen. Enhance your privacy. Take control of your mobile experience in 2025—no root, no jailbreak required.


References

  • Tom’s Guide, “The best ad blockers in 2025,” accessed May 2025, (Tom’s Guide, Tom’s Guide)
  • DroidCrafts, “Ad Blockers for Non-Root Android Phones,” accessed May 2025, (droidcrafts.com)
  • 99RDP, “Best Android Ad Blockers for 2024,” accessed May 2025, (99rdp.com, IconicTechs)
  • IconicTechs, “10 Best Free Ad Blockers Apps For Android (No Root),” accessed May 2025, (IconicTechs)
  • ToptrMobile, “10 Best Ad Blockers for Android 2025,” accessed May 2025, (ToptrMobile)
  • AdGuard, “AdGuard for Android & iOS Overview,” accessed May 2025, (AdGuard, AdGuard)
  • TechBloat, “Top 10 Best Ad Blockers in 2025 (Free or Paid),” accessed May 2025, (TechBloat)
  • Permission.io, “Best Ad Blocker for Android,” accessed May 2025, (Permission)
  • Digital Trends, “The Best Ad Blockers for the iPhone,” accessed May 2025, (Digital Trends)
  • VPN Mentor, “7 Best Ad Blockers for iPhone & iPad in 2025,” accessed May 2025, (vpnMentor)

By combining these insights and recommendations, you now have everything you need to block ads on your Android and iOS devices effectively. Choose the solution that fits your lifestyle, follow the simple installation steps, and enjoy an uncluttered mobile digital world.