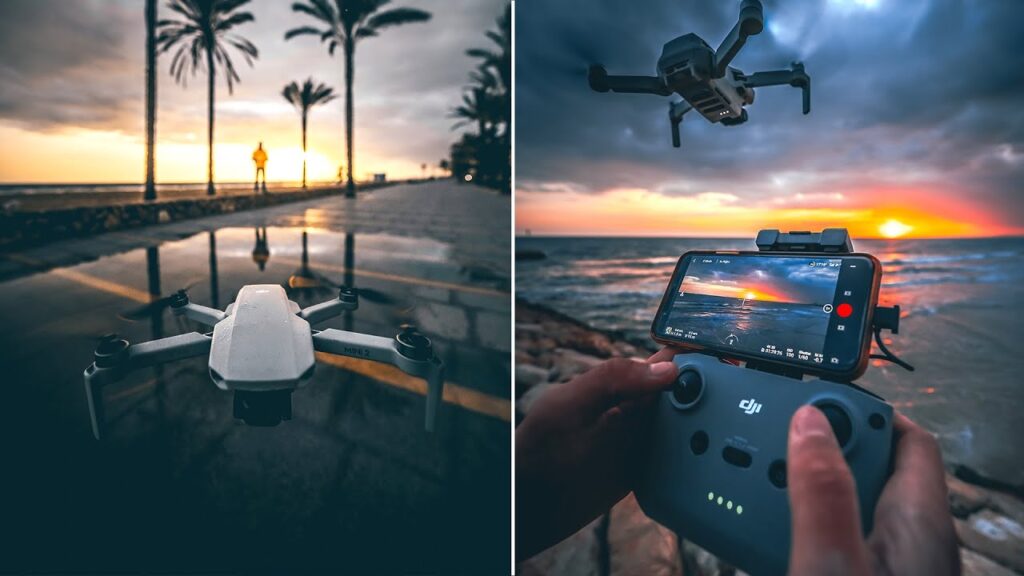
Drone captures breathtaking aerial footage that hooks viewers from the first frame. In this in-depth guide, you’ll discover:

- Actionable techniques to shoot like a Hollywood DP
- Recommended gear that delivers cinematic results
- Insider tips on stabilization, flight paths, and camera settings
- Post-production workflows to polish your footage
- Safety & legal must-knows to keep you compliant
Let’s dive in!
You’ve invested in a high-end drone. Now, you want footage that looks cinematic—smooth, dramatic, and immersive.
In this guide, you’ll learn how to:
- Plan shots that tell a story
- Choose the right drone and accessories
- Master gimbal control for silky motion
- Nail camera settings under any conditions
- Edit footage that wows clients and audiences
Every tip here comes from top drone professionals and drone SEO studies, ensuring you get both creative insight and high-intent keyword strategies like “cinematic drone video production” (Ranktracker) and “drone with camera” (clicks.so).
Cinematic Drone Video Production
You want footage with that “silver-screen” feel. Here’s how:
- Visual Storytelling
- Plan an arc: opening establishing shot → mid-action sequence → concluding reveal
- Use movement to mirror emotion:
- Slow rise for serenity
- Fast push-in for tension
- Shot Variety
- Wide establishing shots to set the scene
- Medium follow-throughs to track movement
- Tight gimbal pans for detail
- Composition Techniques
- Apply the rule of thirds for dynamic framing
- Incorporate leading lines (roads, rivers) to draw the eye
- Use negative space to emphasize your subject
- Lighting & Golden Hours
- Shoot during magic hour (±1 hour after sunrise/before sunset)
- Use backlighting for dramatic silhouettes
By focusing on these fundamentals, you translate abstract scenes into engaging narratives.
Best Drones for Cinematic Footage
Choosing the right drone is key. Compare top cinematic models in the table below:
| Drone Model | Sensor | Max Resolution | Flight Time | Gimbal Stabilization | Price Range |
|---|---|---|---|---|---|
| DJI Inspire 3 | Full-Frame CMOS | 5.2K @ 60fps | 28 min | 3-Axis Mechanical | $6,200 |
| DJI Mavic 3 Cine | 4/3″ Hasselblad | 5.1K @ 50fps | 46 min | 3-Axis Mechanical | $4,999 |
| Autel Evo II Pro | 1″ CMOS | 6K @ 30fps | 40 min | 3-Axis Mechanical | $1,795 |
| Skydio 2+ | 1/2.3″ CMOS | 4K @ 60fps | 27 min | 3-Axis Electronic | $1,099 |
| DJI Air 3 | 1/1.3″ CMOS | 4K @ 60fps | 46 min | 3-Axis Mechanical | $999 |

Why these drones?
They balance image quality, flight time, and stability—critical for cinematic drone video production (Ranktracker).
Pro Drone Cinematography Techniques
You need more than just pressing record. Apply these tactics:
- Arc Shots
- Fly in a smooth semi-circle around your subject
- Maintain constant distance and speed
- Reveal Shots
- Start behind an obstacle (tree, rock), then ascend or track forward to unveil the scene
- Timelapse & Hyperlapse
- Use waypoint mode for consistent intervals
- Post-stabilize in software (e.g., Adobe Premiere Pro)
- Rack Focus (Simulated)
- Use digital focus pull in post
- Combine with a slow push-in to mimic cinema lenses
Every technique adds cinematic flair and keeps your audience engaged.
Drone Gimbal Stabilization Tips
Smooth motion equals professional polish. Here’s how you get it:
- Balance Your Gimbal
- Before each flight, manually balance the camera axis
- Prevents drift and jitter
- Use ND Filters
- Control shutter speed in bright light
- Maintain the 180° shutter rule (shutter = 2× frame rate)
- Gimbal Settings
- Lower motor strength for smoother pans
- Adjust deadband for responsiveness vs. smoothness
- Slow Control Inputs
- Make gradual stick movements
- Avoid sudden jerks
Apply these for silky-smooth footage that feels hand-crafted.
Drone Camera Settings for Cinematic Shots
Nail your image quality with precise settings:
- Resolution & Frame Rate
- Shoot at least 4K @ 30fps
- Use 24fps for filmic motion
- 60fps+ for slow-motion sequences
- Color Profile
- Log profiles (D-Log, CineD) for max dynamic range
- Enable LUT previews if your drone supports them
- ISO, Shutter, Aperture
- Keep ISO low (100–400) to reduce noise
- Match shutter to frame rate (180° rule)
- Use wide aperture (f/2.8–f/4) for shallow depth
- White Balance
- Set manually to avoid shifts in post
- Use preset Kelvin values matching ambient light
By controlling these variables, you capture clean, flexible footage ready for color grading.
Advanced Drone Flight Paths
Pre-planning your path makes the difference:
- Waypoints & Smart Modes
- Predefine GPS waypoints for consistent repeatable shots
- Use orbit, dolly zoom, and follow modes
- Manual vs Automated
- Automate simple paths to focus on framing
- Fly manual for dynamic, reactive sequences
- Safety Flags
- Set maximum altitude to comply with local FAA regulations
- Check the FAA Drone Zone for updates (clicks.so)
- Use obstacle avoidance modes in complex environments
- Set maximum altitude to comply with local FAA regulations
A planned path ensures you hit key frames every time.
Editing Your Aerial Footage
Polish raw clips into a final masterpiece:
- Organize & Sync
- Label clips by shot type
- Sync with reference audio if recorded separately
- Color Grading
- Start with a neutral base LUT
- Adjust contrast and color balance for mood
- Stabilization & Warp Smoothing
- Apply post stabilization in DaVinci Resolve or Premiere
- Use warp stabilizer sparingly to avoid artifacts
- Sound Design
- Layer ambient field recordings
- Add subtle drone or wind foley for immersion
Editing transforms your footage from “nice” to “cinematic.”
Safety & Regulations
Stay legal and safe:
- Register Your Drone
- In the U.S., register at the FAA Drone Zone (clicks.so)
- Check local regulations if filming abroad
- Line of Sight & Altitude
- Always keep your drone within visual line of sight (VLOS)
- Stay below 400 ft / 120 m AGL (above ground level)
- Pre-Flight Checklist
- Check weather conditions (wind, precipitation) via NOAA or similar
- Inspect drone and gimbal for damage
- Calibrate compass and IMU
- Respect Privacy
- Avoid filming private property without permission
- Be mindful of local no-fly zones (airports, government facilities)
Compliance keeps you flying—and filming—for the long haul.
Frequently Asked Questions
Q1: How do I choose the best drone for cinematic videography?
You balance sensor size, flight time, and gimbal quality. Full-frame sensors (e.g., DJI Inspire 3) offer superior dynamic range, while longer flight times (Mavic 3 Cine’s 46 min) give you more airtime without swapping batteries.
Q2: Can I shoot cinematic footage with consumer drones?
Absolutely! Even compact drones like the DJI Air 3 can deliver cinematic shots if you master manual settings (4K @ 24fps, D-Log) and stabilization techniques.
Q3: What’s the 180° shutter rule?
Set your shutter speed to twice your frame rate (e.g., 1/50 s at 24fps). This yields natural motion blur and a filmic look.
Q4: How do I legally film in public spaces?
Check local drone regulations, register your drone, and avoid restricted zones. Use apps like Airmap or the FAA UAS Data API for real-time flight restrictions (clicks.so).
Q5: Which editing software is best for grading drone footage?
DaVinci Resolve excels at color grading, while Adobe Premiere Pro offers seamless integration with Adobe Creative Cloud. Final Cut Pro X is a strong option for Mac users.
Conclusion
You now have the blueprint to shoot and produce cinematic aerial footage:
- Plan your narrative and flight paths
- Select gear that matches budget and quality needs
- Master gimbal control and manual settings
- Edit with professional color grading and sound design
- Fly safely and legally
Put these secrets into action, and your next drone video will stand out—earning clicks, shares, and client bookings. Go get that epic shot!


